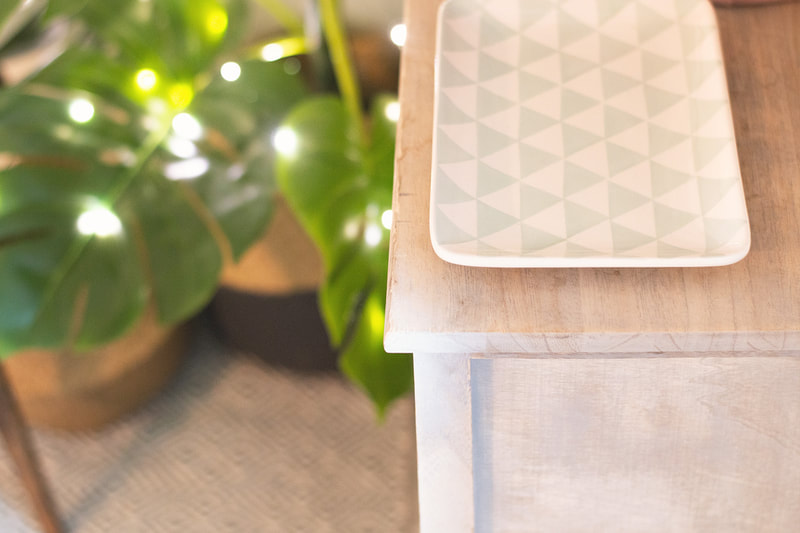


It’s been two weeks since we finished our two week bathroom makeover and I’ve finally found the time to share the reveal! I can’t get over how much brighter the space feels after years of it being black and white! It’s certainly a more cheerful place to get ready in the mornings. This project has been a long time coming as we've been planning and ordering the materials gradually over the last year. Initially, I used procreate to trace the existing bathroom so I could add layers of colour and pattern to work out the design. I made a moodboard alongside this to keep on my phone for shopping for accessories to check they would match the scheme. We wanted the feel of an eclectic boutique hotel, for leisurely baths and relaxing skincare routines. Once we knew what we were looking for we set up price alerts to get the best prices for the tiles which saved us a lot of money. The other big money saver was keeping what we could, and doing absolutely everything ourselves - David basically became a plumber and electrician with the help of YouTube (don't worry we've since had it checked over by qualified professionals!). We ripped out the old bathroom, kept the toilet and sink, then started to build it all back. The process took the two of us 10 long days but I'm so glad we did it that way! It's definitely our biggest project to date and the most satisfying because of it. I'll pop a list of our purchases below, if I've missed anything your curious about just drop me a message. Floor Tiles / pink carnaby / @porcelainsuperstore Blue Panelling Paint / dusky blue / @ronseal.uk Pink Wall Paint / fairy’s tutu / @valsparpaintuk Blind @laredoute_uk Fresh as a daisy print @ohsodaisy.shop Wild flowers print @mellow_prints Rug @primark.home Lights @dunelmuk Bin @sostrenegrene Green Cabinet Paint @littlegreenepaintcompany garden Radio @robertsradio revival petite Soap dish & plant pot @rosiehayceramics I've already used the bathroom for a couple of photography set ups! It's so great to have a space which flows with the rest of our colourful home. 
0 Comments
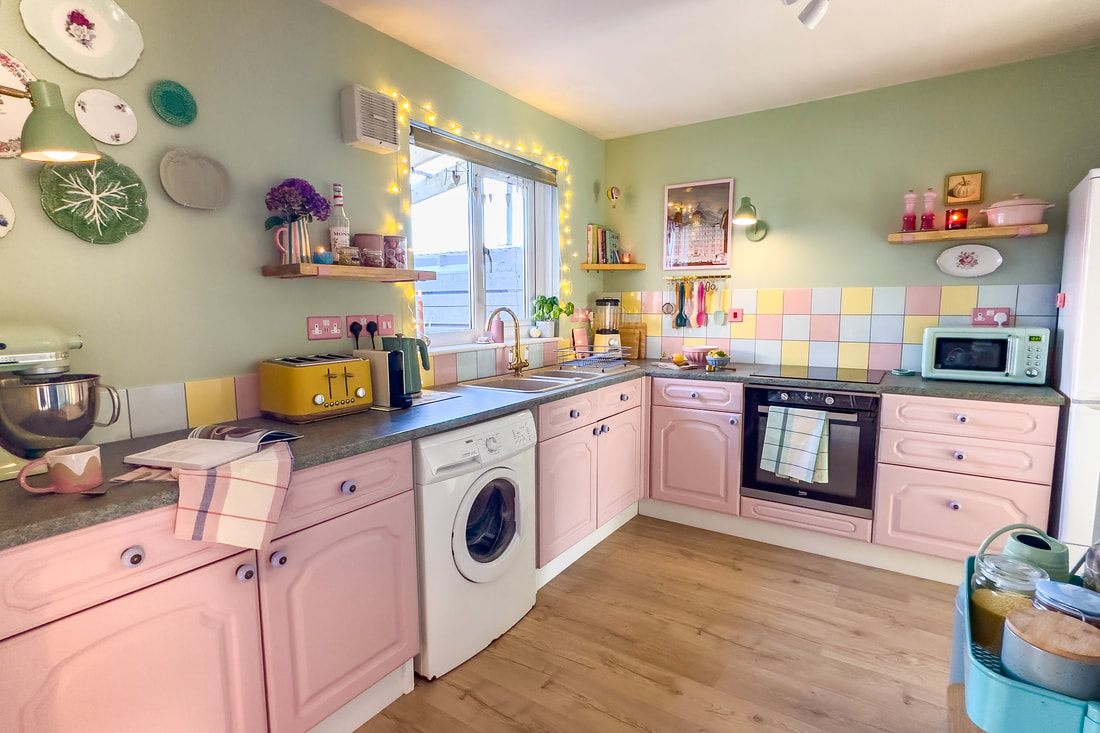
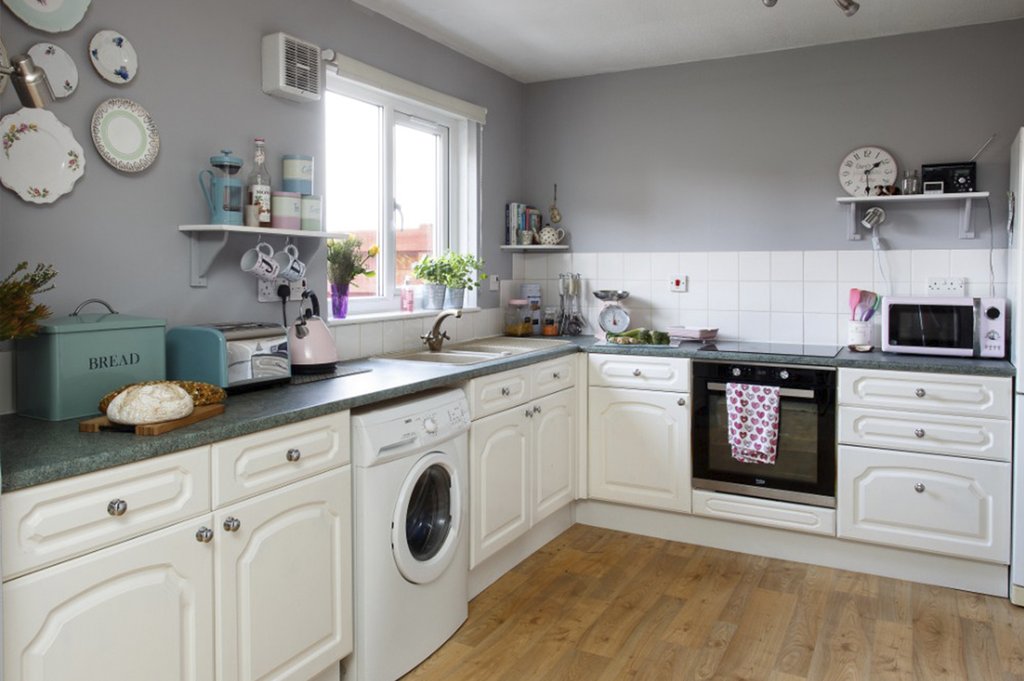
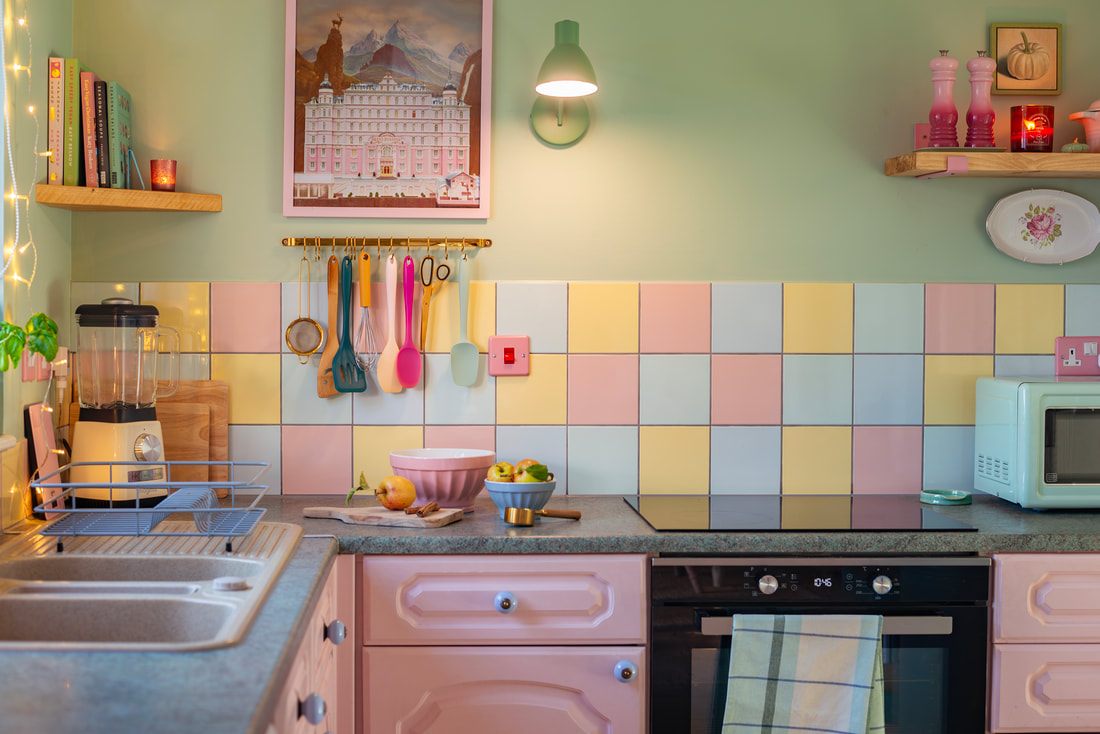  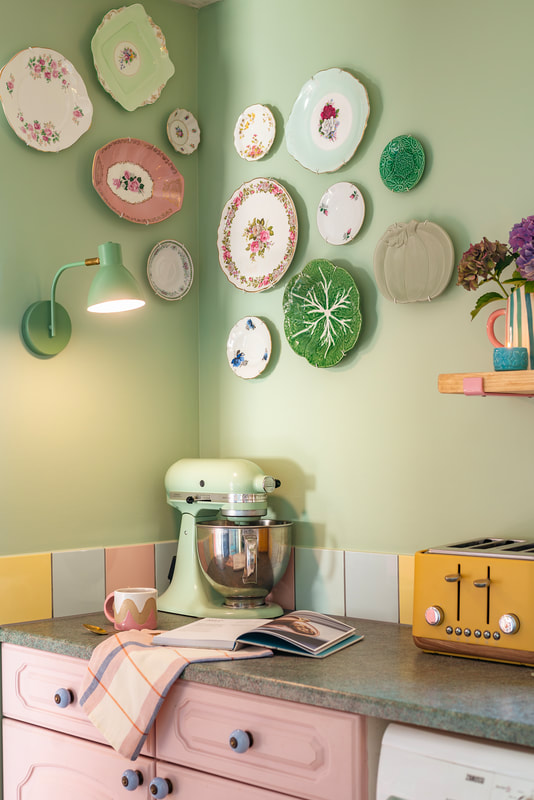 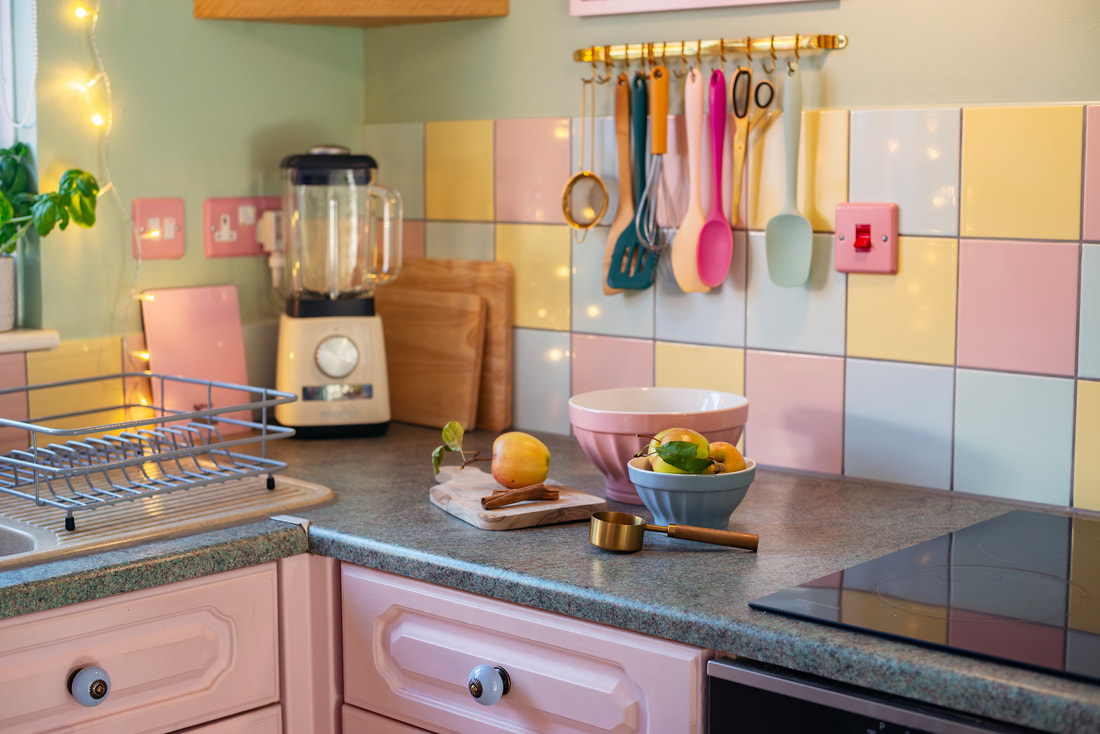 We've had another kitchen update! If you've been around here a while, you'll maybe remember we had a mini kitchen makeover a few years ago. It involved tile decal stickers and painting the cupboards pink. Well, the pink cupboards have stayed, but we now have some beautiful new tiles - plus a few other changes!
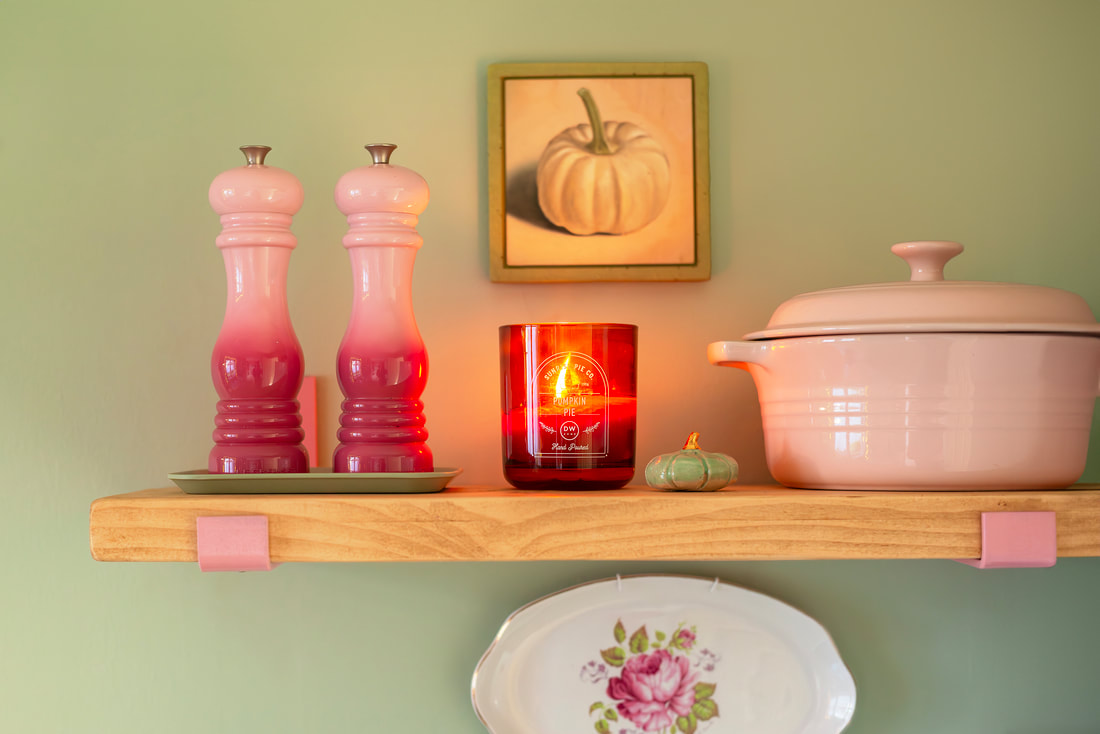
I spent quite a while gathering tile samples; I initially did want something patterned or a classic metro style. In the end I couldn't choose a colour so decided to go for a patchwork of pastels and a darker grout for a fresh and fun vibe. The tiling was a big job which grew arms and legs and resulted in replastering the walls, so naturally we had to repaint the kitchen as well. I didn't want anything which would distract from the tiles too much so went for a soft green which suited existing appliances and the pink units. Since the old shelves had to come down during the process I thought now was the time to treat ourselves to some rustic new ones for added cosiness. We ordered some made to measure, and I found pink brackets to go with them. One of the slightly complicated jobs was switching over all the sockets to cute pink ones - we also added a couple of double sockets as our kitchen has always been lacking plugs. This has given us so much more flexibility with the layout of our appliances, and the pink makes a feature of them which I love. Finally, we updated the lighting by adding stylish green wall lights which stop the need for big light brightness when pottering in the evening. These are actually not wired in because we only decided on them after tiling! But, we did find rechargeable usb bulbs which mean they work wirelessly. I've made a list of kitchen purchases below, but if I've missed anything you're interested in, let me know.
Next on our home DIY list is the bathroom, our biggest project to date!  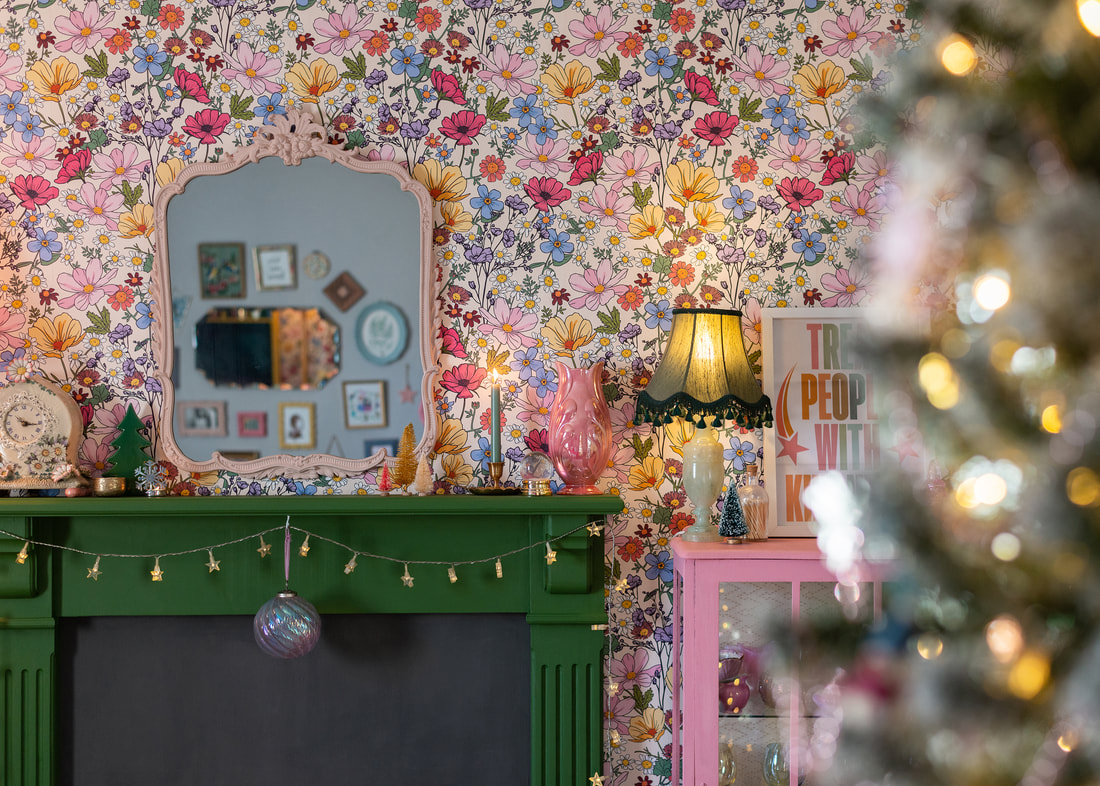 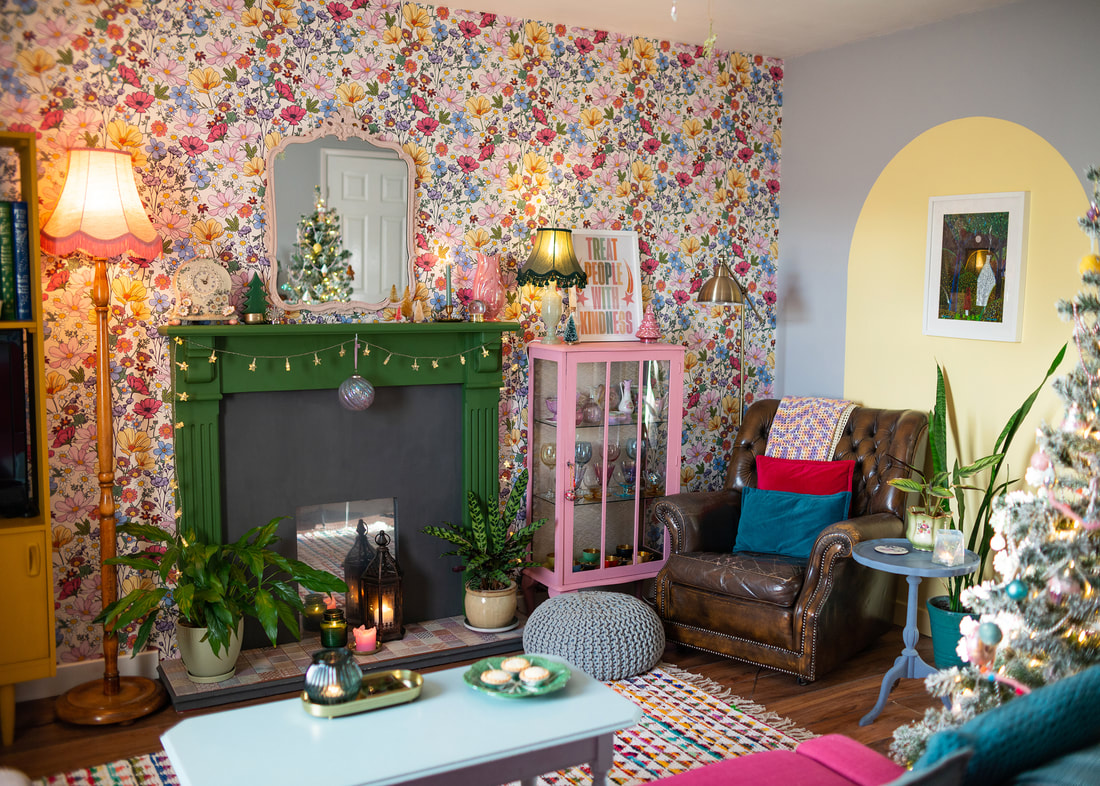 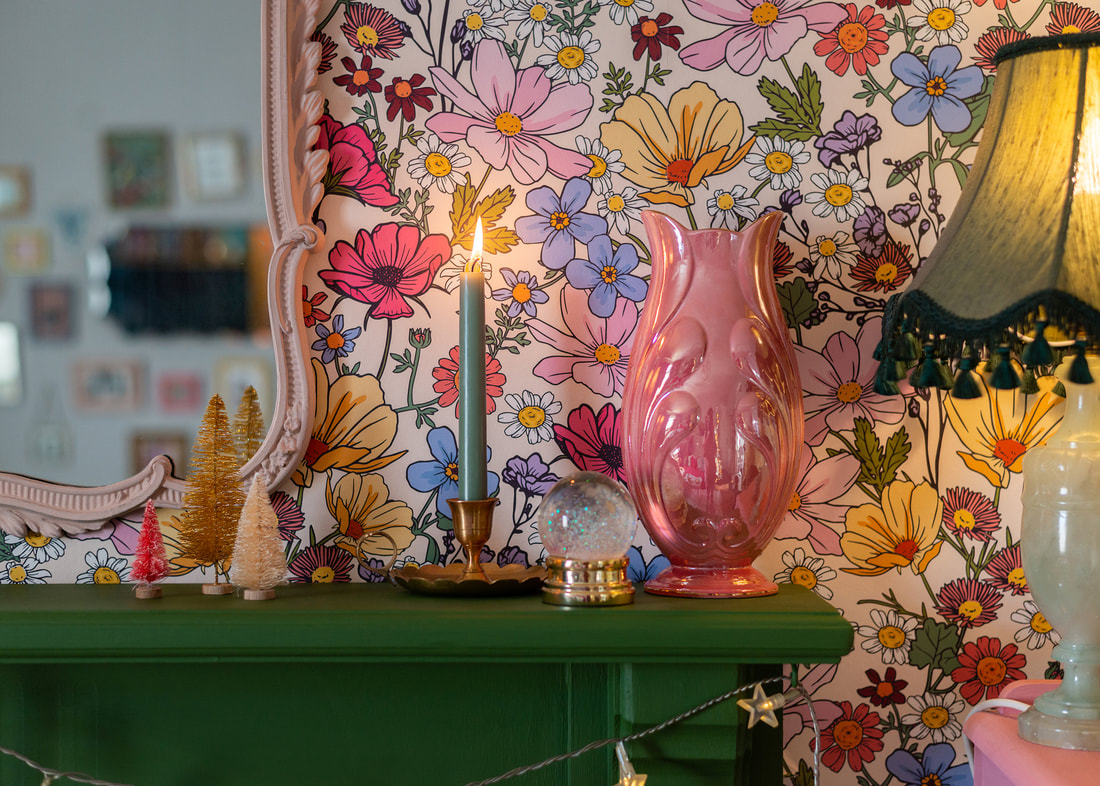 Before
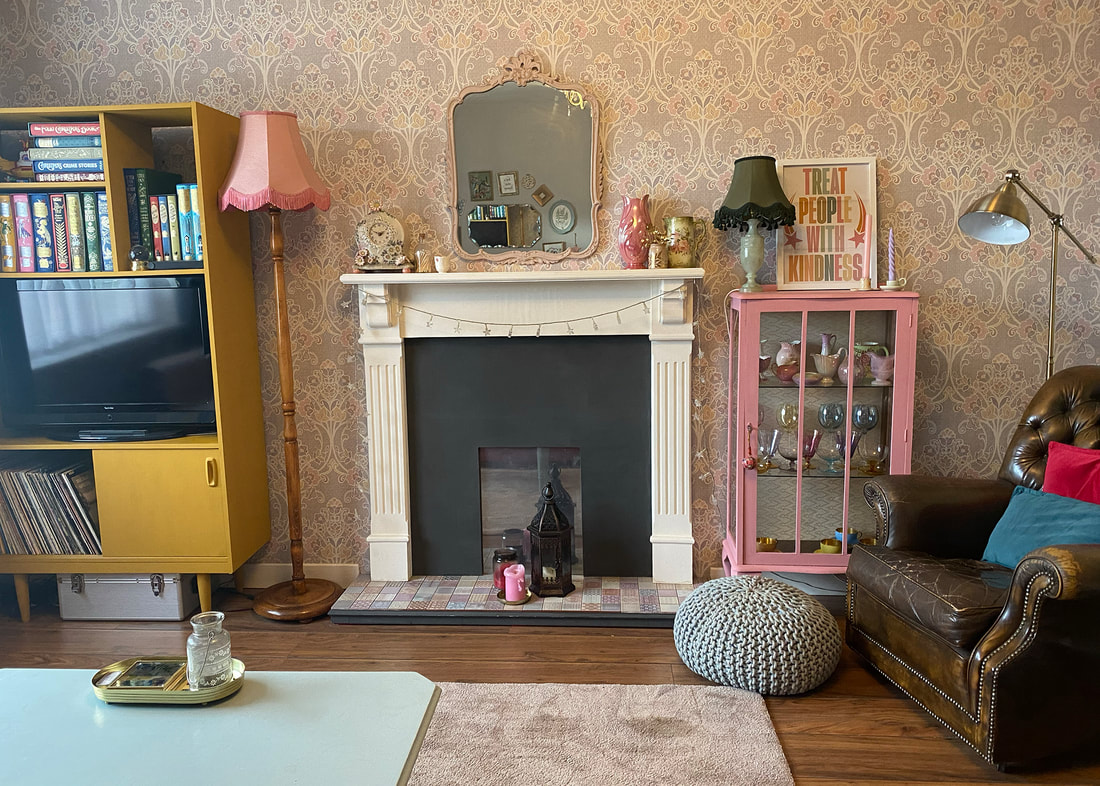
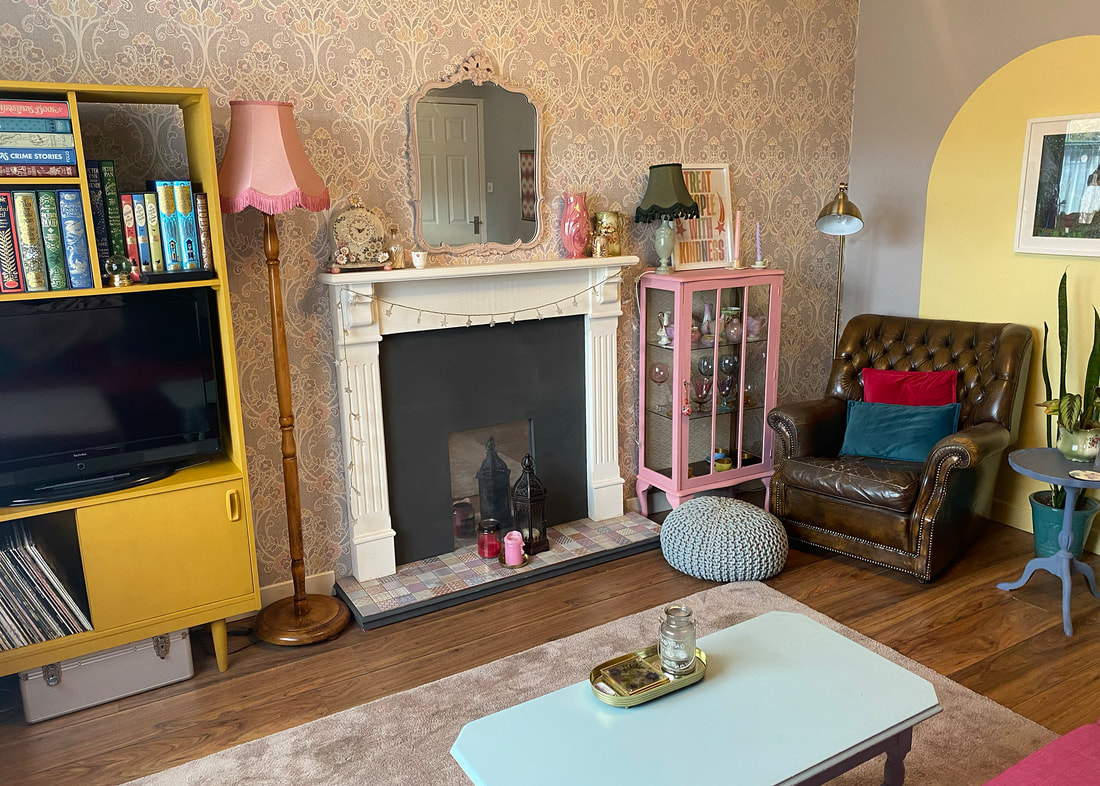
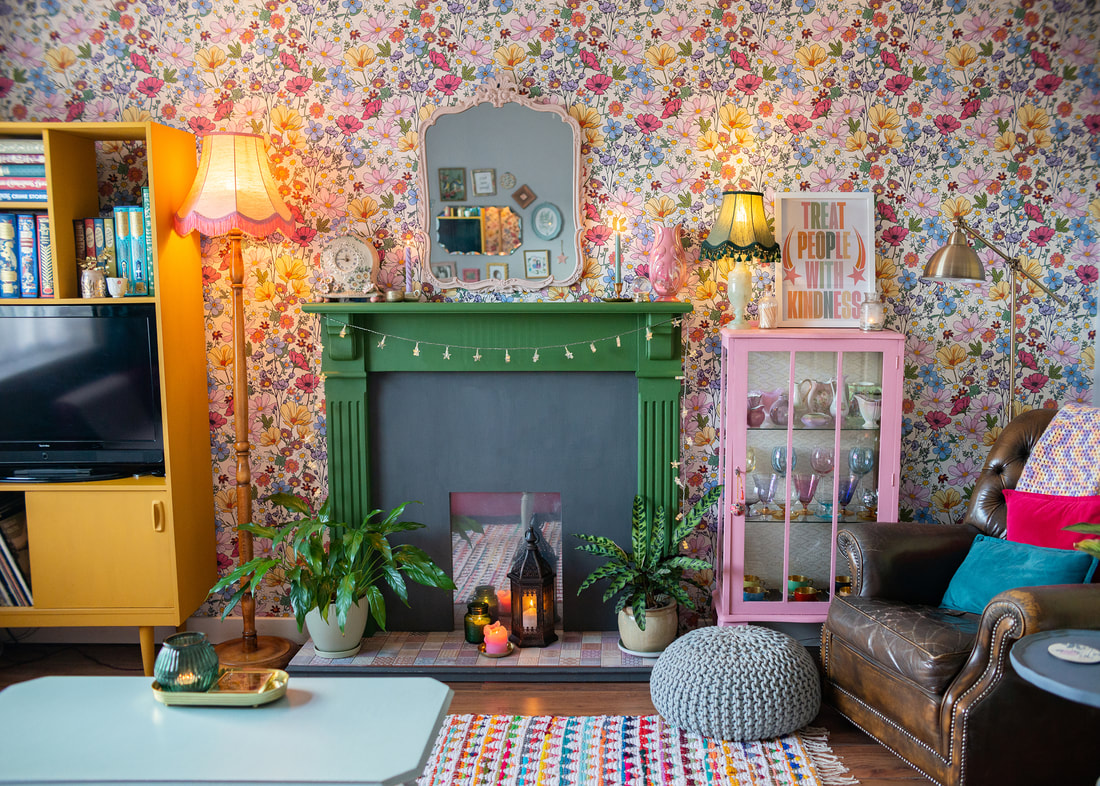 *Lust Home gifted me the wallpaper and paint featured in this post. All opinions are my own. I was already a huge fan of Lust Home wallpapers after using two of them in our retro caravan makeover, so when they asked if they could send me some for a future project I jumped at the chance to transform the living room. It was on my to do list for next year anyway but there’s no time like the present when your favourite interiors brand wants to collaborate! I chose some samples which arrived quickly and were such a good size for getting a proper feel for the pattern and colours. The paint samples are stickers so you can pop them directly onto where you’ll be painting which gives you a much better idea of how it’ll look in the light of your space. I went for She’s a Wildflower (brights on cream) and Smashed Avo paint to give the fire place a cosy update. The paint is actually an eco conscious (yay!) matt emulsion (meant for walls) but I’ve used other matt emulsions on furniture before - as long as it’s sanded and primed and not a high traffic piece it should be fine. You can always seal with a matt varnish if you’d like extra protection from scuffs. The wallpaper is perfect (shout out to Kelly of Oh So Daisy who designed it) and it really ties in the colours of all the different vintage furniture in the room. It’s paste-the-wall which makes it easier to hang, and a really nice thick weight to it. The makeover wouldn’t have been complete without a new rug. Our current beige rug was a temporary fix after an unfortunate incident with a glass of red wine ruined the previous one. When I found this colourful recycled cotton rug from La Redoute it was love at first sight, but I was a little worried it would be too much with the rest of the decor. When my Mum (who came to share her wallpapering skills) saw the rug she seemed concerned too, but once it was all in place she admitted: “it’s mad… but it works”. I am absolutely over the moon with our living room makeover - after transforming the caravan I found I had the confidence to go bolder in our home. I never thought I’d be a maximalist but it’s just so much more fun! Florals aren’t the obvious choice for winter but it turns out they look magical with the Christmas decorations and glow of twinkly lights and candles. Almost like a fairy grotto. I can’t wait to style the space when spring comes too.
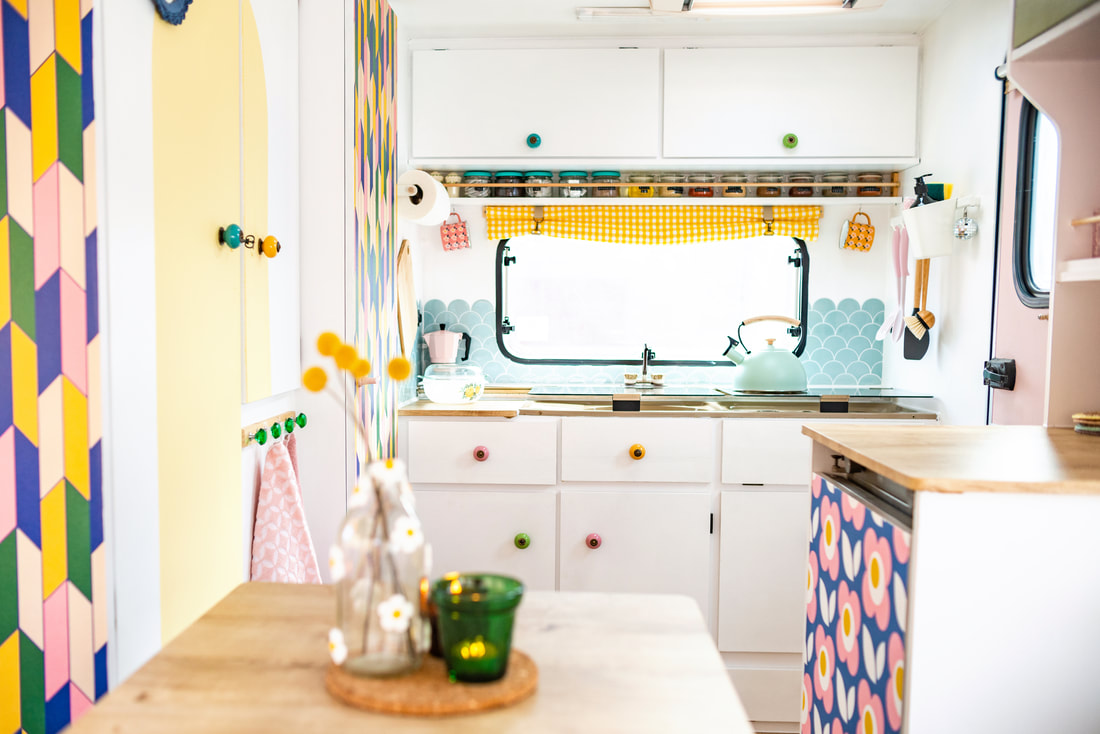
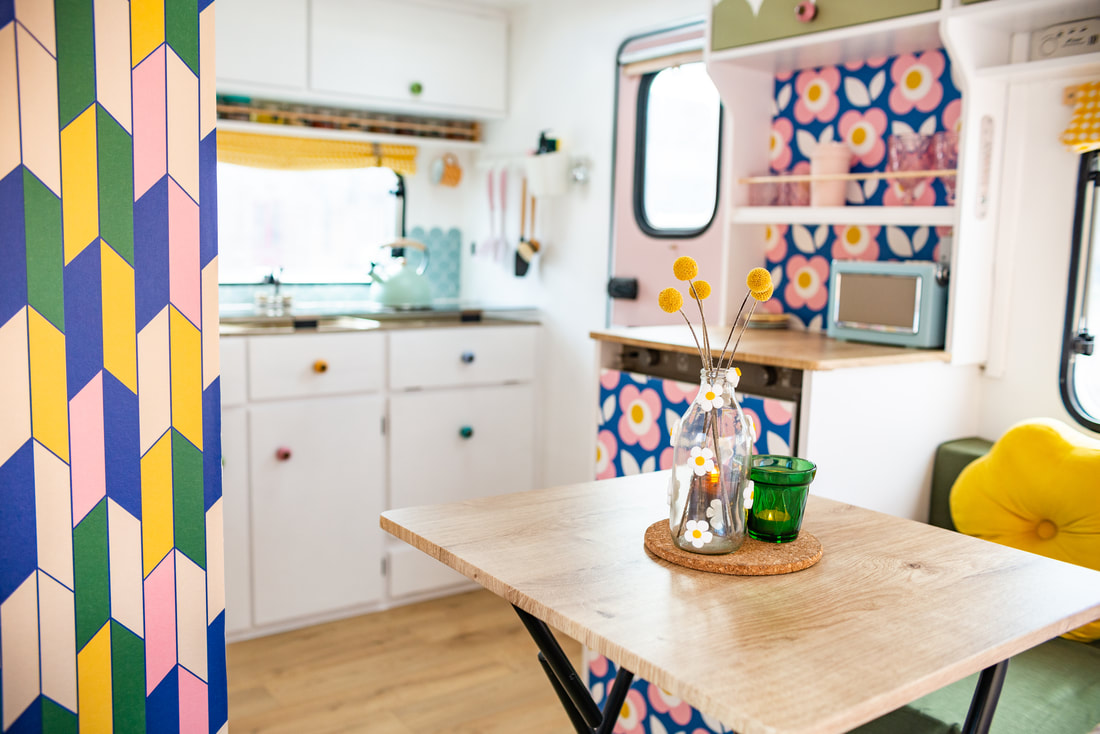
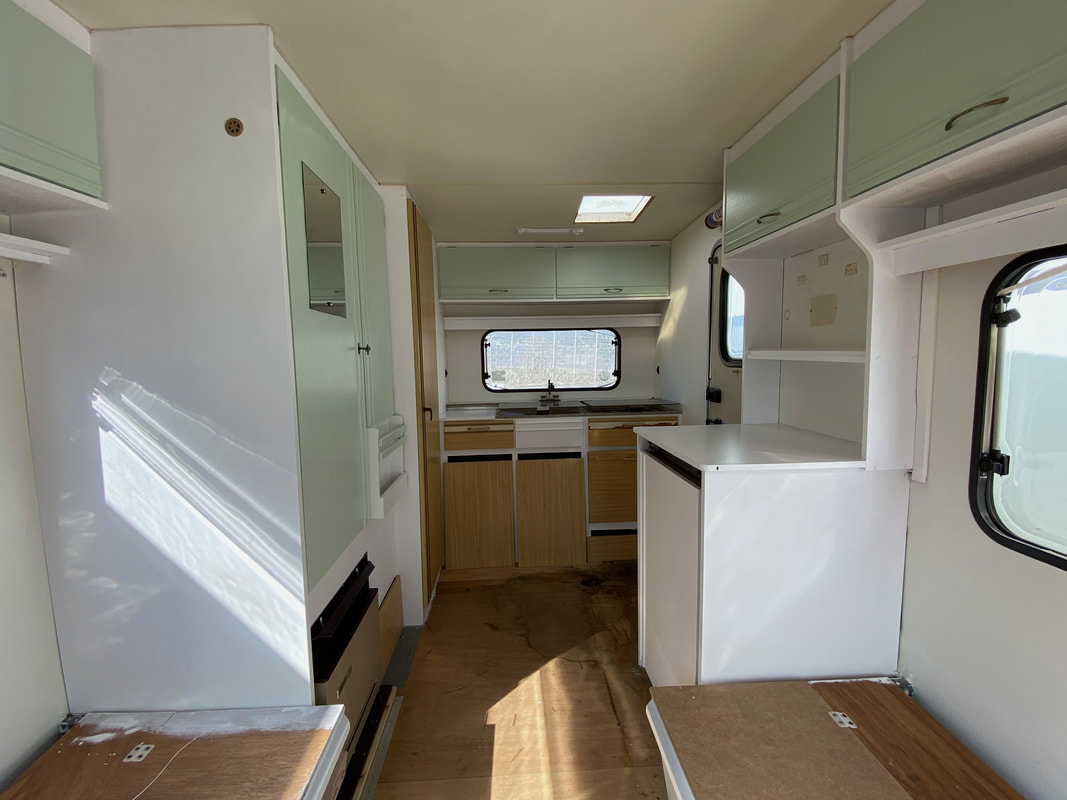
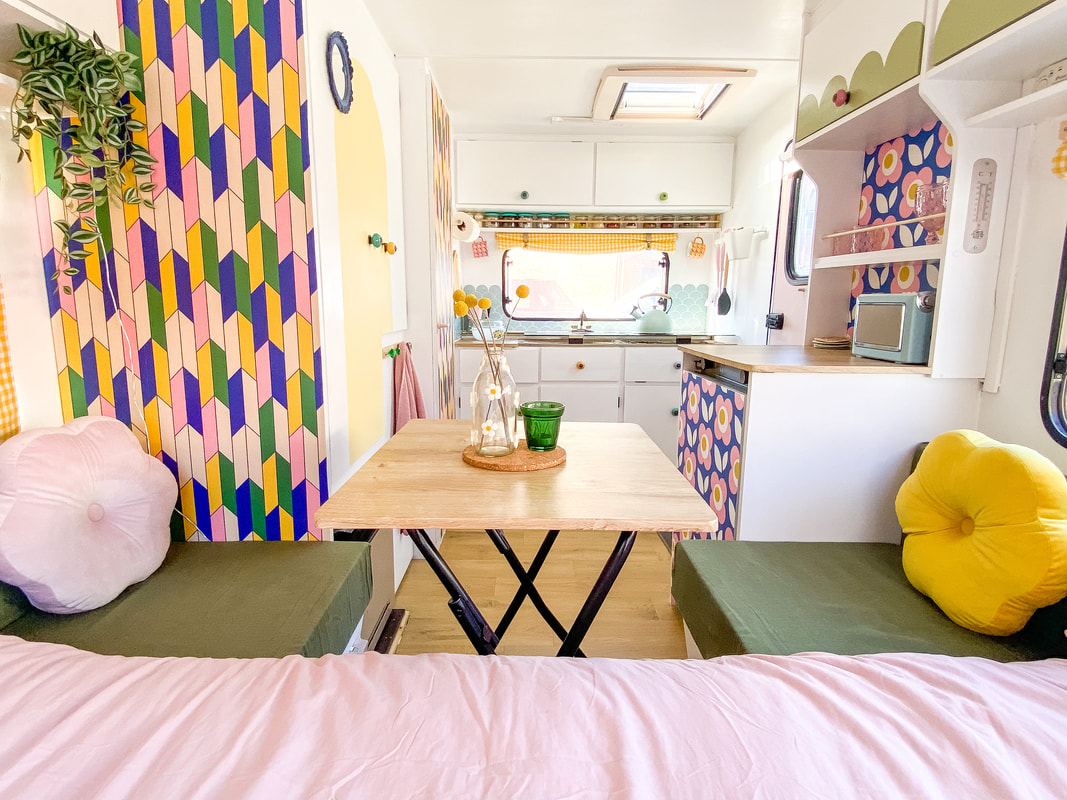
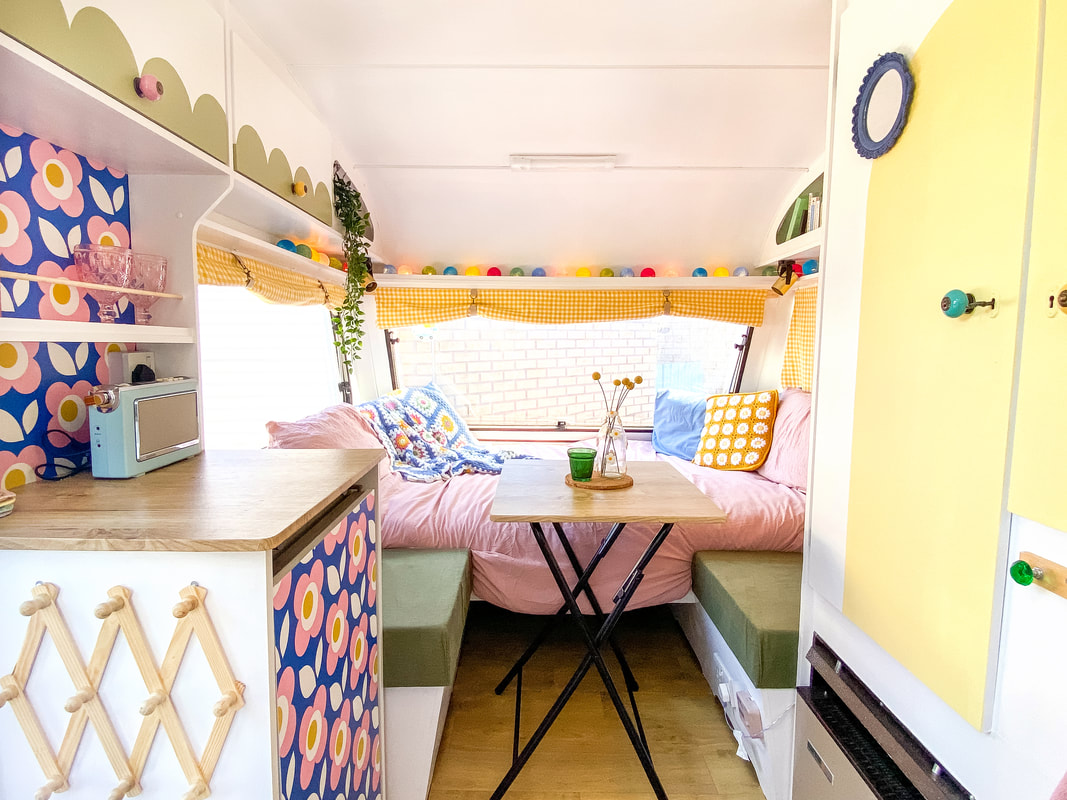
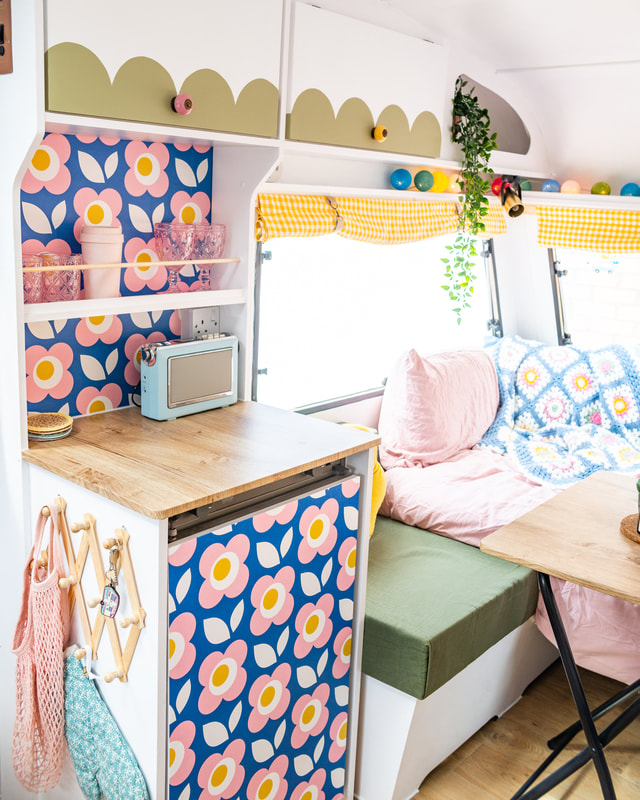
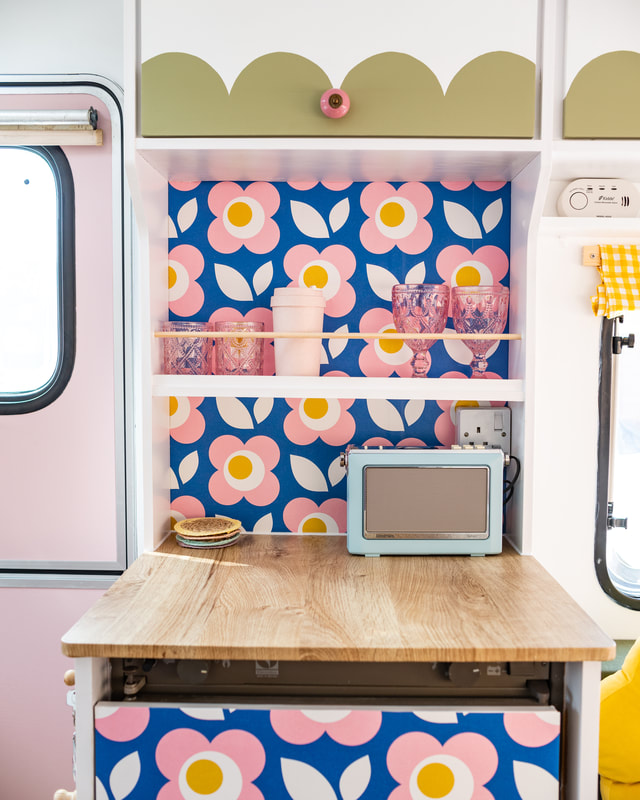
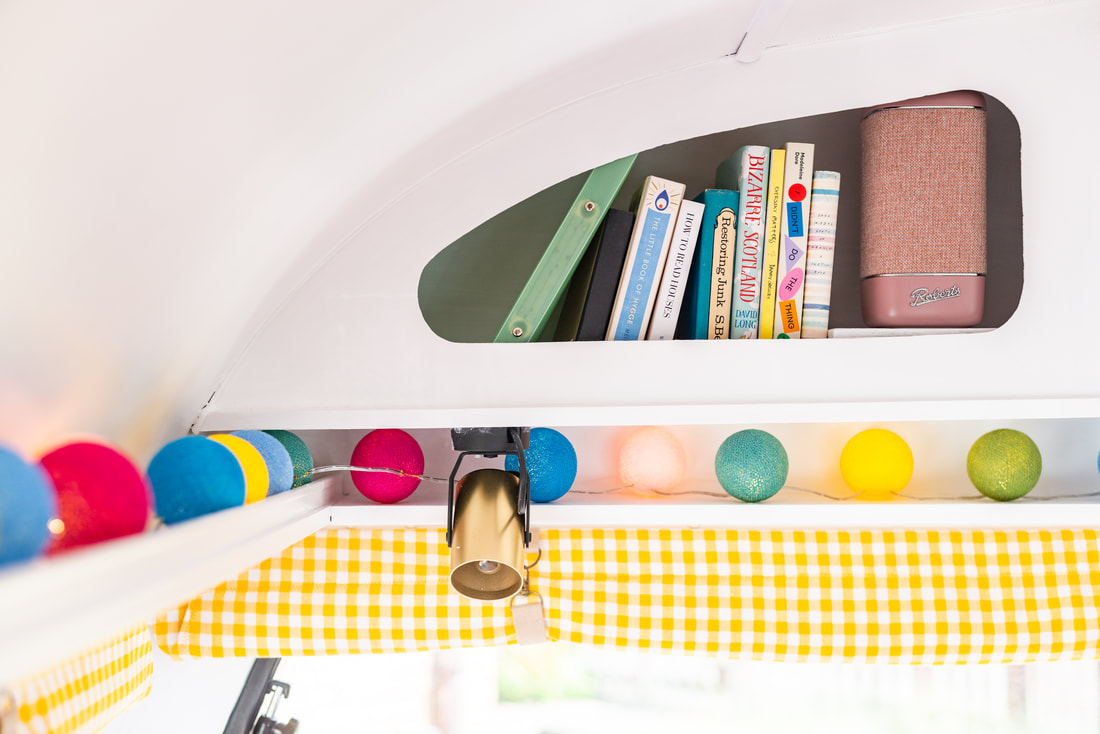 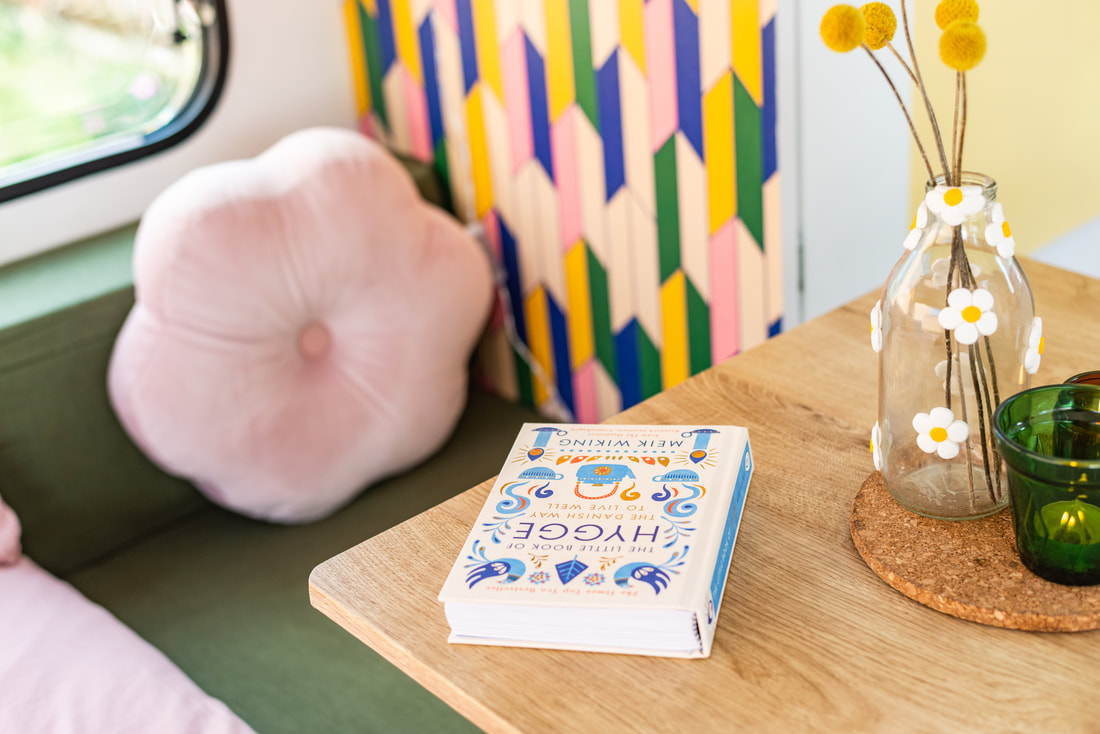 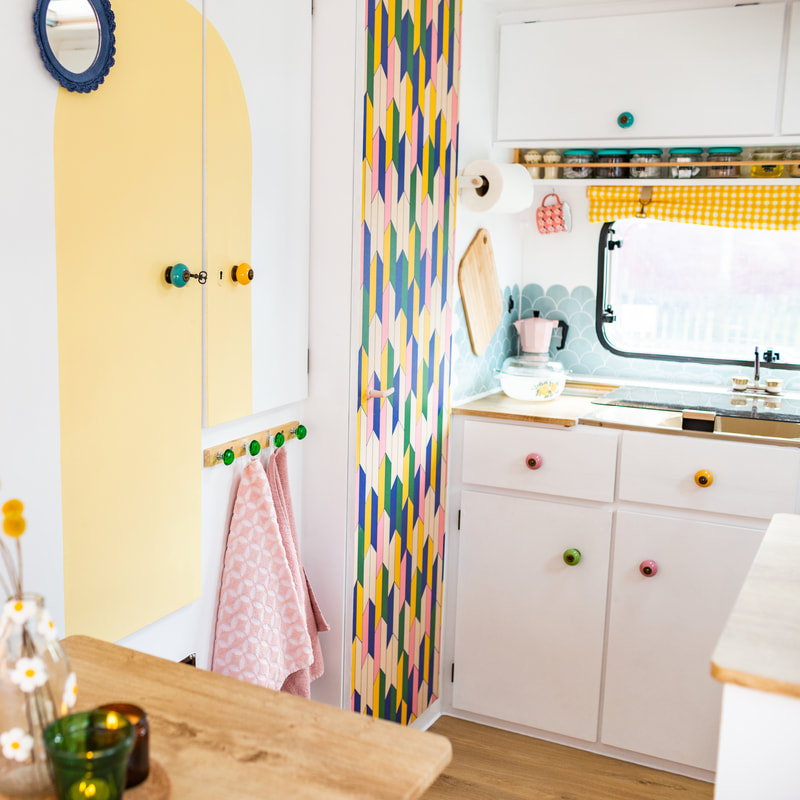 Last April, I was waiting on a date for major emergency* surgery so it seemed like a good time to convince David that we should buy a vintage caravan. It would be the perfect distraction, I said, and in my defence planning the project most definitely was. There did, however, turn out to be a lot more work involved than I imagined, so here we are - well over a year later - and it’s finally finished! The previous owners had started doing up our wee 1985 caravan, so we don’t have an original photo of how it would have looked, sadly. We decided we wanted to have a proper mattress for comfort and so we wouldn’t have the faff of rearranging cushions and making the bed each night. With a 4 foot mattress making up the bed/lounging area, this left just enough space for a dining section in the middle. We also decided to take out the shower as the original tray was badly damaged and there was damp in the cubicle, instead we just have a cassette toilet and little sink. We were very lucky with the kitchen; the original fridge, oven and hob all work perfectly! My Mum and Dad gave me a pair of Enamel Happy cups for my birthday before we bought the caravan, not long after that I found Lust did a retro daisy wallpaper. These were the starting point for the interior style which I planned out on Procreate. I’ve loved having an excuse to find bits and pieces to match over the last year, even sourcing mini utensils to stock the kitchen has had me in my element. I’ll pop a list of some of the items below:
I really wanted the space to feel like an escape pod where we can go to disconnect from technology and slow down. We have a cupboard stocked with games and puzzles, a little book shelf and a retro radio. I have a few things I’d like to work on next year, but for now we’re going to enjoy a few more trips away before we have to put it back into hibernation. Let me know if you have any recommendations for where we should plan a trip! *I’ve not spoken about this on here before, but it wasn’t actually an emergency in the end. They just had to treat it as an emergency to be on the safe side due to test results. 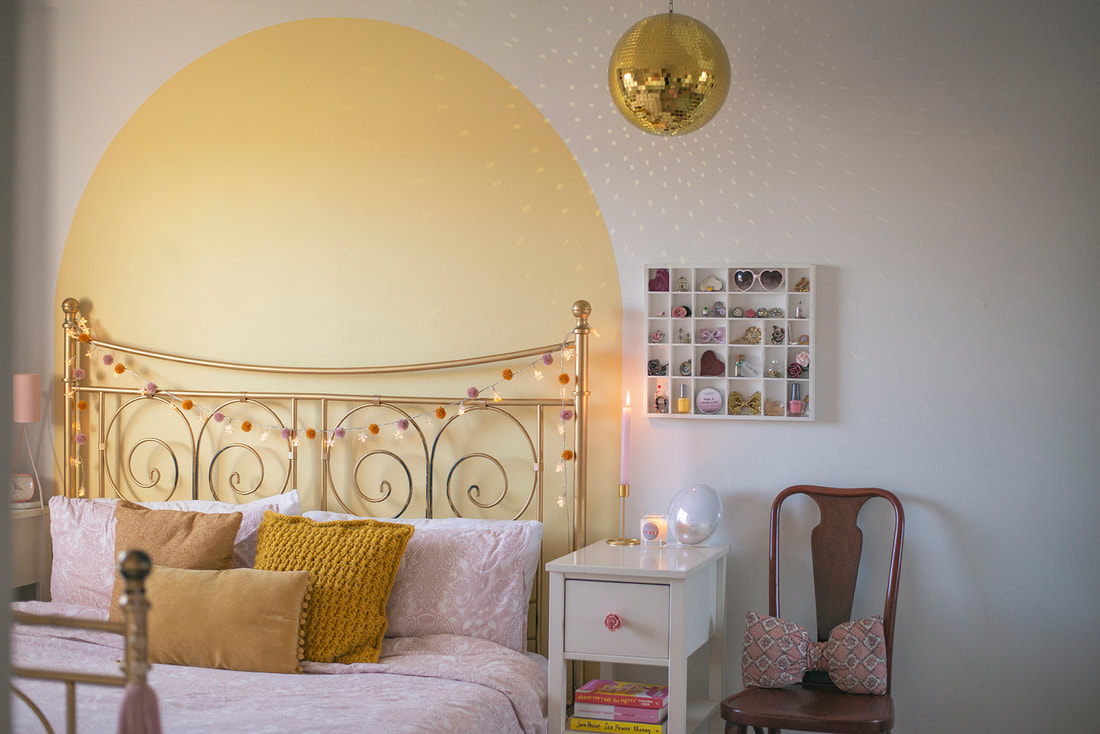 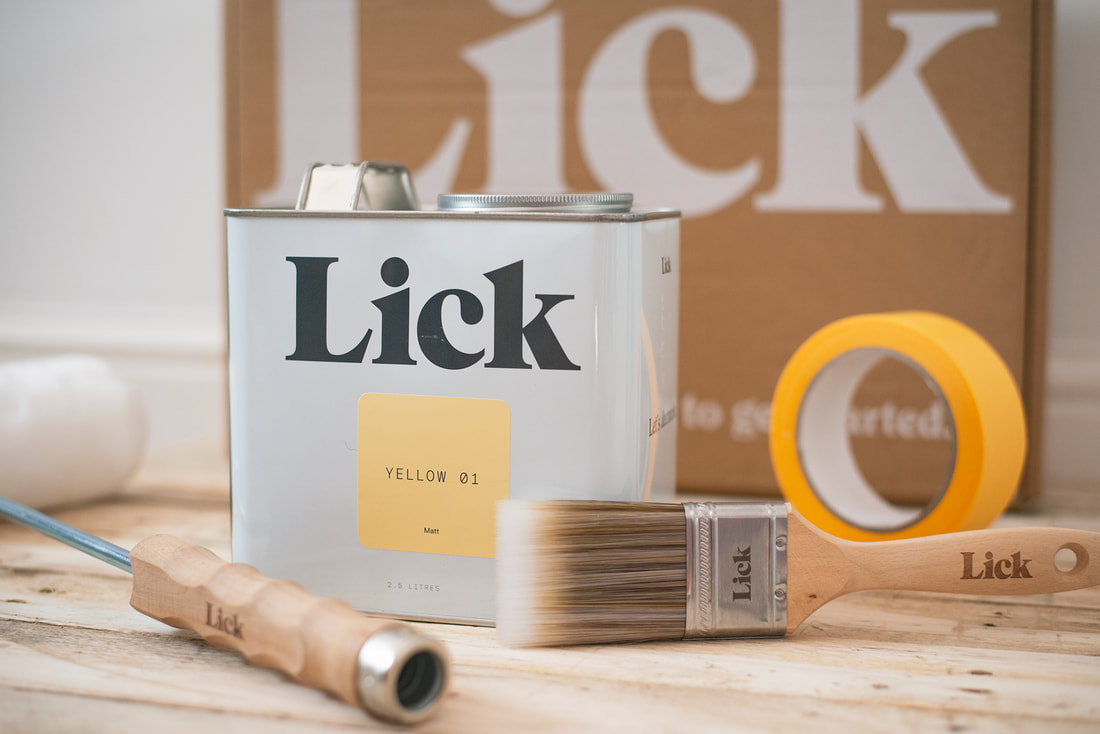
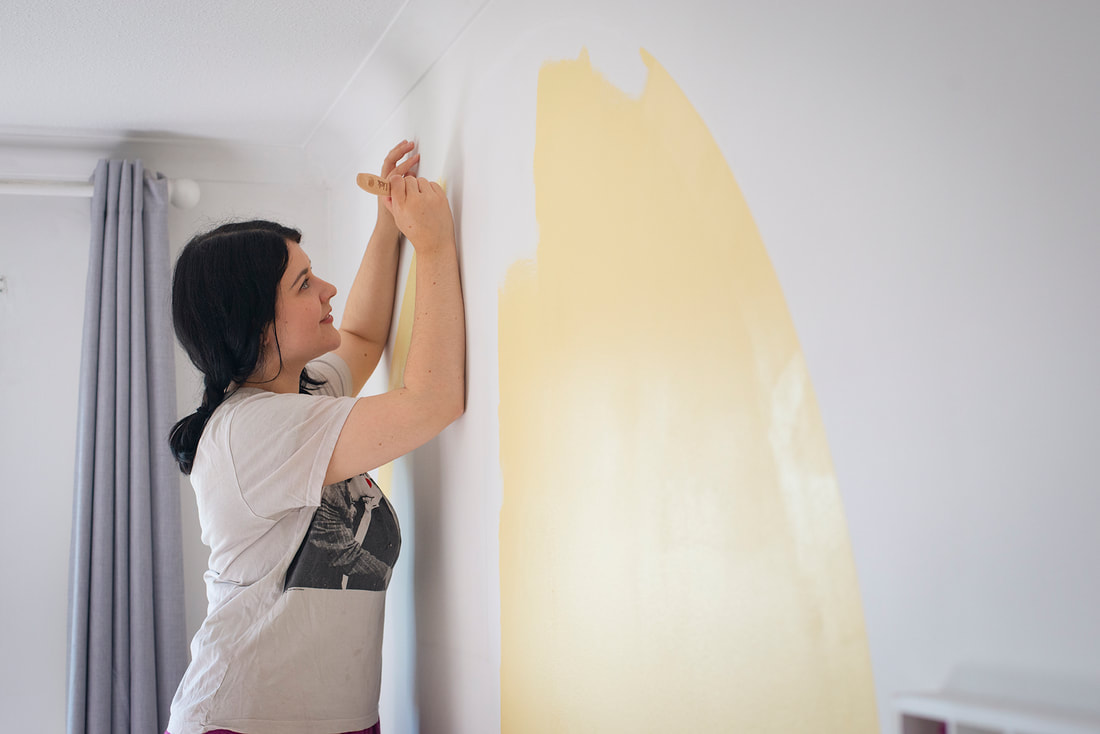
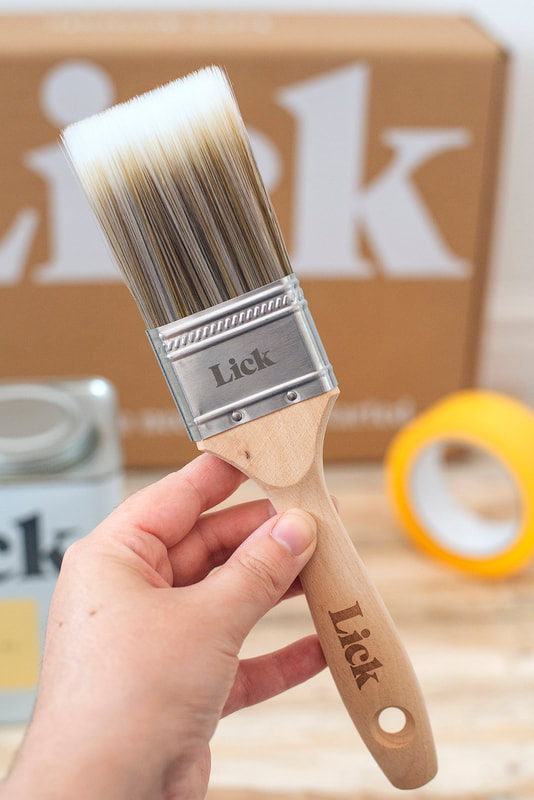
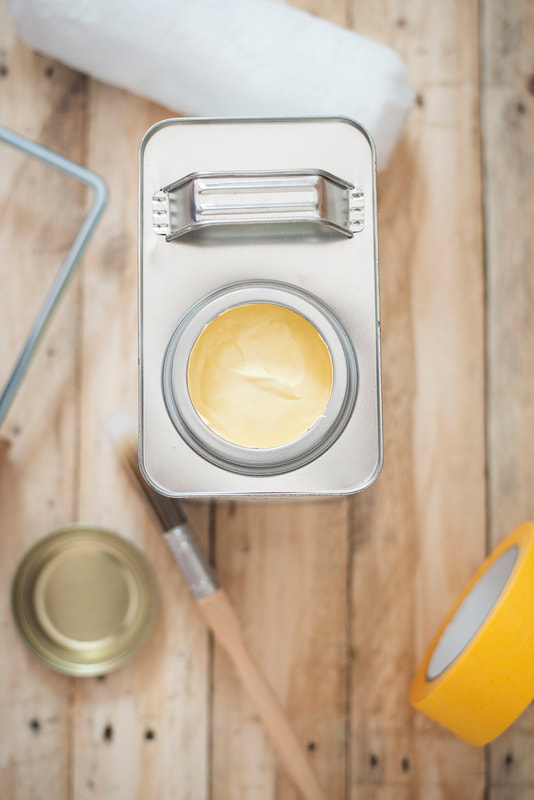
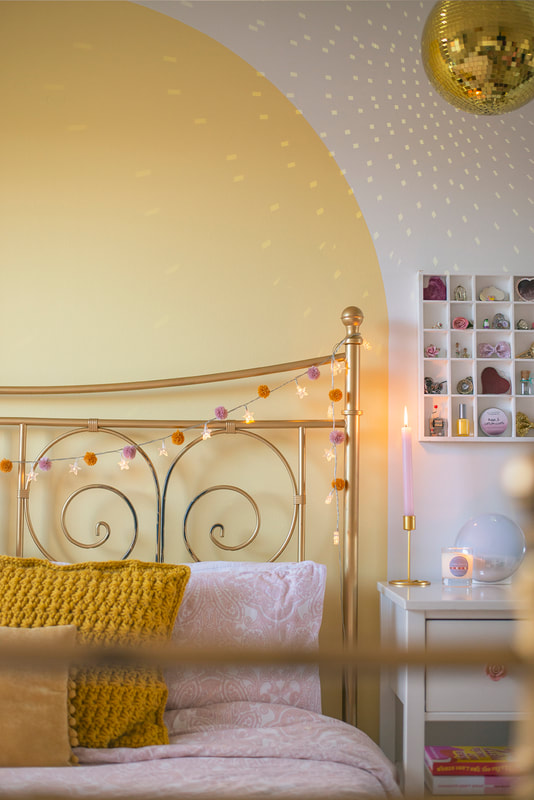
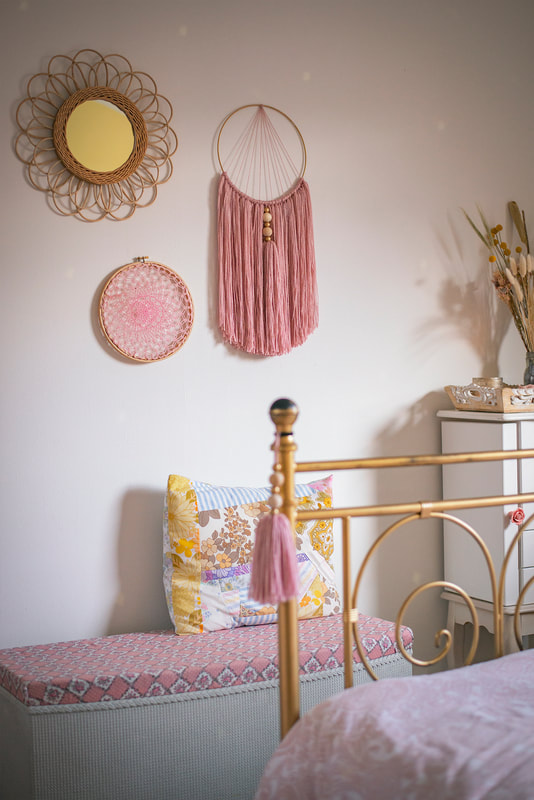
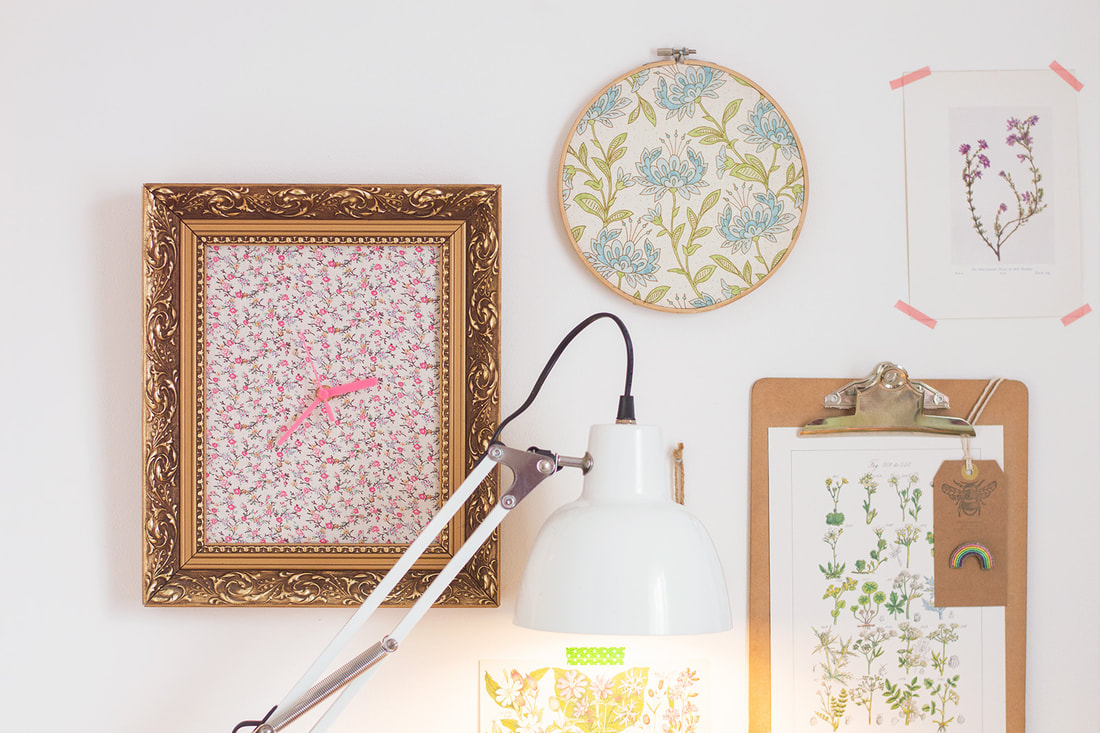
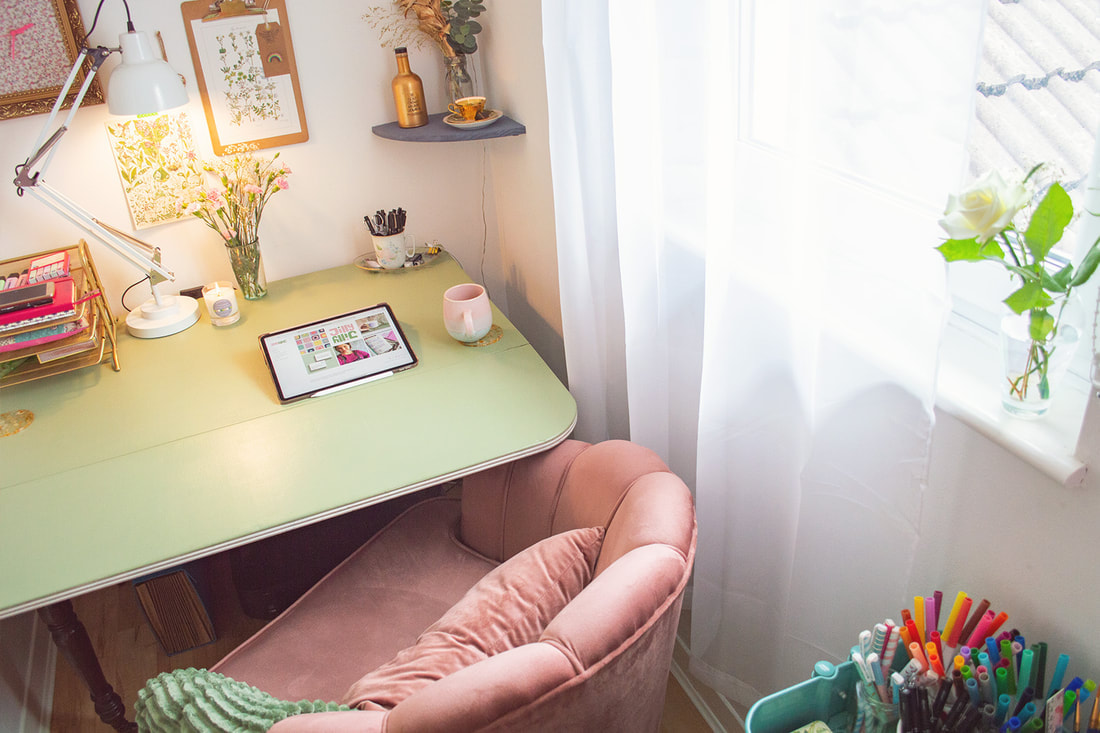
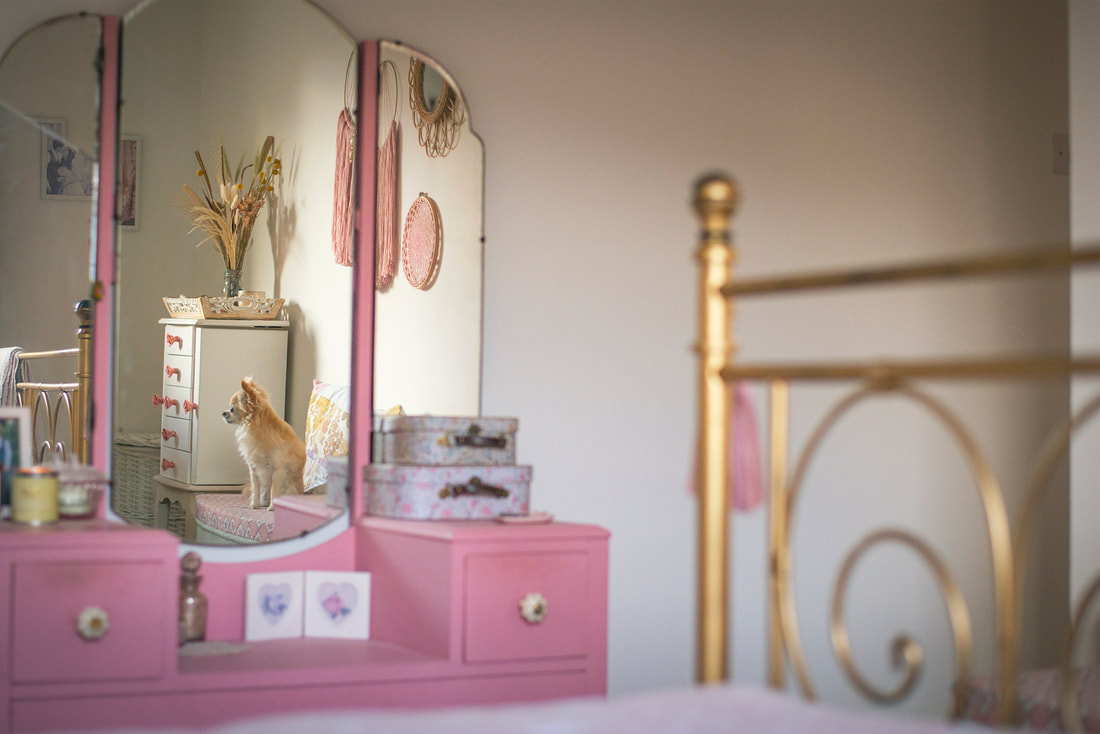 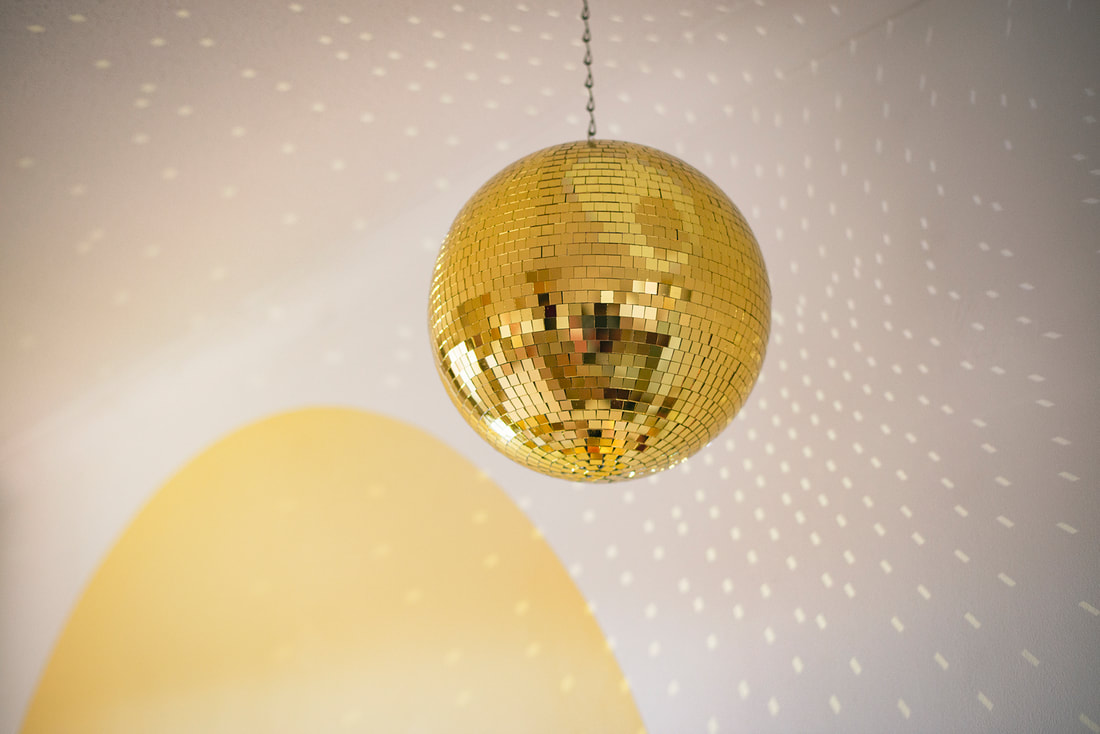 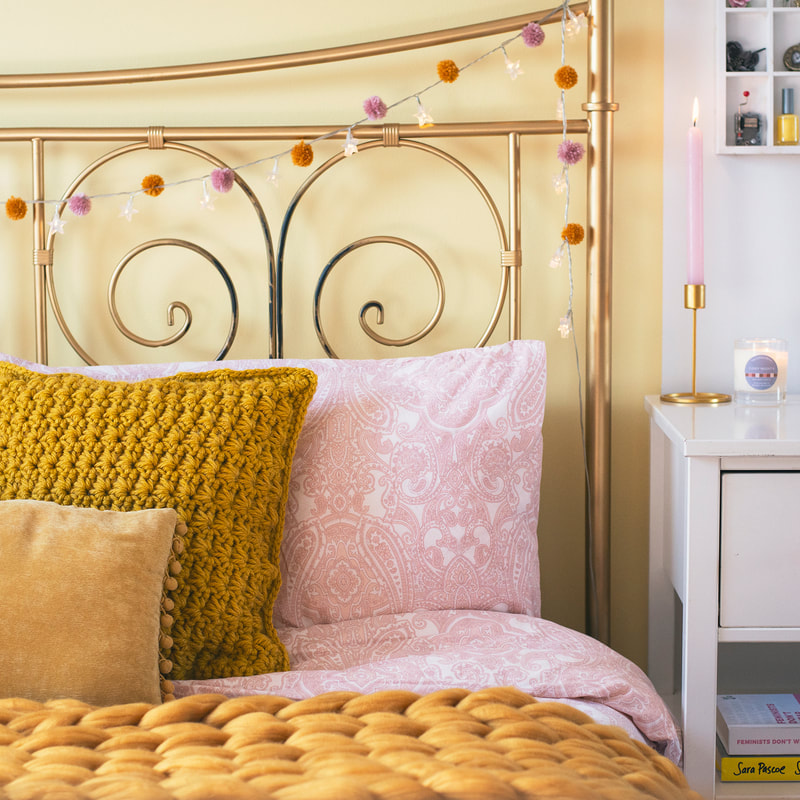 *Lick gifted me a Colour Consultation, Decorating Kit and paint in exchange for a review. All opinions are my own. When Lick got in touch asking if I'd like to try their Video Colourist Session to help makeover a room in my home I thought it would be a fab opportunity to change up our bedroom a little. My appointment was booked with Sam and held via WhatsApp. We had a lovely chat about interiors including my likes and dislikes, details of the space I wanted advice on (how we use it, what would be staying the same etc), my interiors style and any other requirements. It was a really relaxed chat and Sam gave me the encouragement I needed to go bold as I told her I loved the arch murals I'd been seeing on Instagram recently. After the session I was sent a bespoke mood board with details of Lick paint colours to complete the makeover. Lick then sent me one of their super handy Decorating Kits and a tin of Yellow 01 which is a soft creamy yellow, perfect for adding a cosy pop of colour to our otherwise white bedroom. I'm just going to take a moment here to say how much I love Lick's branding - from the little messages on the packaging to the logo engraved wooden handles and gorgeous tin - there are so many little touches that make them stand out. The decorating kit I received is the single room painting kit which includes a roller and handle, 2" flat brush, metal roller tray and yellow masking tape. We measured out the space behind the bed, taped up the straight sides and floor, then used a pencil with some string and a pin (as a compass) to draw the arch. David did the rollering while I did the arch edge - I was so surprised at how easy it was as a wee DIY project! The paint went on so nice and smooth, it only needed one coat as the wall underneath was white. It's a really thick, well pigmented paint and a little definitely goes a long way. We finished off our mini bedroom makeover with some wee pops of yellow and other cute accessories. First, a few thrifty ones - the cushions were spare ones my Mum had sitting around, I made some pompoms to add to my fairylights (you can see how I did this using a fork here), I added a couple of yellow/gold items to my accessories box frame, and I put one of my great grandmother's vintage doilies in an embroidery hoop as a wall decoration. The beautiful wall hanging is from Letti and Low on Etsy and I found the rattan mirror on eBay. I also couldn't resist taking a pic of one of Cushy Knit's squishy blankets on the bed as it just looks so snuggly with the new colour scheme. Then, last but not least, we got a big yellow mirror ball! I absolutely love it, it's so twinkly in the sun and just makes it feel like a really cheerful space to wake up in, especially on these gloomier mornings. If you're thinking about having a home makeover, I wouldn't hesitate to recommend Lick. The colourist sessions are such a great tool for helping inspire you to try something different in your home with confidence. You can find out more here and also be sure to follow Lick on Instagram as there's so many beautiful real homes featured. I keep spotting more colours I'd like to try elsewhere in the house! 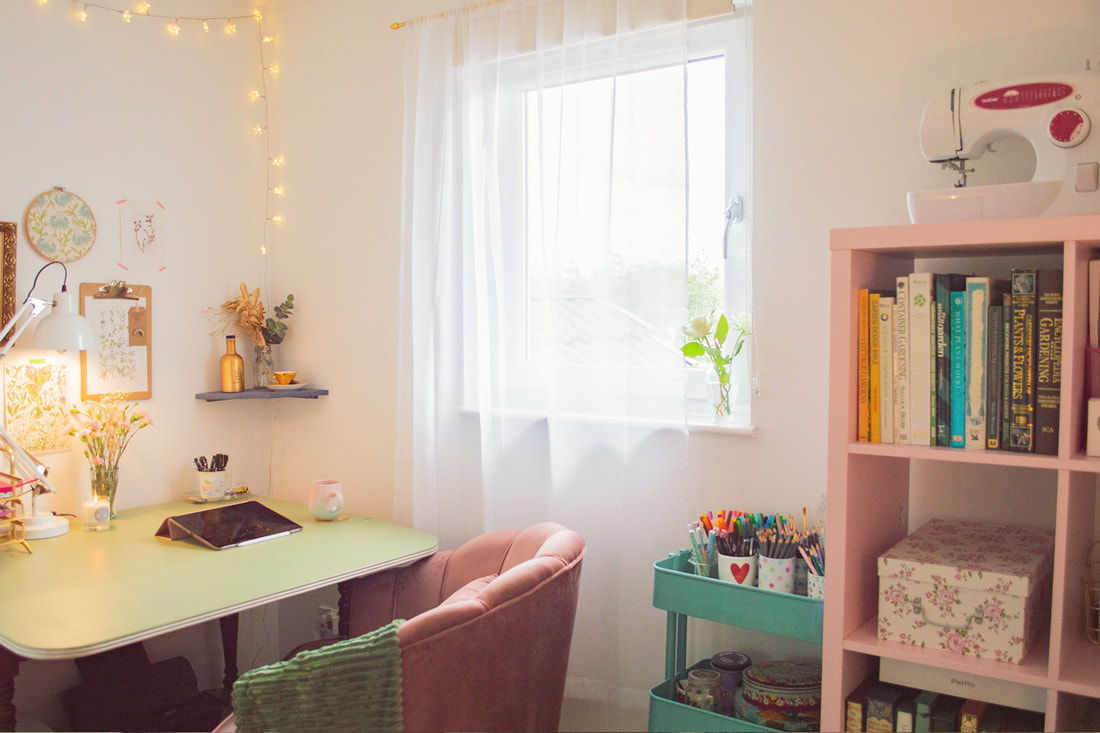 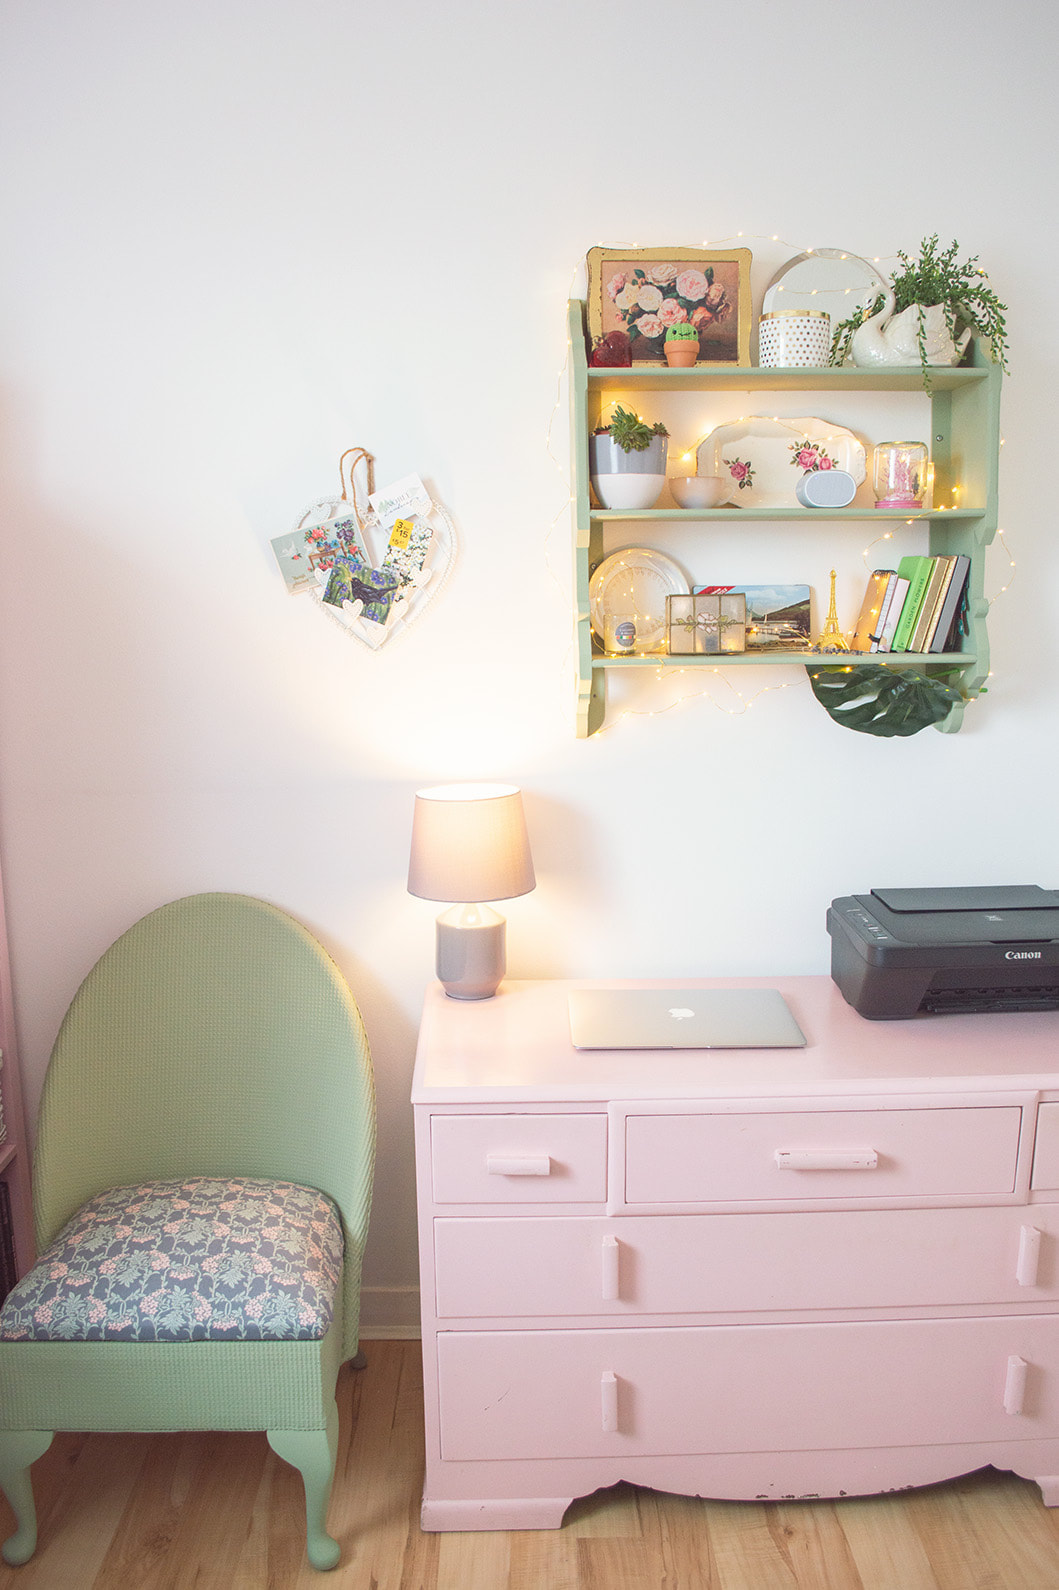 before as our wee guest bedroom which often became a dumping ground 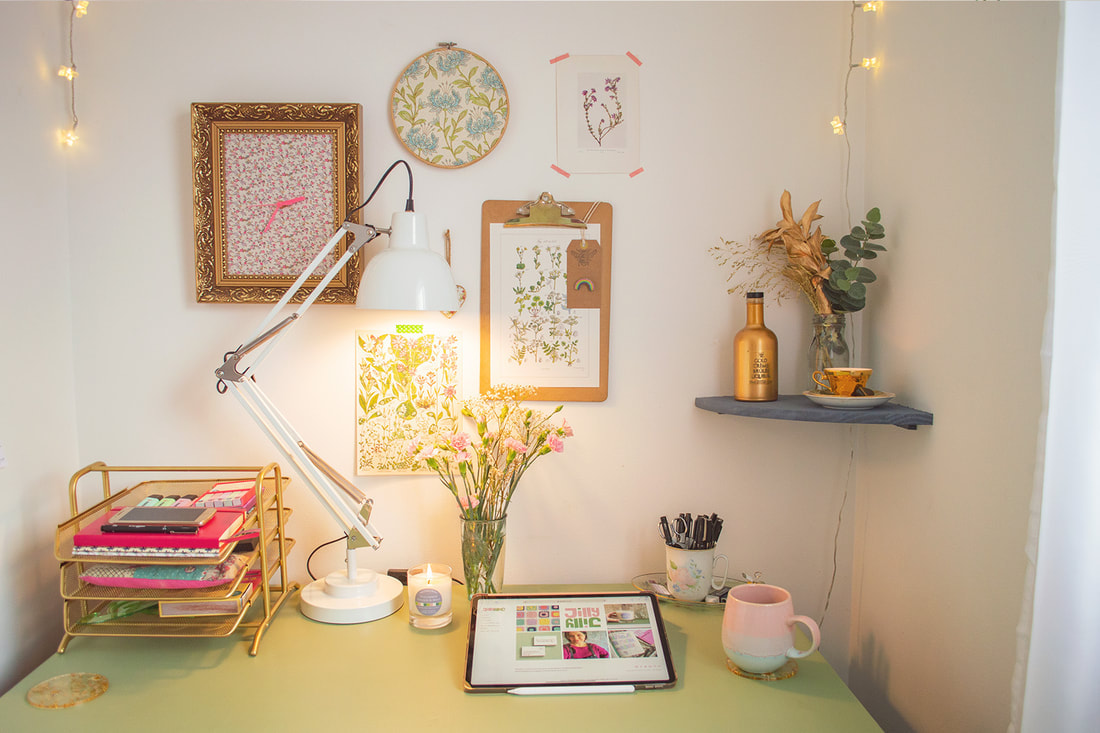 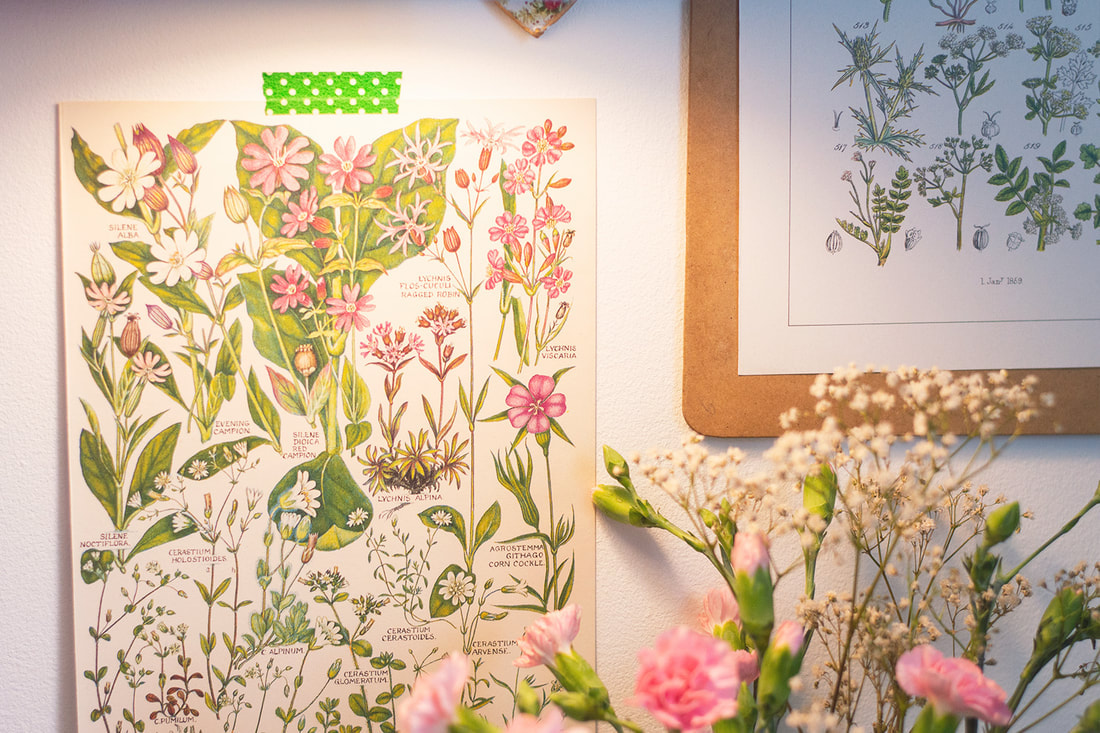 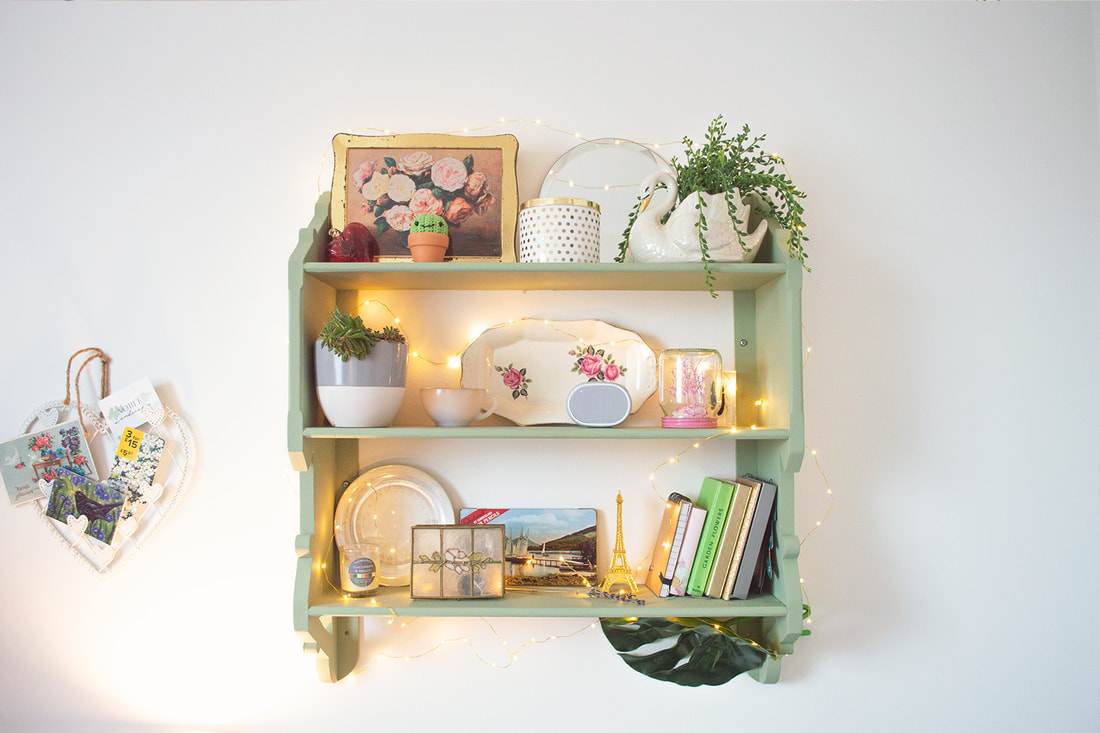 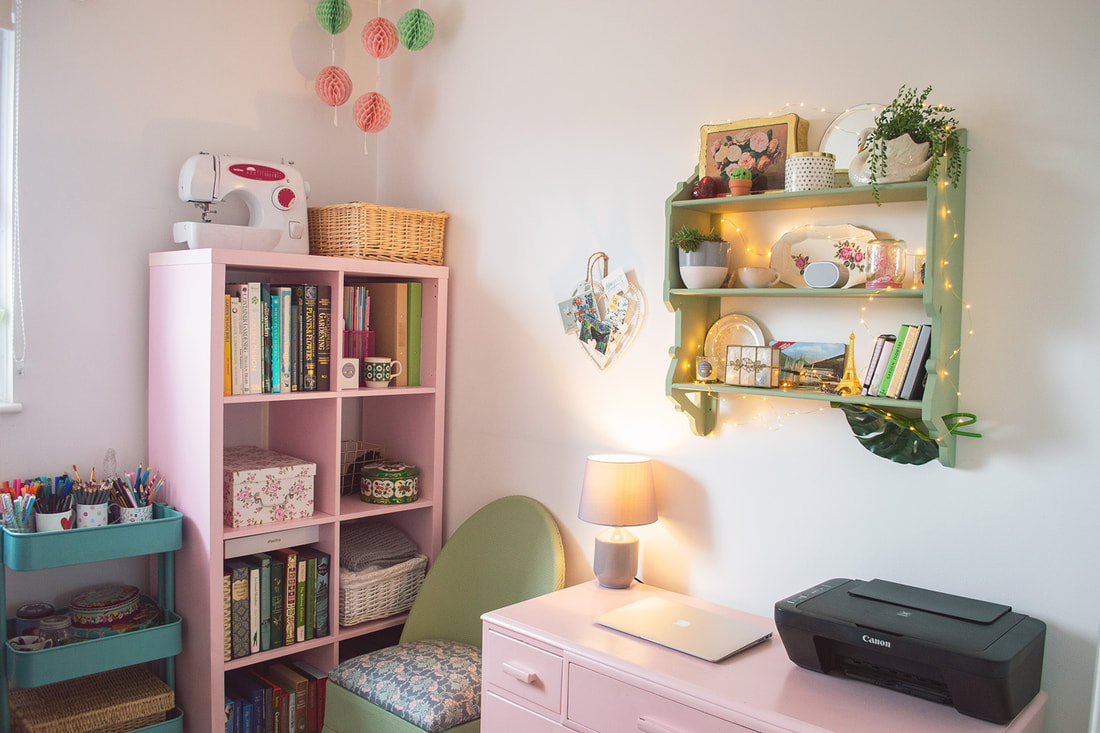 This post contains affiliate links to products. I may receive a commission for purchases made through these links. I hadn't planned on creating a new workspace, it kind of just happened. One day, during lockdown, I mentioned how I'd like to work in our small guest bedroom as it's at the front so gets more sun, and wondered if we could swap them round. David wasn't overly keen and it did seem like a hassle/some top procrastination, but a week or so later we were looking for things to do and it suddenly seemed like a great idea! This definitely marked the end of an era. Moving to a much smaller room meant packing up the side of my business I'd been falling out of love with to make sure there was room for all of the important stuff for moving forward. It was absolute chaos. I had instant regrets when both rooms were filled with piles of disorganised EVERYTHING. Why did I have so much stuff?? A day of work later and we had the layout of my new workspace! At this stage I decided I wanted to paint everything a muted green so I ordered a tin of Rust-Oleum Bramwell which we used on the desk, shelf and wicker chair. The chair was actually in the garage from when my parents were clearing out - it used to be in my nursery/bedroom growing up and has constantly changed colour. I covered the cushion with a fat quarter of gorgeous liberty fabric from eBay. I also found half a can of matte gold spray paint from a previous project in the garage, which David used to spray my old bright pink IKEA file shelves with. I love how they turned out! My favourite mini DIY that happened was the clock. This vintage frame was used for displaying brooches and the hands were taken off an old clock which didn't suit the new space. Those, combined with some floral fabric, make a fun but practical addition to my wee gallery wall. The botanical prints are all from CowParsleyCo on Etsy. Keeping to the botanical theme, I treated myself to some custom coasters from Flower Resin - they are made with daisies, ferns, pink petals and gold leaf. So perfect! My desk candle is from The Candle Bothy, I love the cucumber, ginger and mint scent, plus it's a bonus that the label matches perfectly! Last but not least, is my lovely new pink velvet desk chair. I wanted to have a comfier space to sit as I'm so bad for going downstairs to work from the sofa in the living room. I can safely say it has increased productivity by 100%. It's my focus zone, but I can sit with my legs crossed and draw or cosy up with Daisy. I'd seen these in TK Maxx years ago and always wanted an excuse to buy one, but because it was during lockdown I managed to find a similar one on eBay. Everything else we already had, it just needed a bit of reorganisation. I really love it and it's become a place I'm excited to spend time in. So cosy and inviting! As for the old studio, it's now a guest bedroom/gym/games room which makes for a much better use of space. 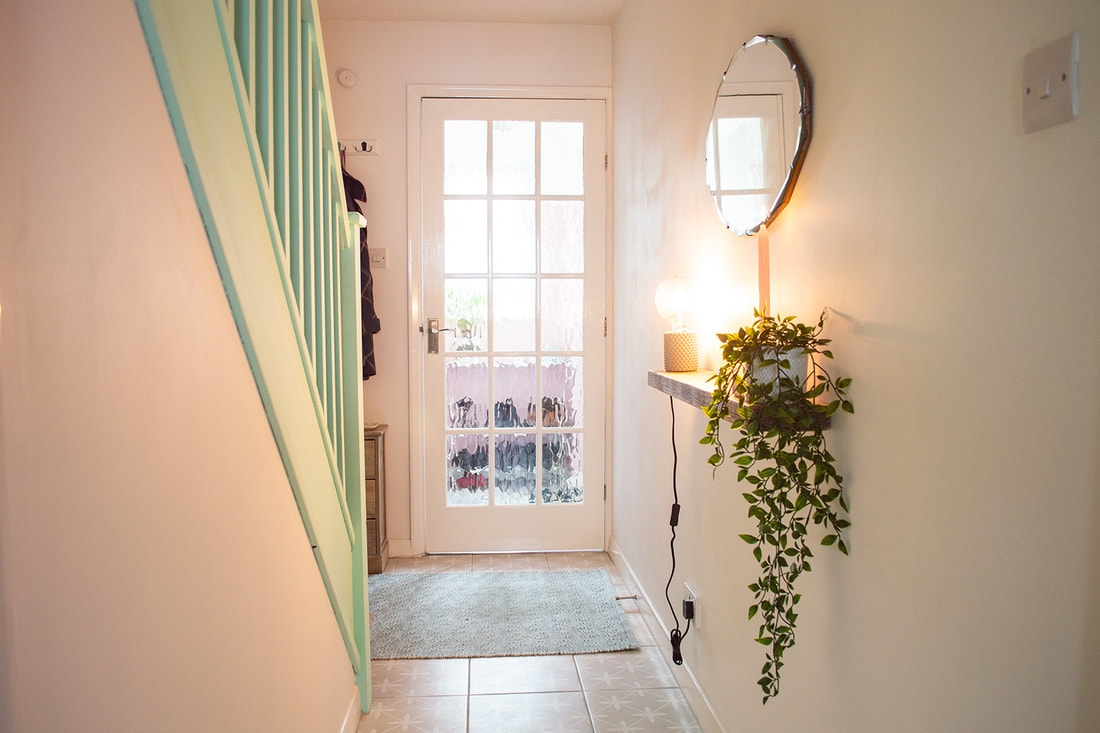 TA-DAH! It might have been over 6 months since we finished our hallway makeover, but it still feels fresh and new every day! I'm so pleased with how this turned out, especially as it was the final piece of the puzzle in terms of making our home fully our own. I started a moodboard aaages ago, because I can never resist a moodboard, but since the hall was going to be quite a big job for us, we saved it until last.
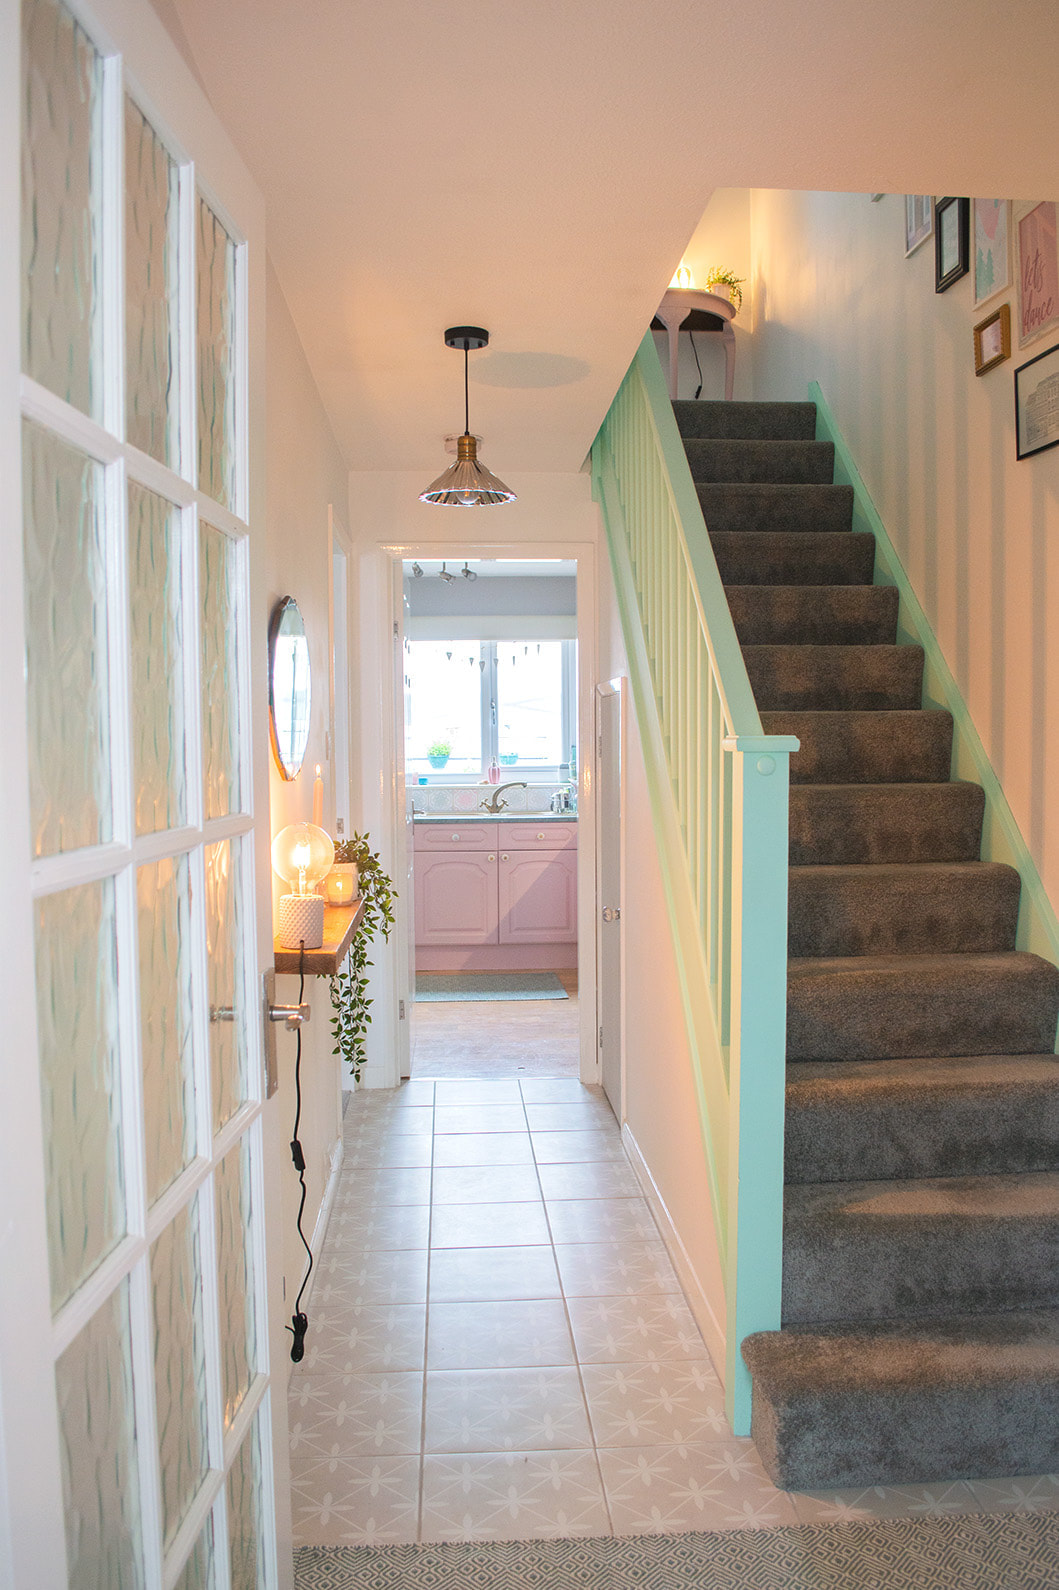
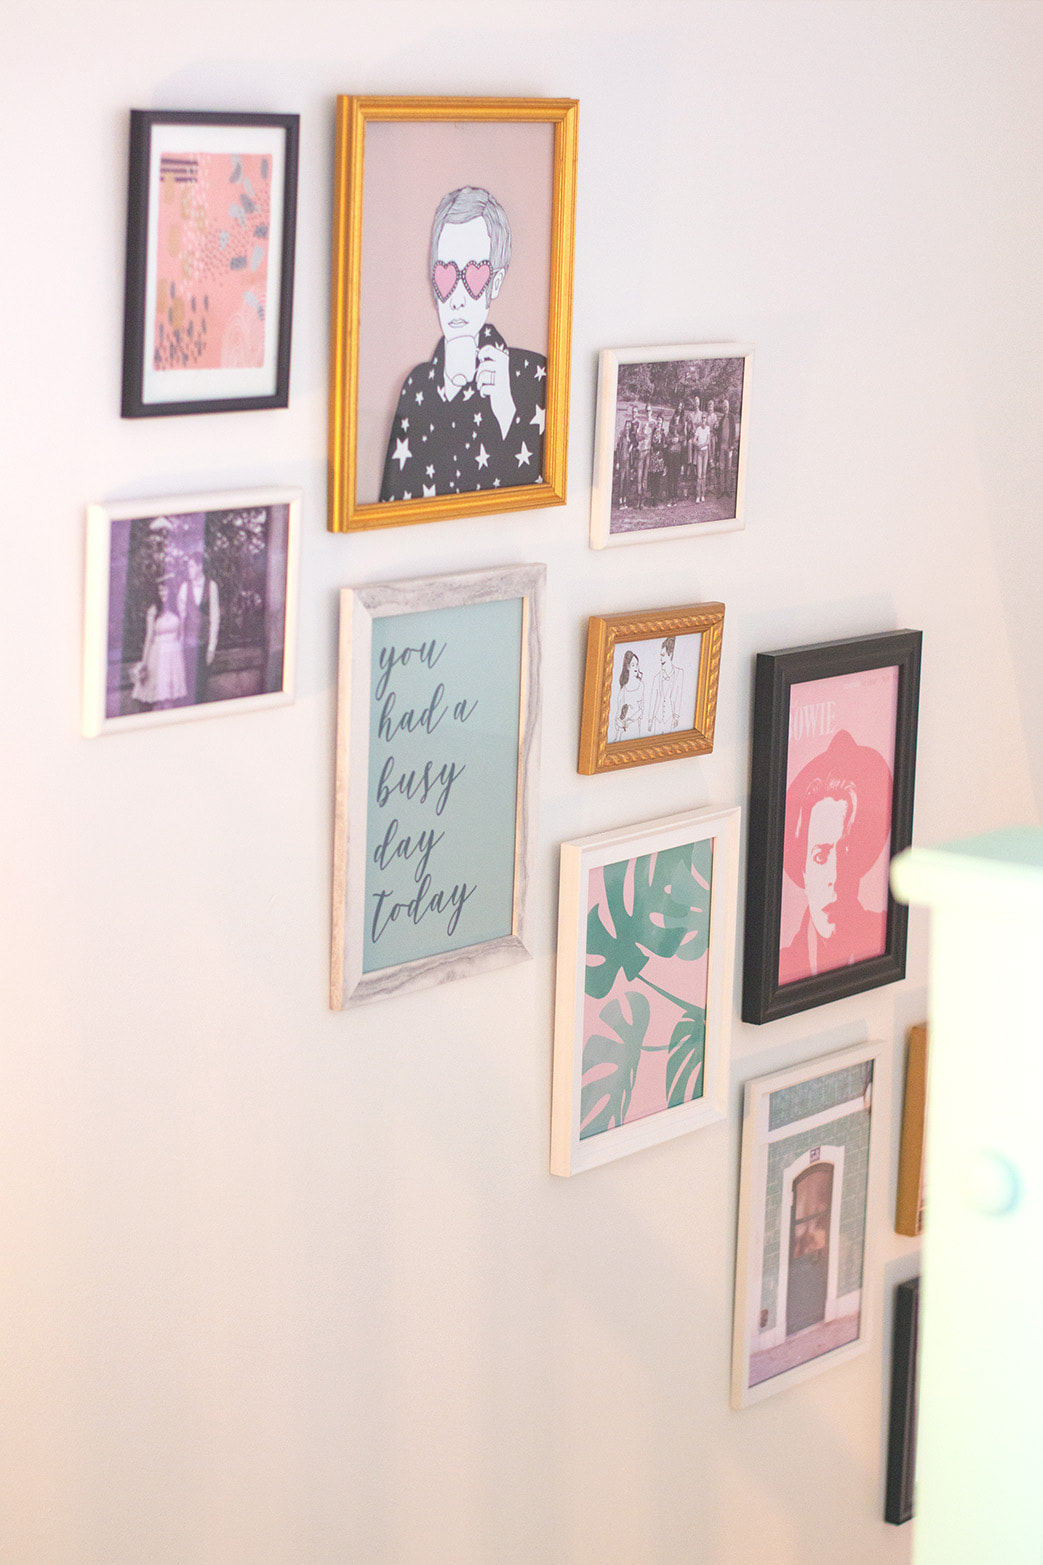
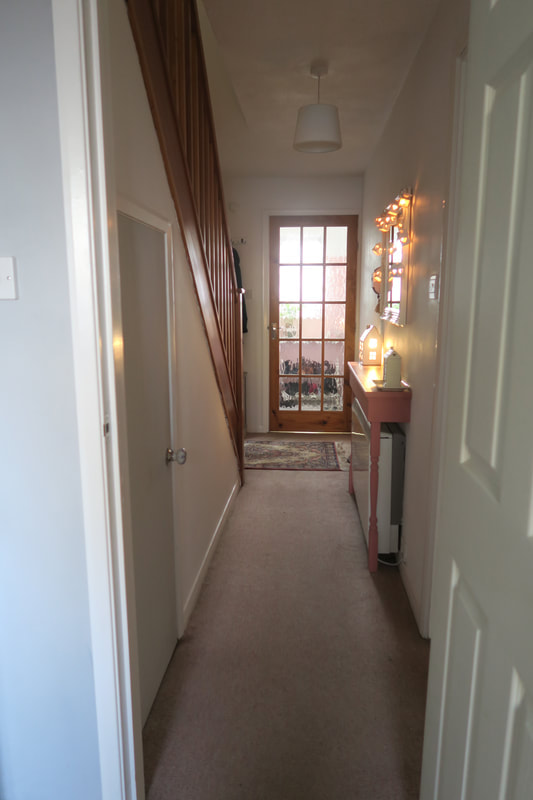
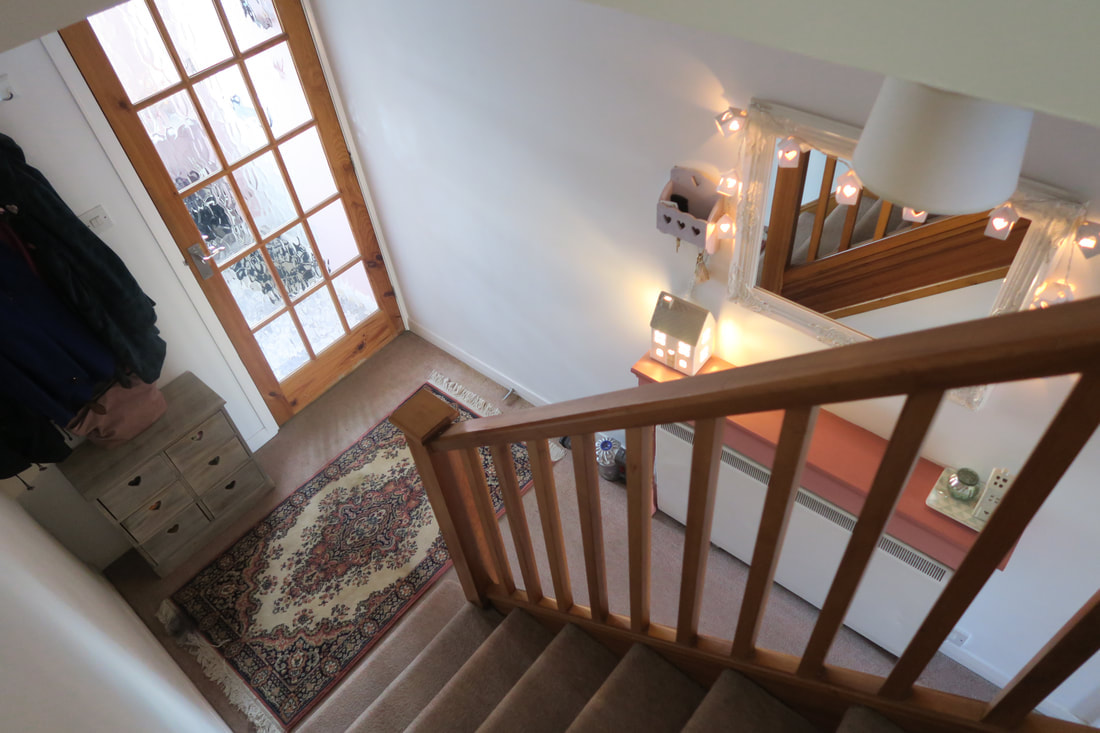
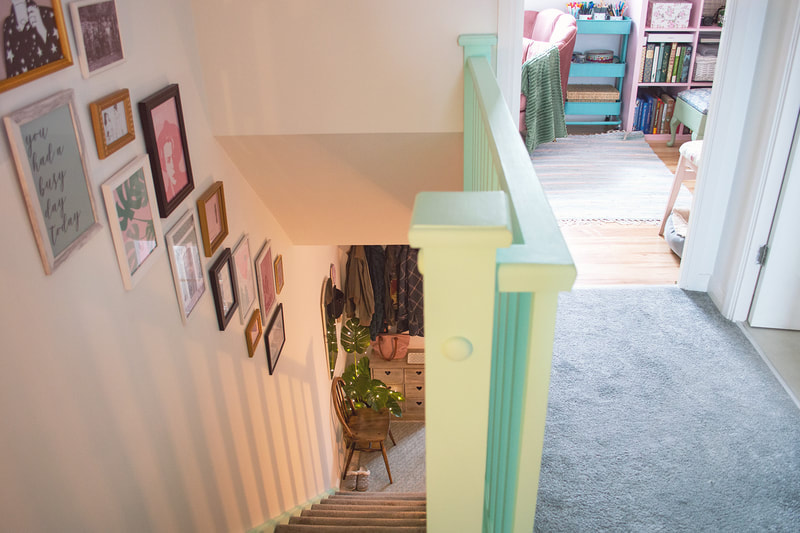
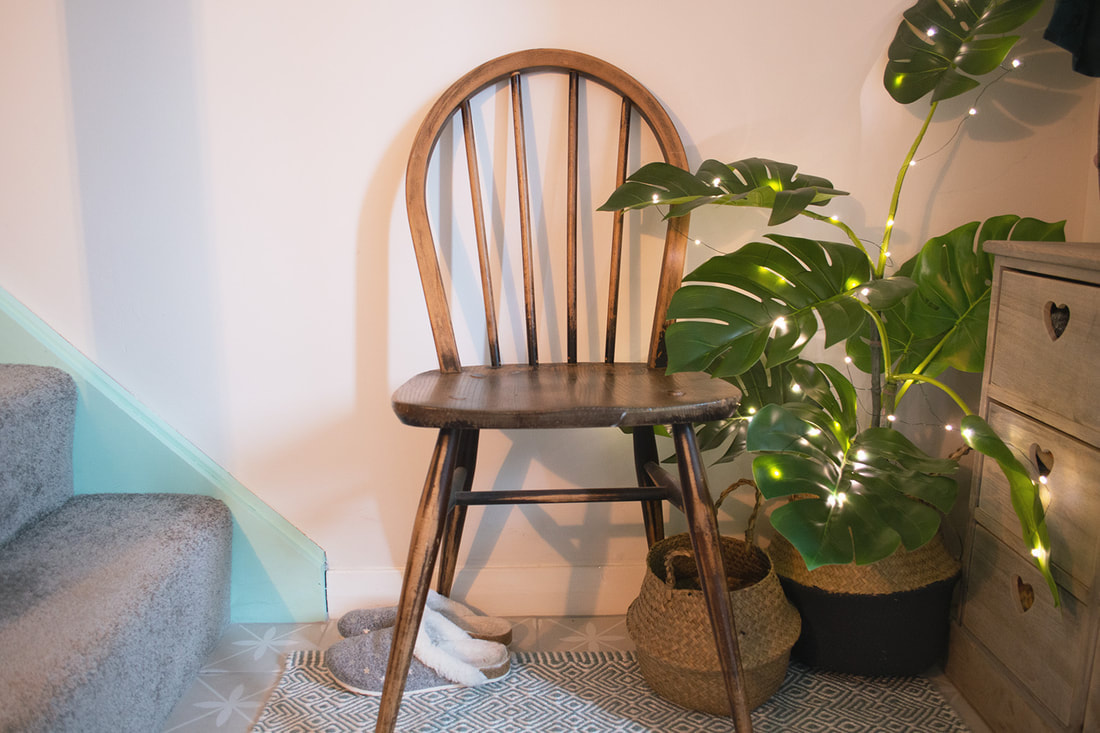 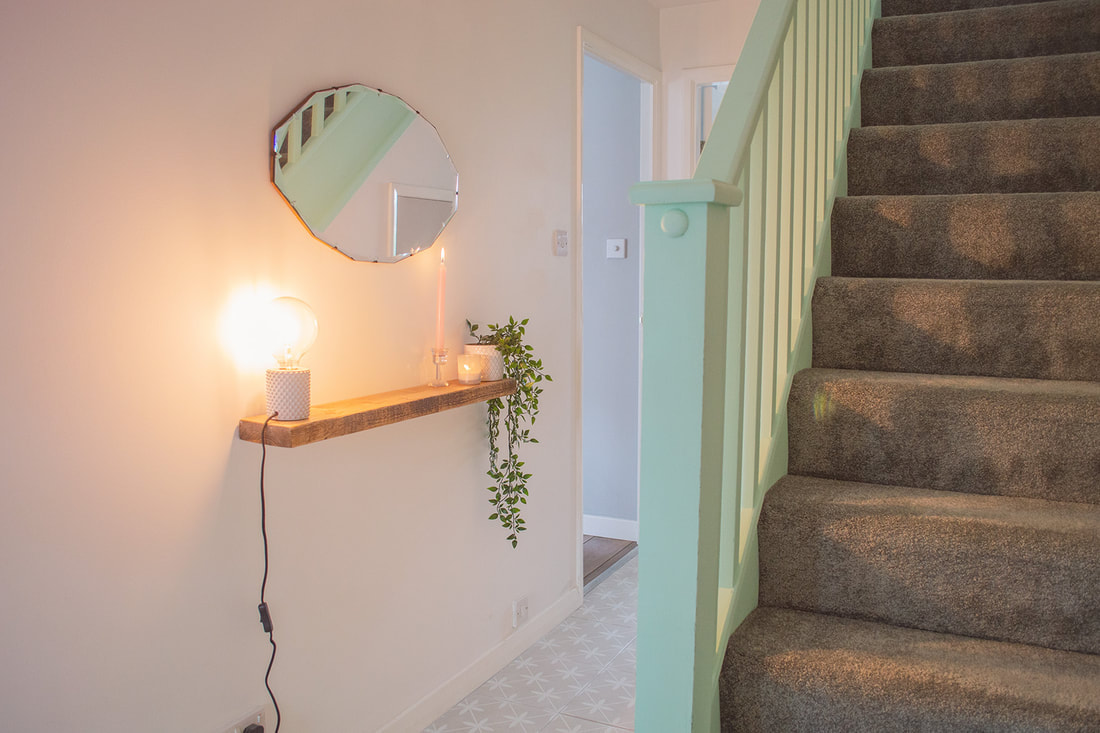 Before Some more details 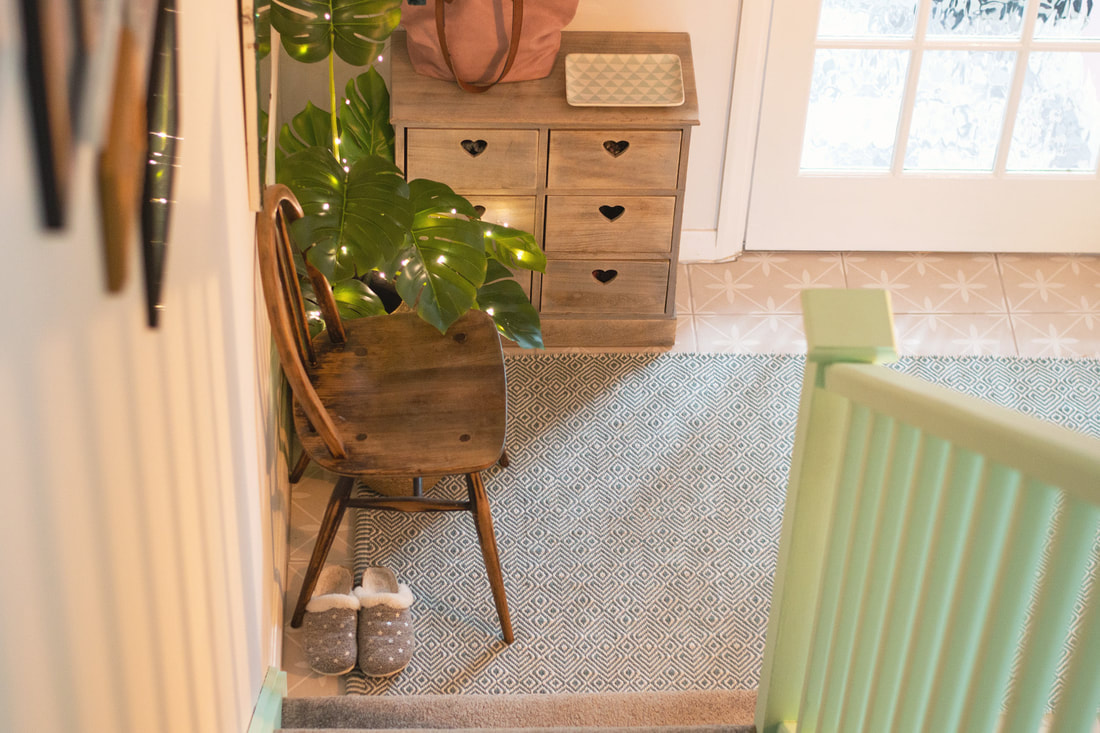 This post contains affiliate links to products. I may receive a commission for purchases made through these links. If you've seen any of my interiors posts before, you'll know we love to challenge ourselves to DIY, upcycle and thrift as much as possible. This has meant most of our makeovers were done on tiny budgets, but this is the first where we admitted defeat and paid to get the stair carpet fitted! Other than that, this was a classic team Jilly and David job - I did most of the tedious banister painting (Autentico Versante Matt in Menta) whilst David was in charge of tiling the floor. David also removed the old shelf/clunky storage heater that didn't do much, and put up our beautiful floating sleeper shelf (eBay £30). This turned out to be a much bigger job than expected as he wanted it to be super secure, but it's so worth it as it really opens up the space and adds character. Meanwhile, I was rummaging through the house and garage to see what I could use to accessorise. I love this old spindly chair, but I'm not sure where it came from! We already had the drawers in the hall but they look much more at home in the new colour scheme, which is actually pretty neutral for us. I wanted the space to feel as light and airy as possible, so knew all the brown woodwork needed to be painted. The floor tiles were a big part of the inspiration for keeping it a more natural colour palette (£25.63m2 from Tiles Direct). Originally we were going to stick with just mint and greens to add colour but the pink snuck in through some of the accessories as I felt it added more warmth when paired with cosy lighting and touches of gold. The frames were mostly from charity shops and feature a mix of my own illustrations and photos, with some Etsy prints mixed in. (Let's Dance from PrintPunkStudio / Elton John from CarrissaTanton / Blah Blah Blah from StelleDesignStudio / Work Hard & Be Kind from mboldnstudio). The beautiful Weaver Green rug was an early birthday present, it's made entirely from recycled plastic bottles! The mirrors are vintage - the one above the chair belonged to my great grandmother and the other was only £10 from Fancy That?. The glass light shades also have a vintage look but are actually just cheap ones from eBay. I also found the seagrass baskets on there which add a nice contrasting texture. Finally, we wanted to add some plants but I've tried keeping them alive in the hall before with no luck - there's just not enough sunlight sadly. So I've cheated and got a few lovely artificial plants from IKEA which definitely bring some life to the space. It's quite hard to write a post like this without it becoming a list of products sometimes! I hope you've enjoyed seeing our hallway makeover, I'd love to know what your favourite part is?  Before - Photograph by Douglas Gibb Photograph 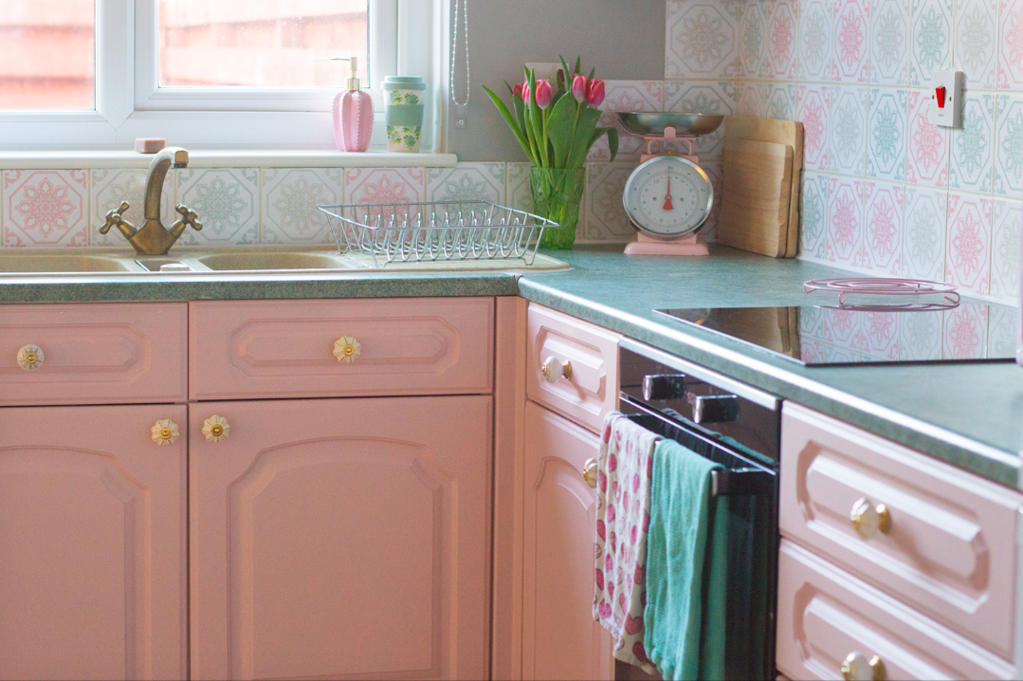 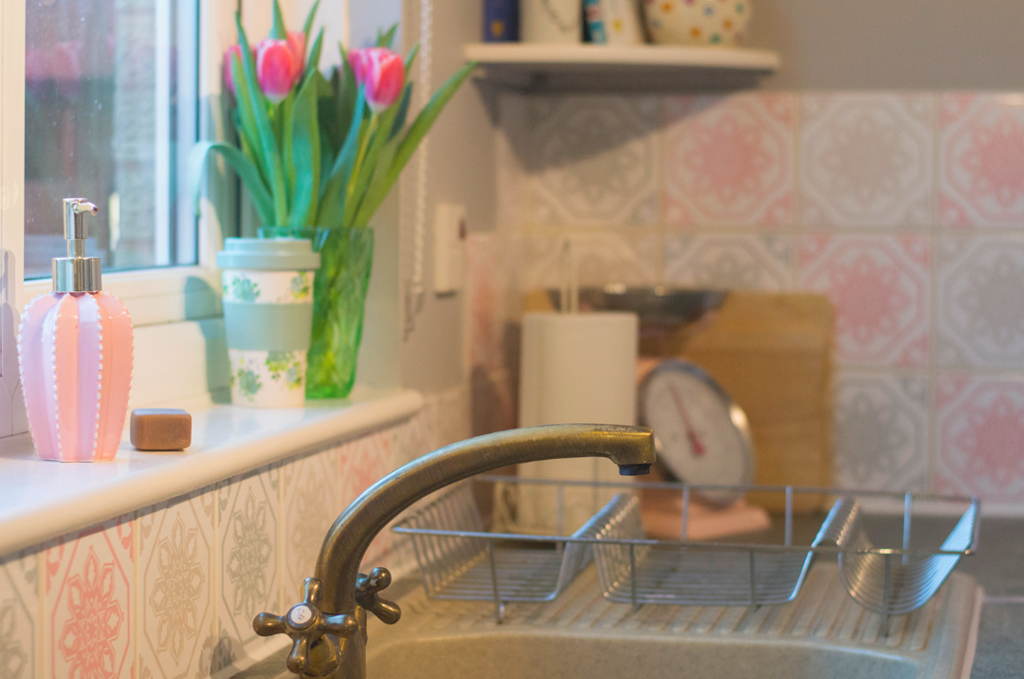 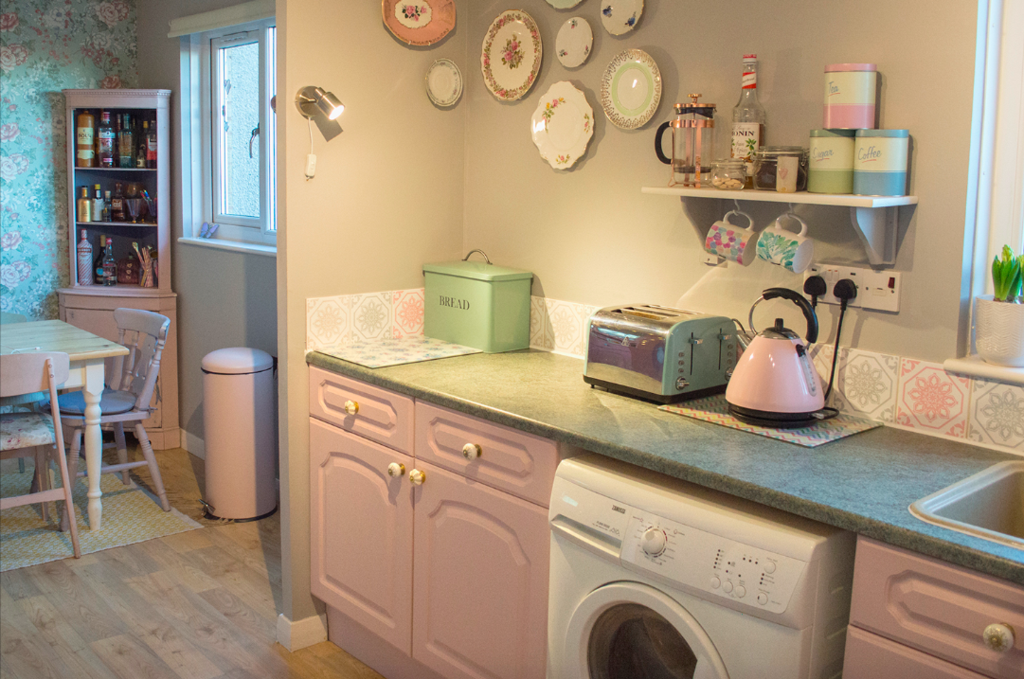 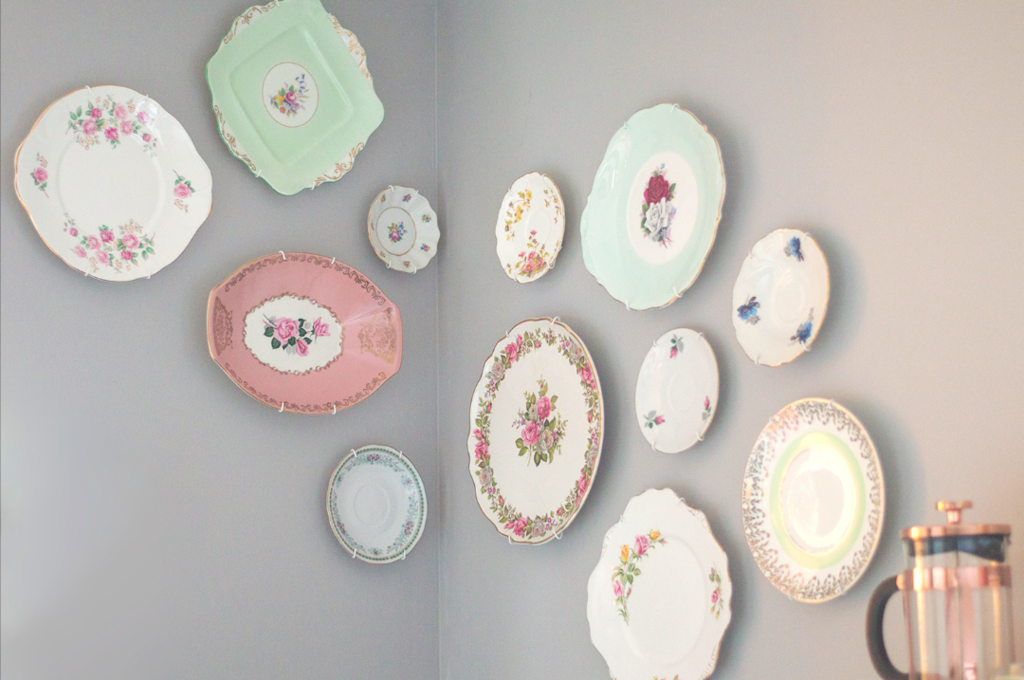 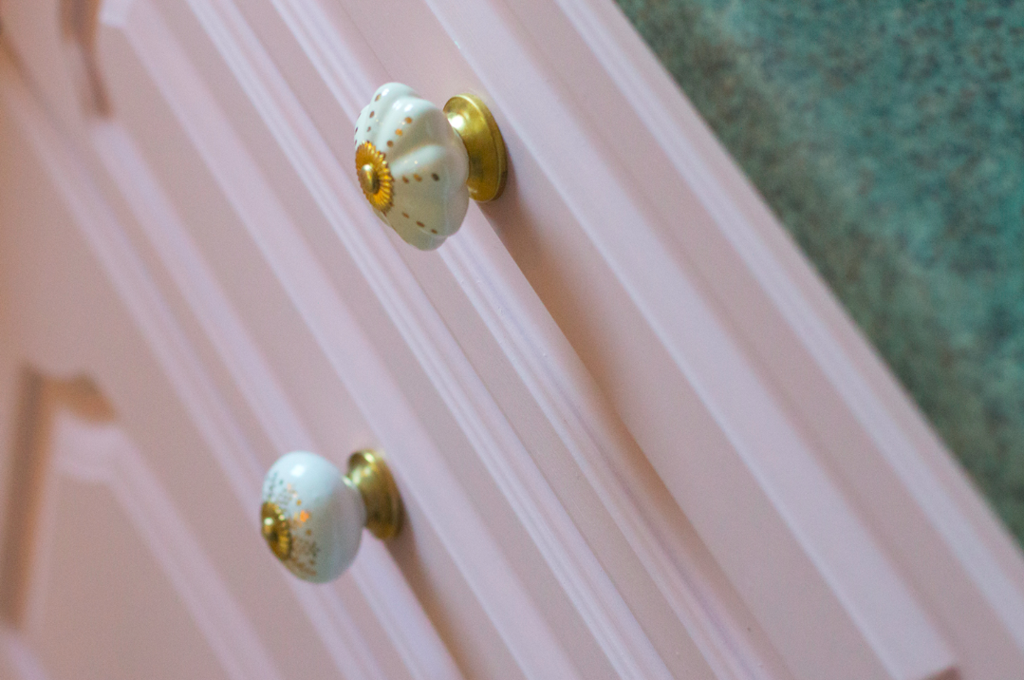 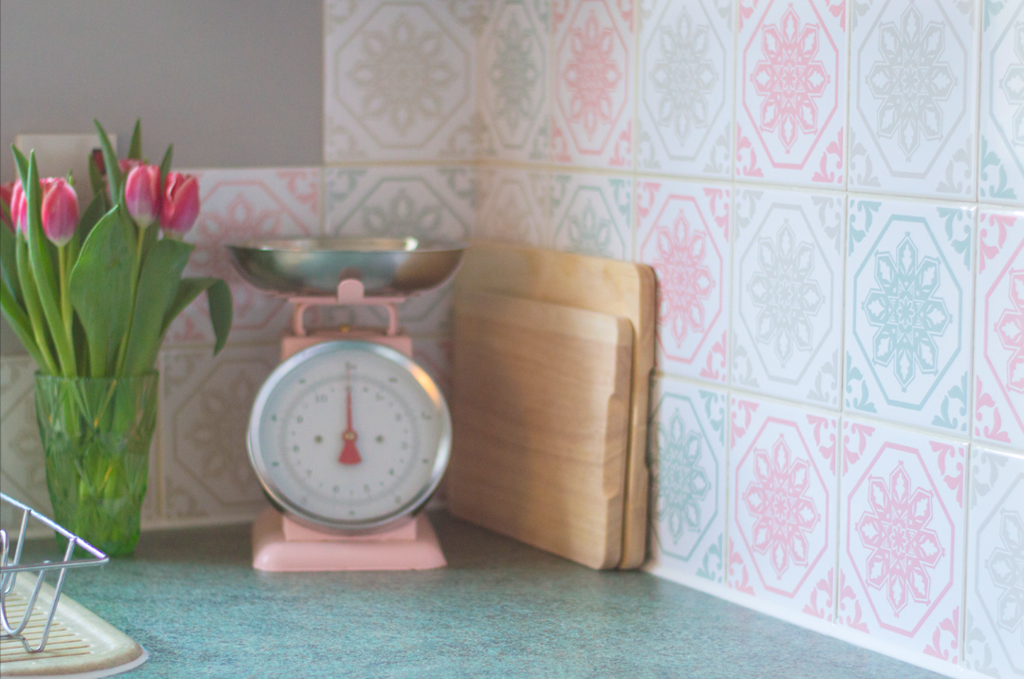 This post contains affiliate links to products. I may receive a commission for purchases made through these links. Happy new year! It's been a while but since we've just finished our mini kitchen makeover I thought it would be a nice post to start the year. It's now been over 15 months since we moved into our house, the kitchen wasn't top of the DIY list as it wasn't too bad, just a bit plain. We wanted to give it a cheap and cheerful revamp and since David had time off after new year, what better time to go for it than the holidays?? The original kitchen was in good shape (apart from a couple of wee joinery bits that David fixed) so after a deep clean and light sand we were ready to paint. The paint we used is Autentico Versante Matt in Antique Rose which was £26.95 for 1L - we had leftover after 2/3 coats. Autentico says it's ideal for kitchen cupboards and that its 'built-in moisture membrane and UV filter makes it water resistant and prevent colours from fading'. It's only been on a few days but I love the finish so hopefully it stays that way! To finish them off I chose some ceramic cream and gold drawer knobs which were from TK Maxx, I think they were £5.99 for 6. Of course, we have 13 kitchen cupboard handles but luckily I had a spare from another piece of furniture we upcycled last year! I spent a while looking at various options for the tiles and couldn't decide, so opted for tile stickers which are a much more affordable and less permanent solution if I change my mind anytime soon. These were from Wall Genie on Etsy and were just under £40 for three packs of 30 so I could have the mix of colours I wanted and some spares. I ordered a sample at the start of October and stuck it on to see how durable it was, and found no issues at all. They were a little fiddly to apply perfectly, especially around the sockets, but real tiles would've been much worse! Finally, we added to our vintage plates wall by hanging some diagonally up from the ones we hung when we moved in. I'm so pleased with the end result and it feels like such a happy space now. |

HelloHere you'll find my latest projects, behind the scenes, tips, DIY projects and more! Categories
All
Past Posts
October 2023
|