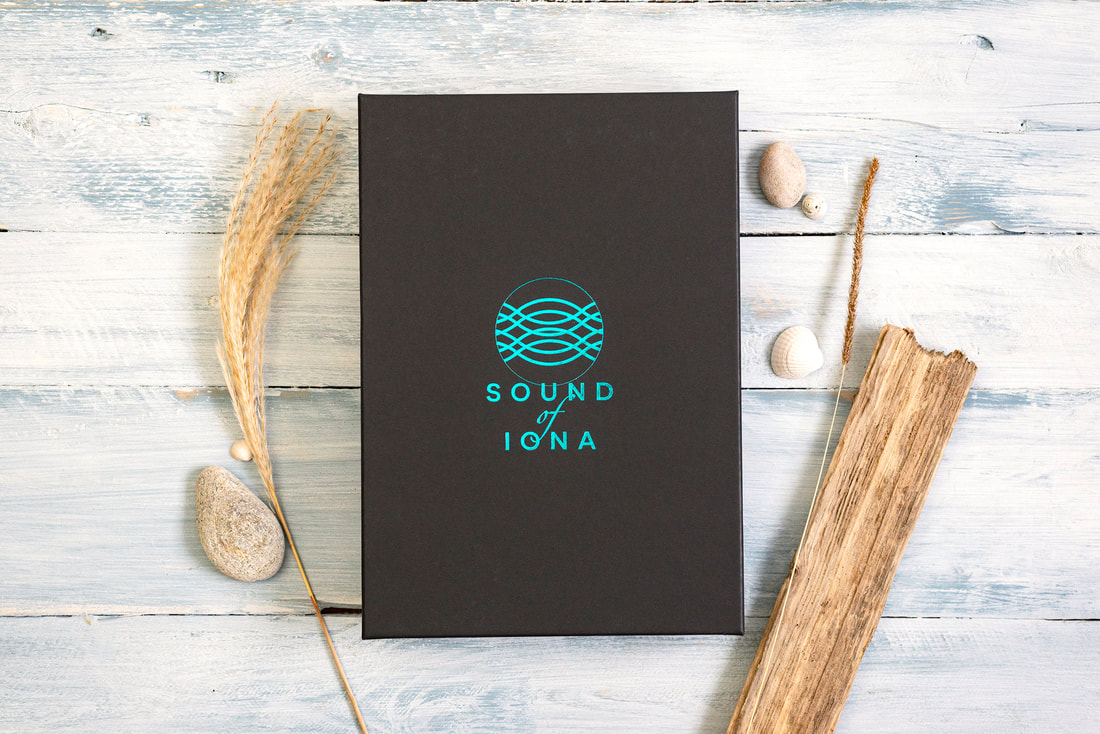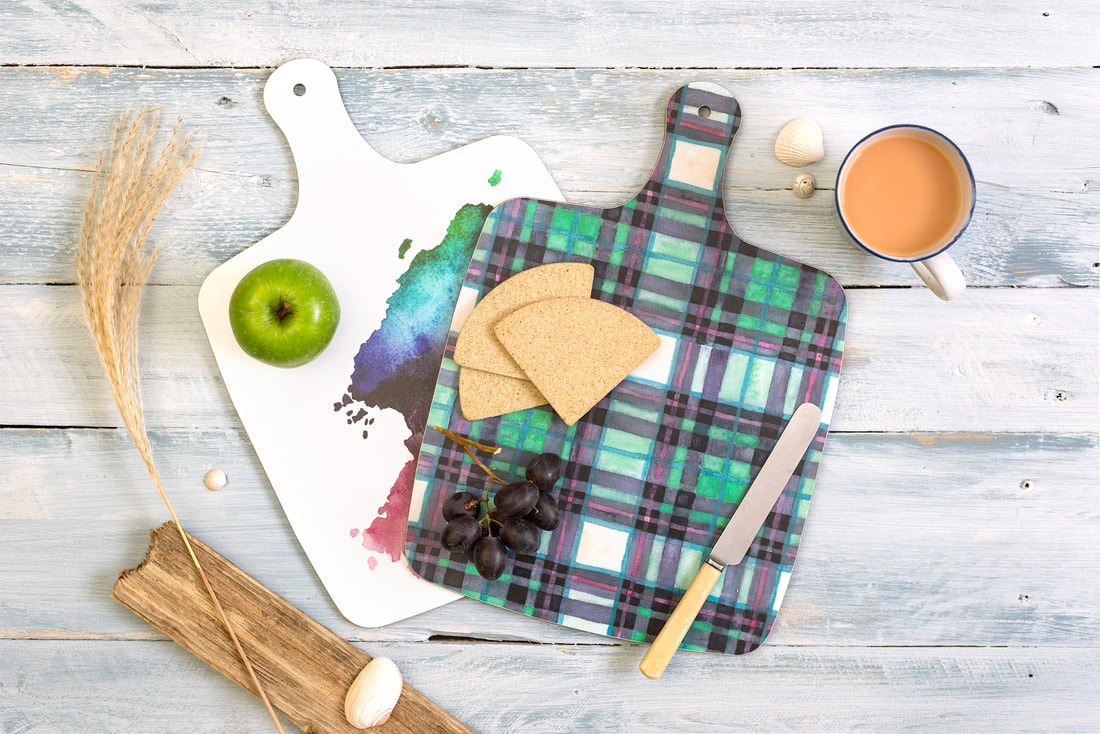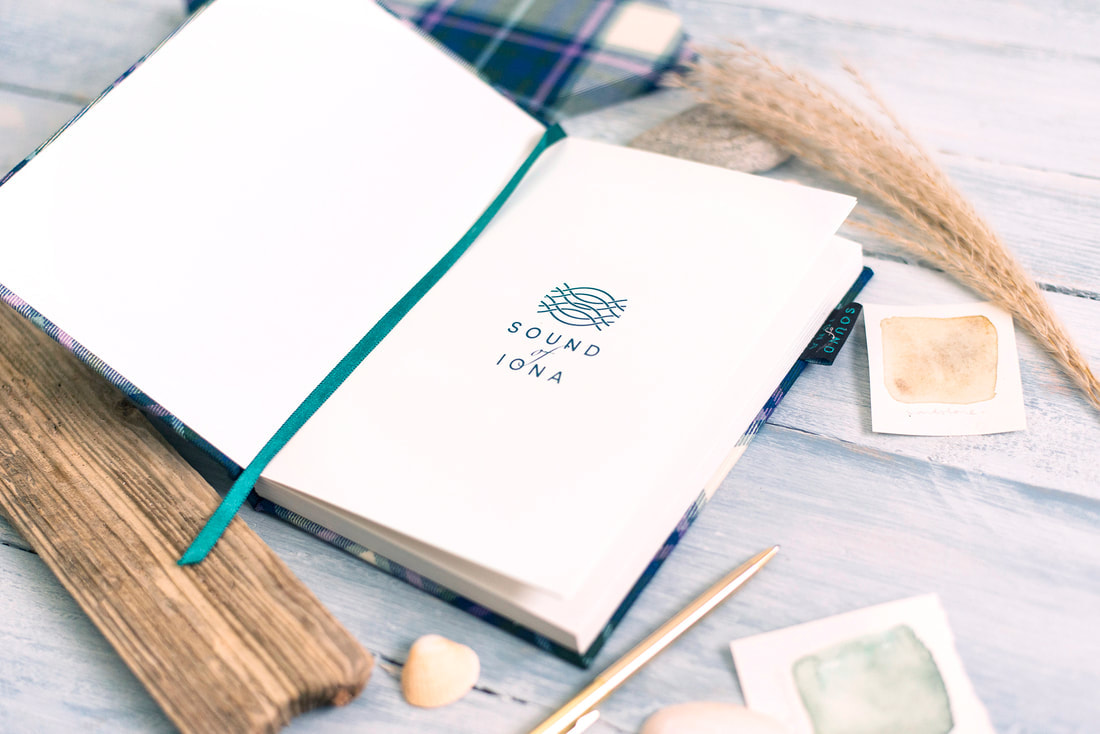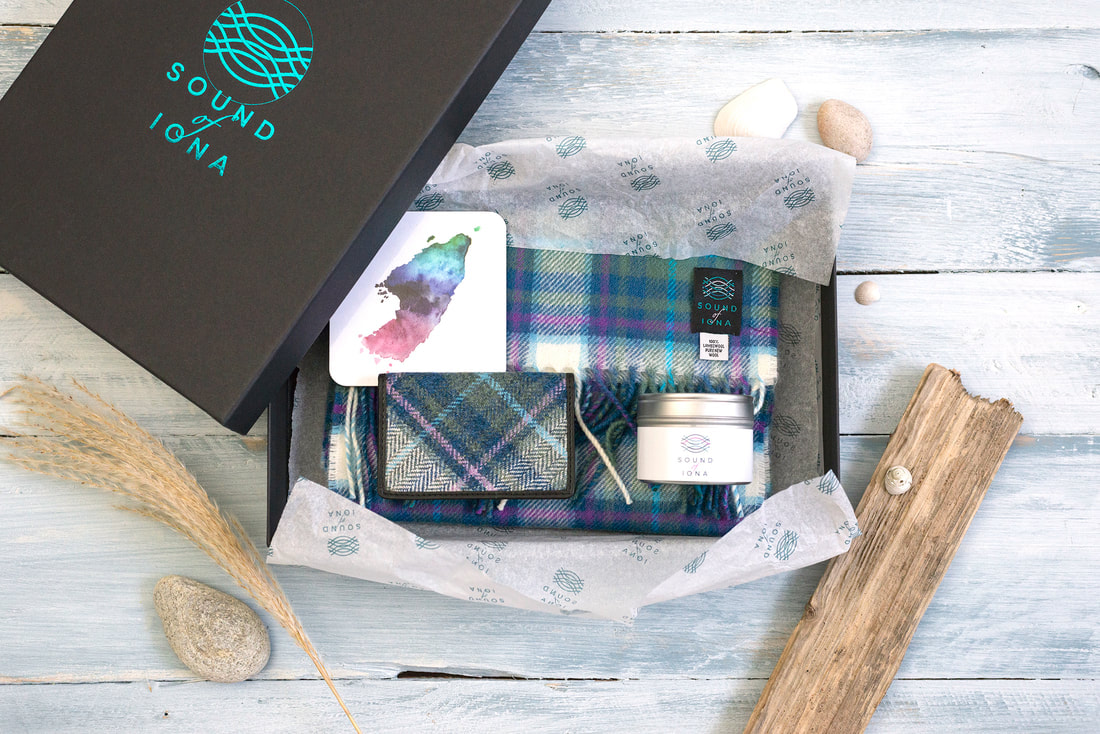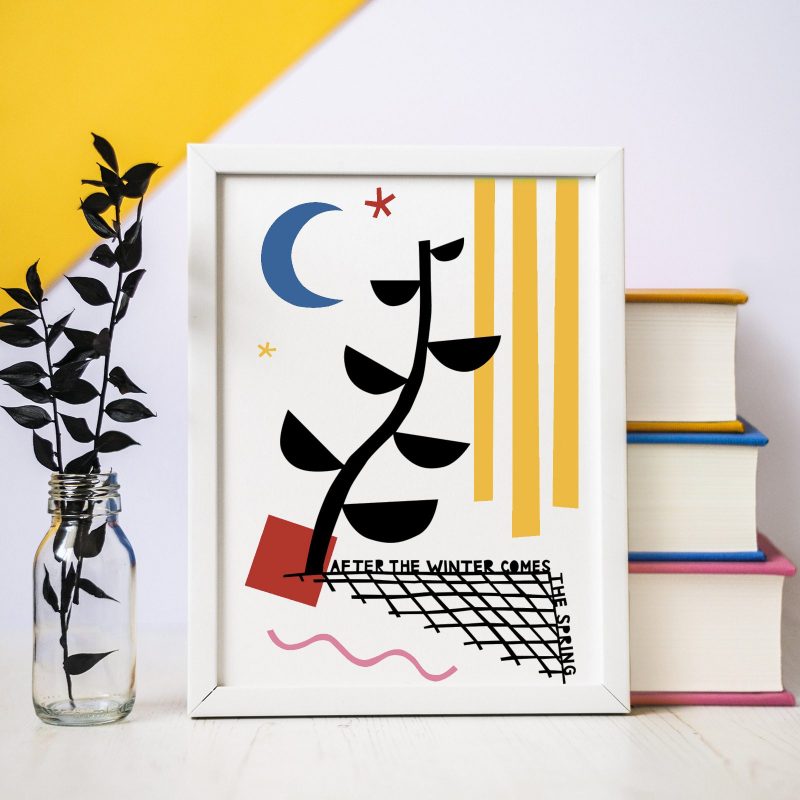
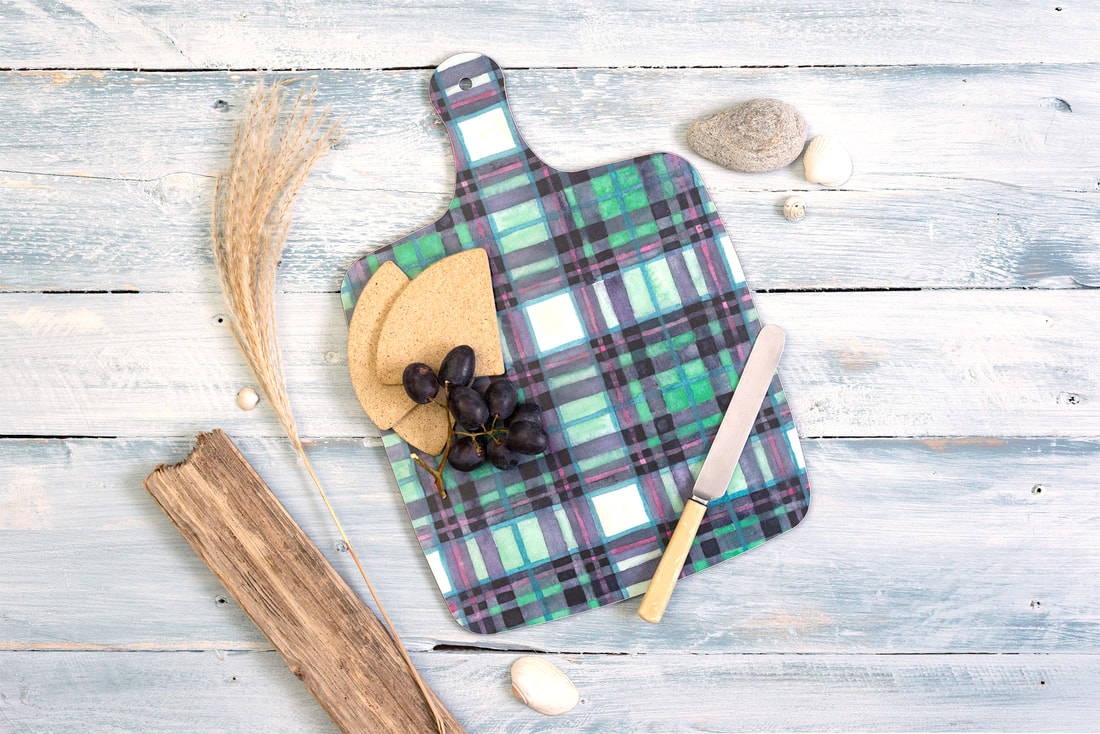
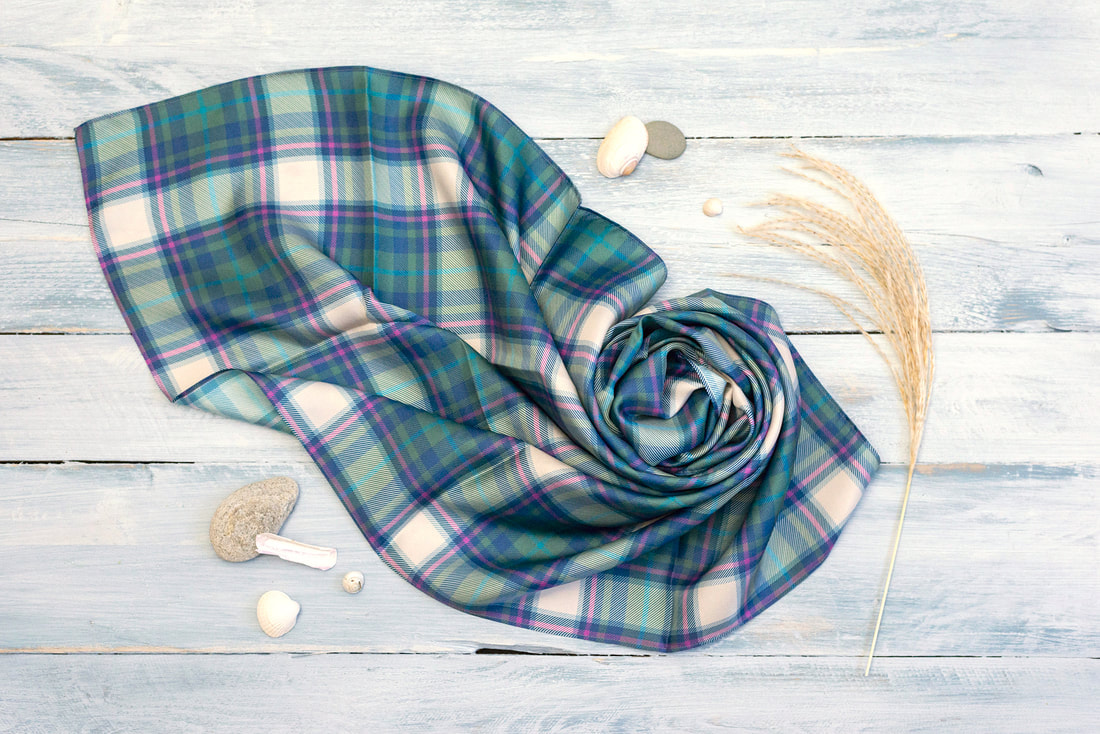
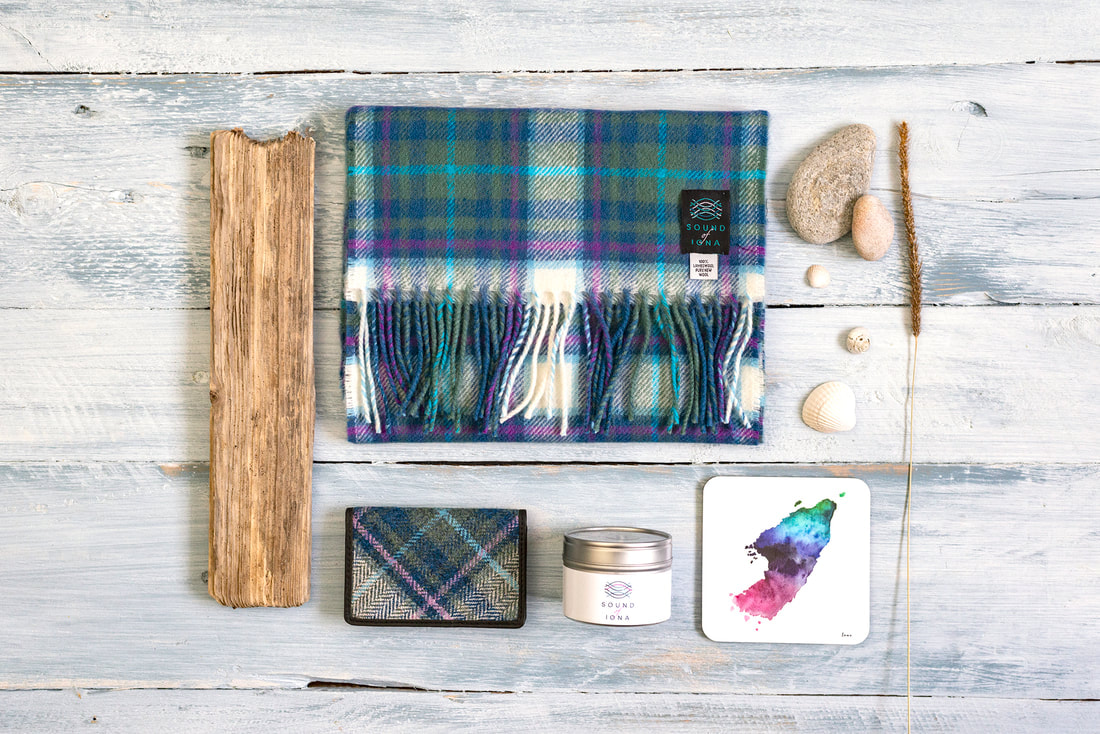
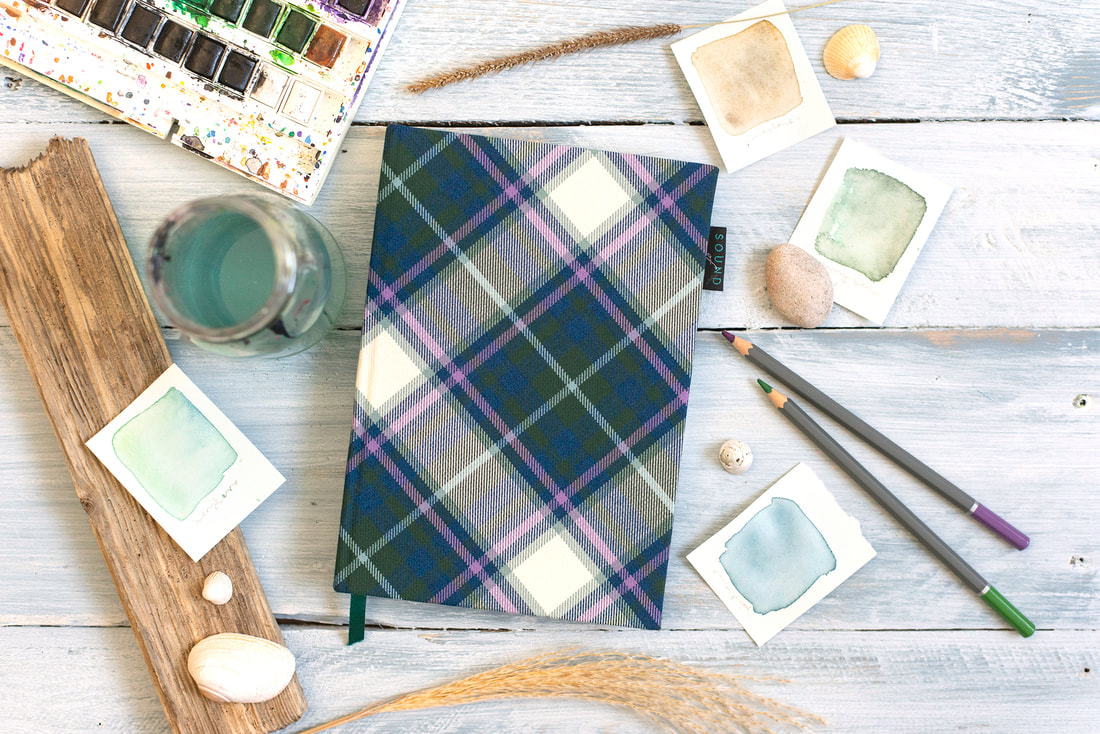
    This wee lifestyle photoshoot for Iona Tartan was a lot of fun. I created a custom 'sea worn' wood backdrop to compliment the tartan colours, used natural beachy props and finished with simple accessories to tell the story of each product. Below you can also see the thumbnail planning of this shoot. 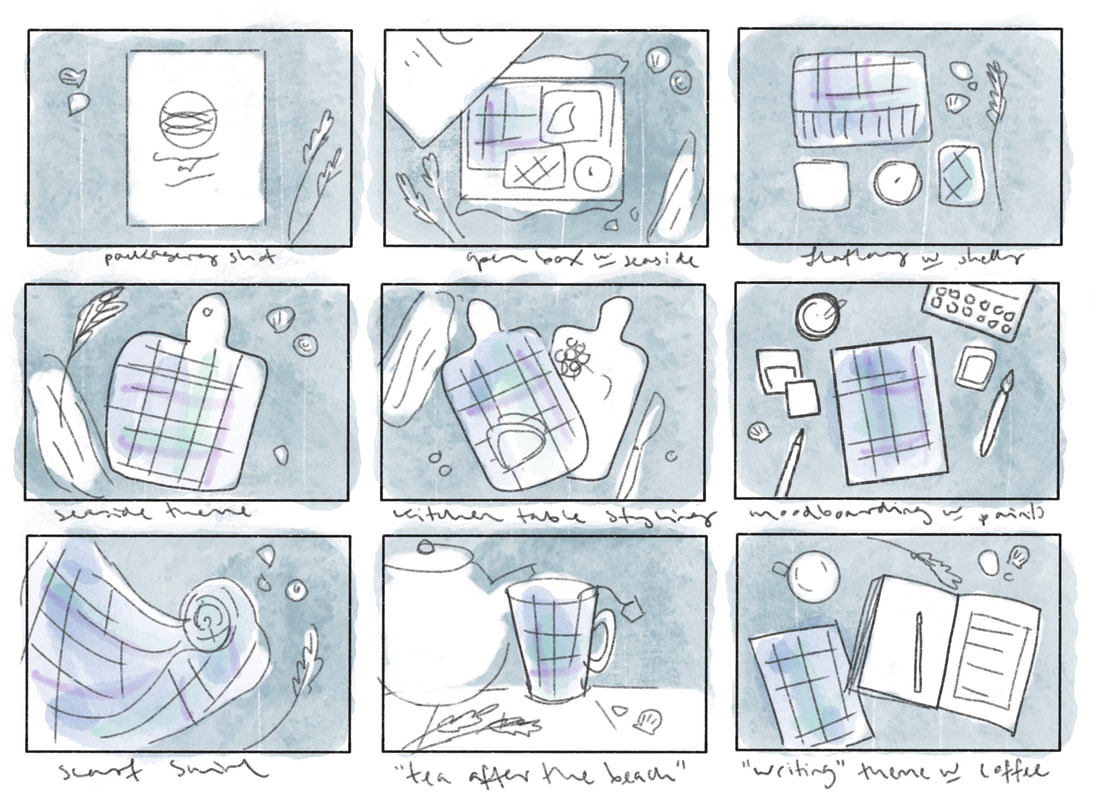 If you'd like to book a similar photoshoot you can do so here 
0 Comments
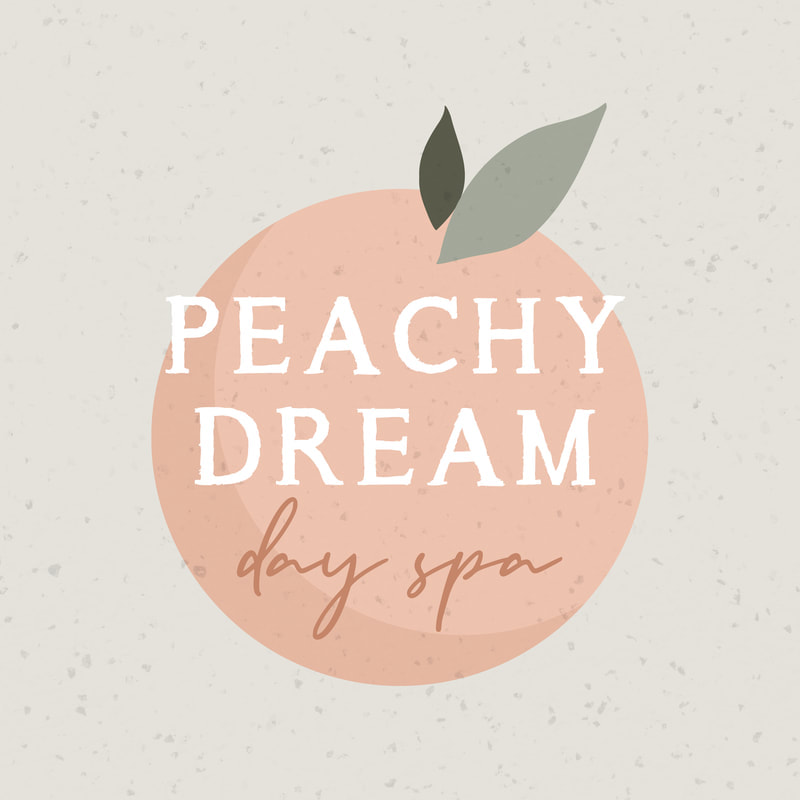 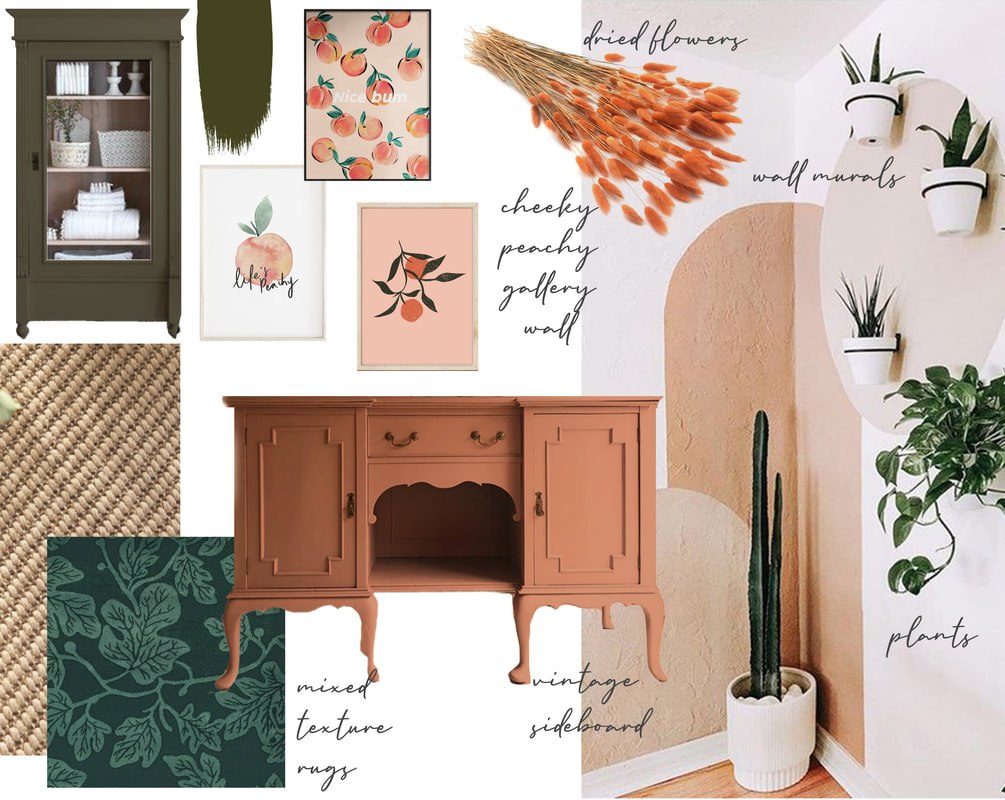 
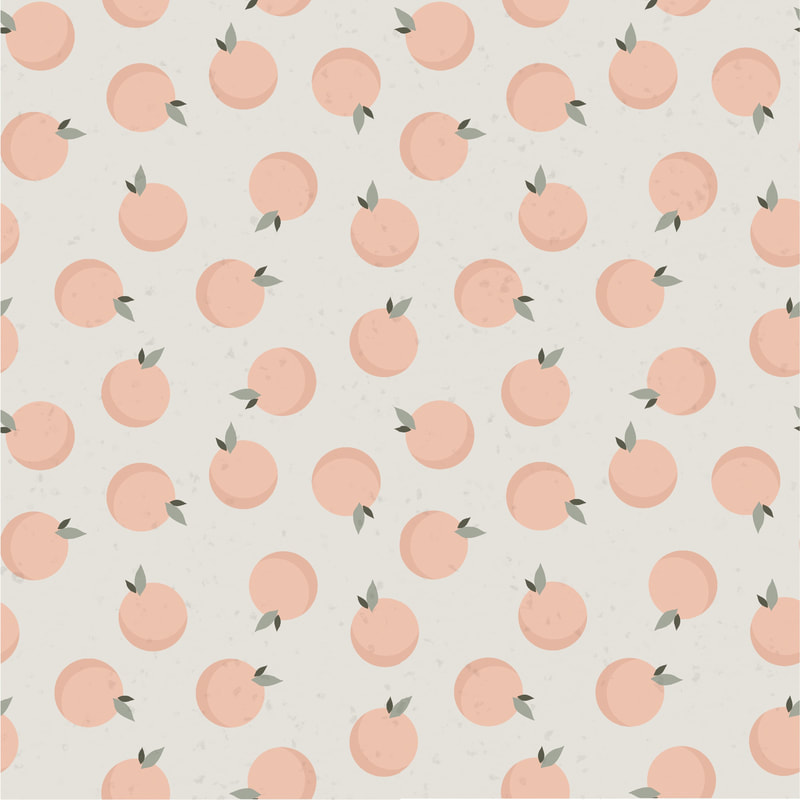
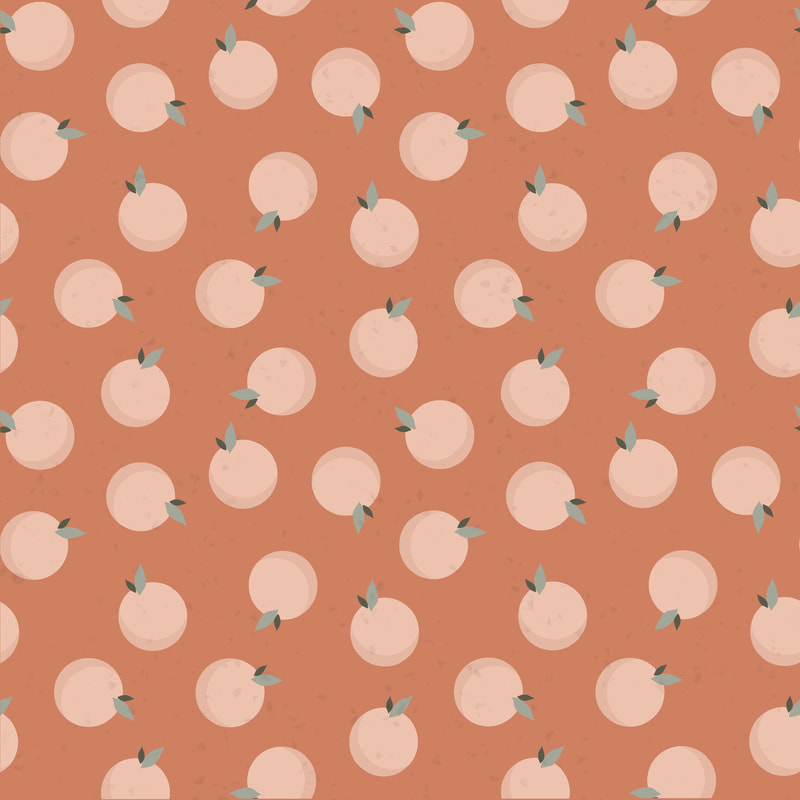
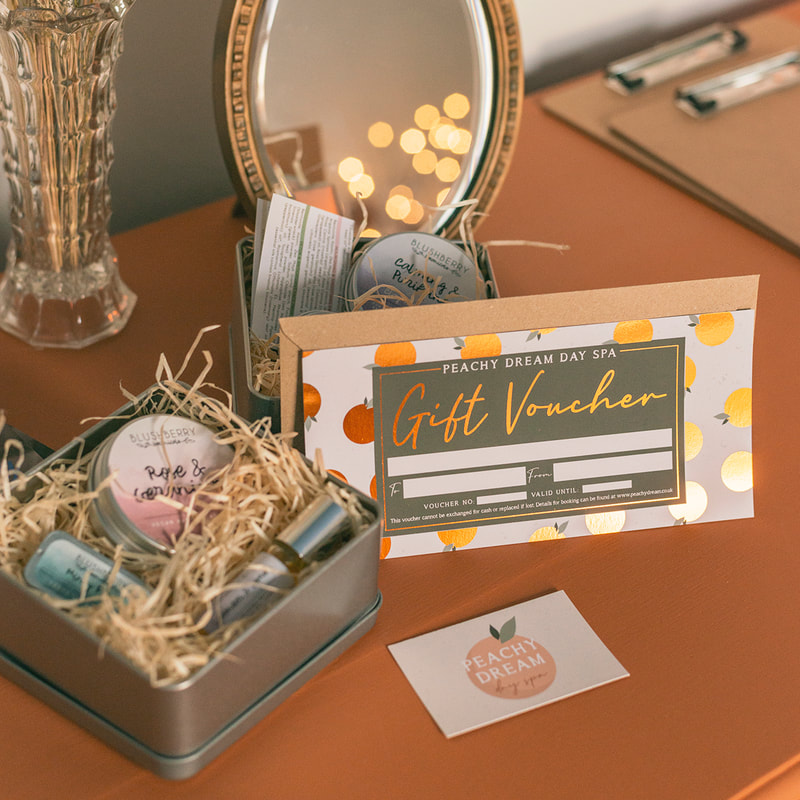
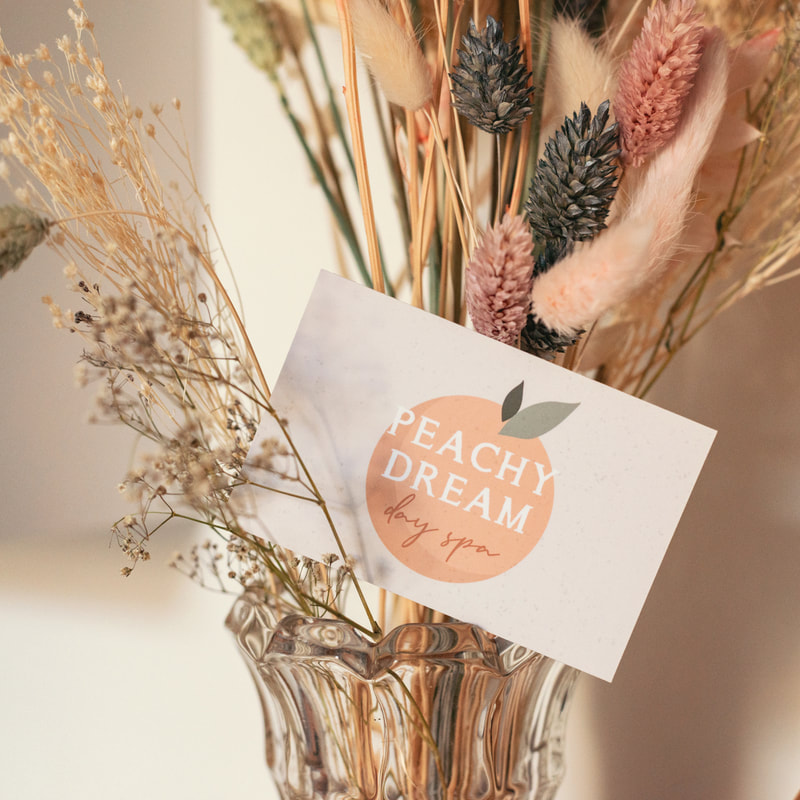
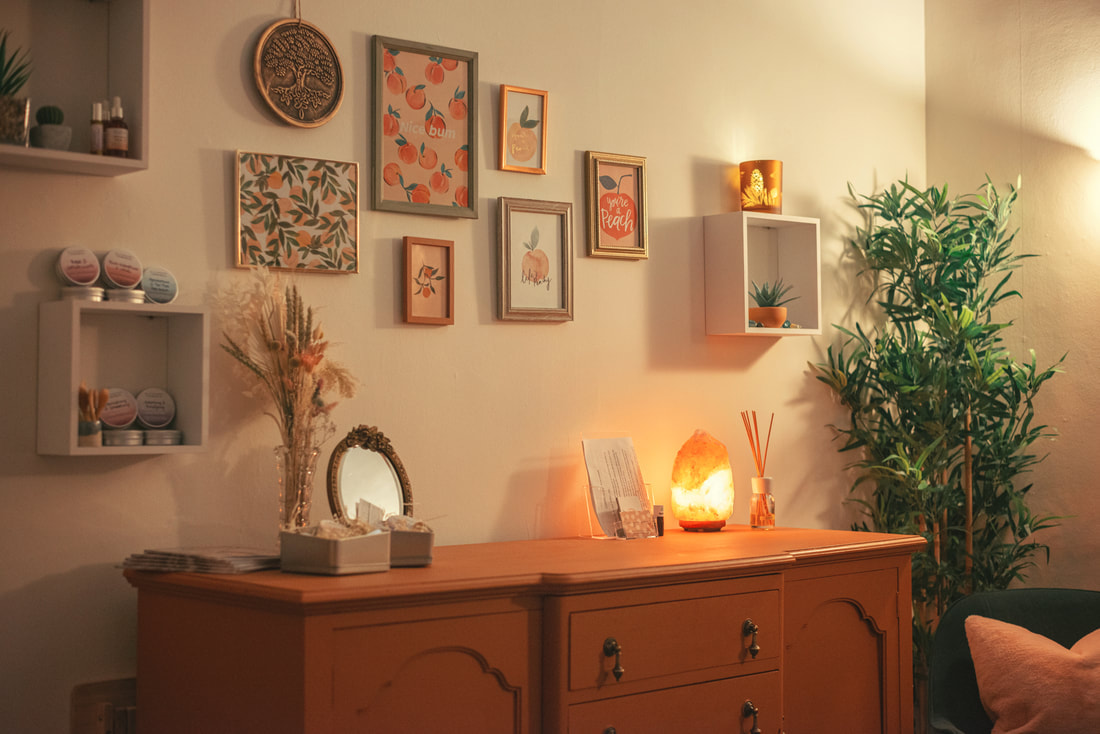
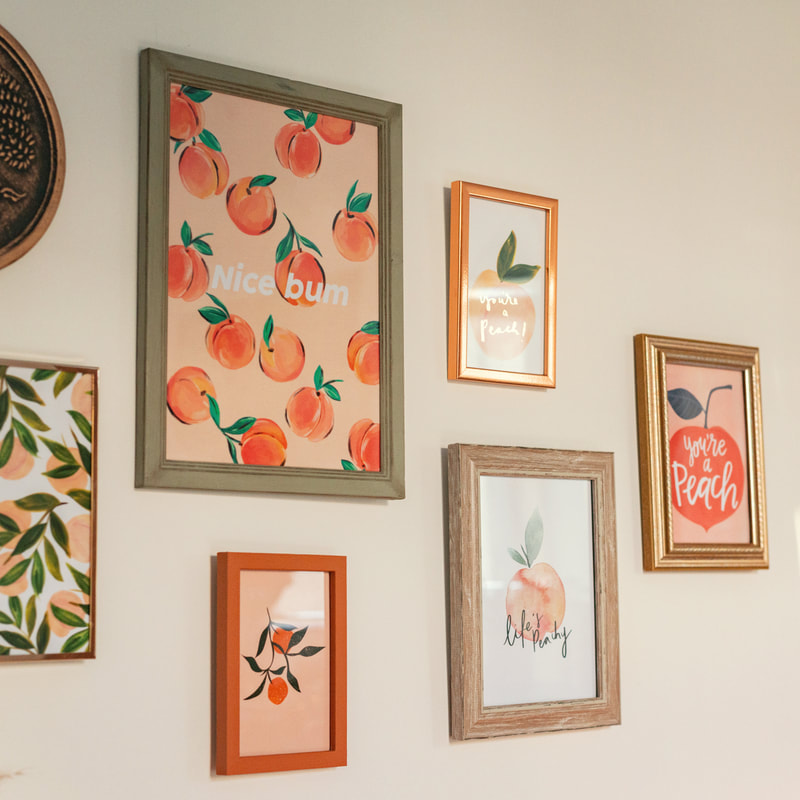
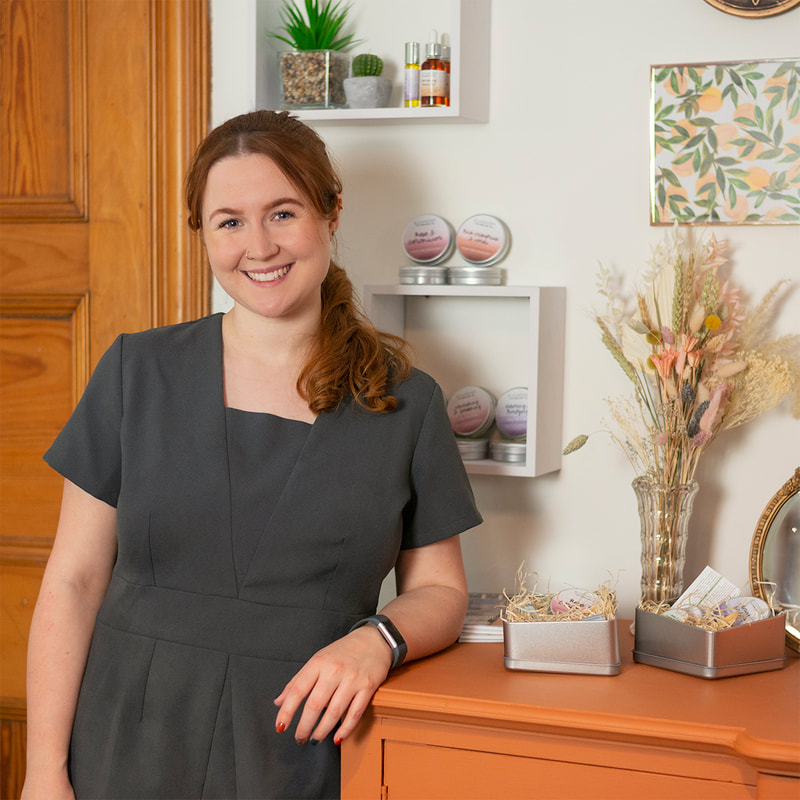
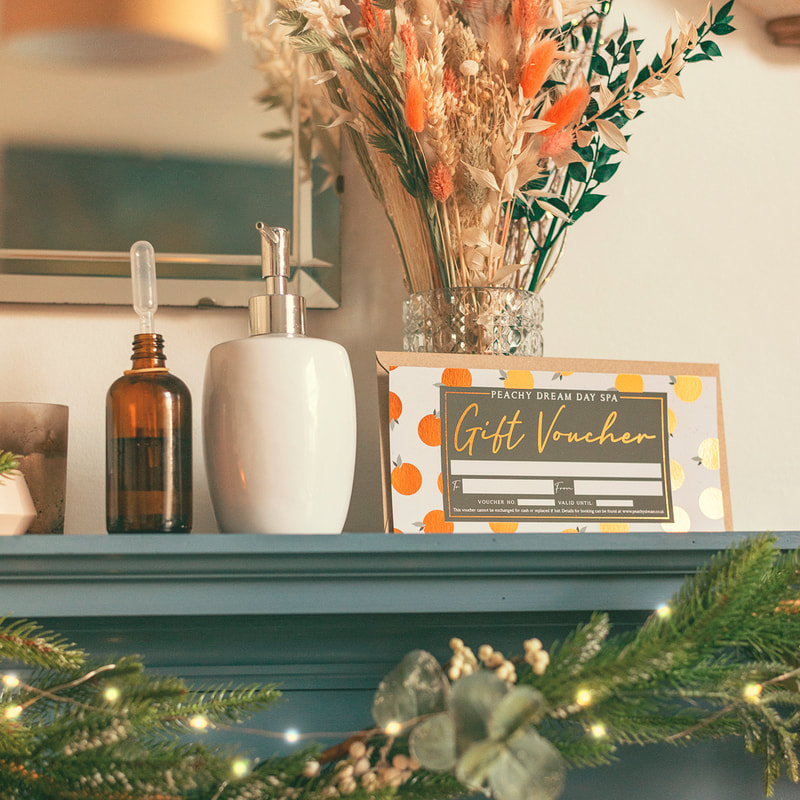
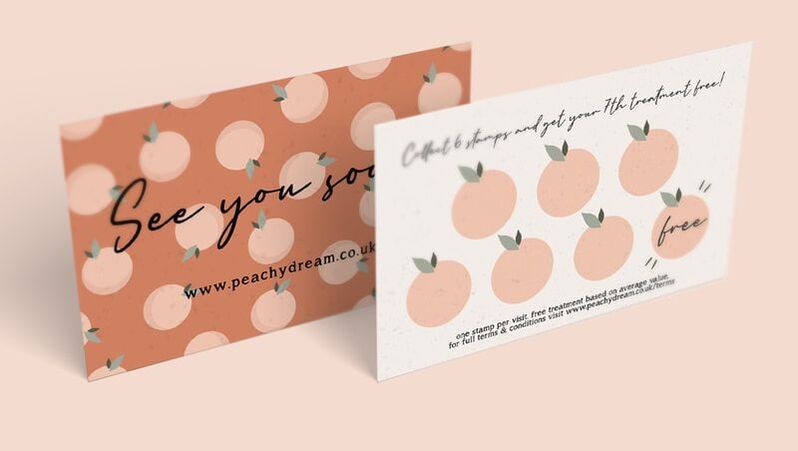 Peachy Dream is a boutique home-based day spa in Rosemount, Aberdeen offering a range of beauty and spa treatments. Amy had an idea of the colours she wanted included so we used this as a starting point. The brand design features a minimal peach shape which is used throughout, with textured elements and hand lettering style typography. Overall, we wanted to create a dreamy nostalgic aesthetic with an uplifting feel. 'Cheeky peachy' phrases are used on the printed materials to make clients smile and this is continued inside the spa through the selection of artwork for the gallery wall. Amy also required a moodboard to show how the Peachy Dream brand could be carried through to the interior of the spa. Once she had the spa beautifully decorated she booked a personal brand photoshoot so she could show it off on her website and social media. This brought all of the elements together to give her clients the full Peachy Dream brand experience. Jilly’s work is exceptional! I started my day spa in 2020 and really couldn’t have done it without Jilly’s help. Jilly really listened to exactly what I was looking for in creating my logo and branding. Everything looks so pretty and professional. From logo design, vouchers, loyalty cards and price lists - Jilly can do it all! And I even got a photo shoot of my work room and myself working, she made me feel so relaxed while doing it. Not only do I LOVE your work but my clients always compliment too! I would highly recommended Jilly to anyone. Thank you so much again If you'd like to book a branding project you can do so here. 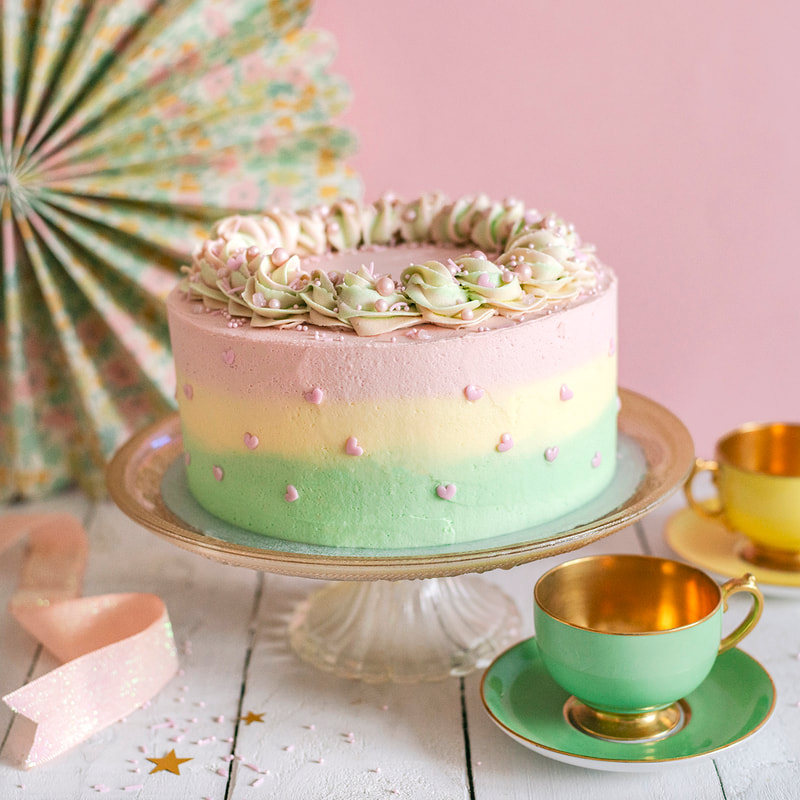 Pastel cake of dreams - vegan carrot cake with cream cheese frosting  "Pop Hearts" - jam filled iced pastries inspired by classic pop tarts 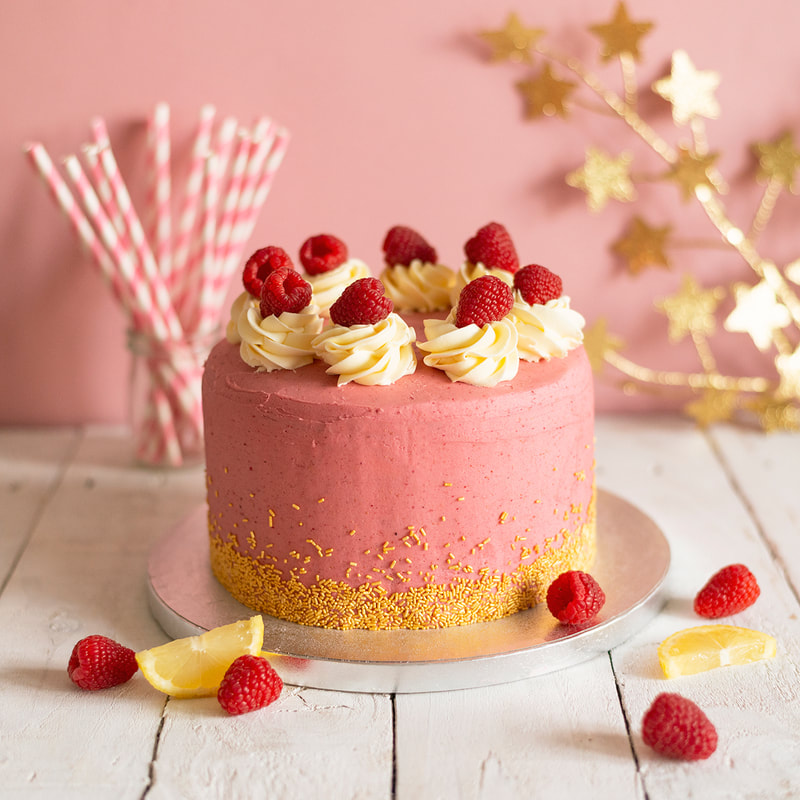 Lemon curd cake with raspberry cream cheese frosting Happy New Year! Can I still say that? Probably a bit late, but since it's my first blog of 2021 I think I will. After having a wee break from social media, I returned in January with a new focus for my Fun A Day project - vegan baking! It wasn't what I'd originally planned, but after David was given some cake decorating tools for Christmas we were looking for an excuse to practice some techniques. Neither of us had tried any 'proper' cake decorating before, though I am guilty of sitting watching videos of cookies being iced - it's so relaxing! David seemed to think that his landscaping skills would be transferrable and has since referred to crumb coating as cake rendering. What I loved about this project was that it really gave me a reason to make time to try out recipes I'd had saved for ages, and I'd get to work on my project with David. There was the added challenge of adapting some recipes to be vegan but we had a lot of success, and it was nice timing with Veganuary which also runs for the duration of January. I think my favourite part was having pretty cakes and bakes to photograph, I was able to set up some cute scenes and try out some fun styling. If anyone would like to commission some recipe book photography I'd be delighted to help! Also, a really lovely bonus was that we were able to box up bakes for friends and neighbours, inspire others to bake and even post some treats for family birthdays! I've made a highlight on my Instagram if you'd like to see some behind the scenes and more of the project - here. Giselle from Score + Fold got in touch as she wanted a bespoke set of mock up images to makeover her shop. She had a Pinterest board along with some sketches of what she had in mind - it was my job to bring these together into 4 scenes which could be used with any of her designs. This was achieved by using a limited colour palette, clean backgrounds and simple branded elements. The four scenes tell the story of the process - on the cutting mat, in the studio, at the packing station and on display. If you'd like to book a photoshoot for some custom mockups (and save lots of time getting your products out there!) you can do so here 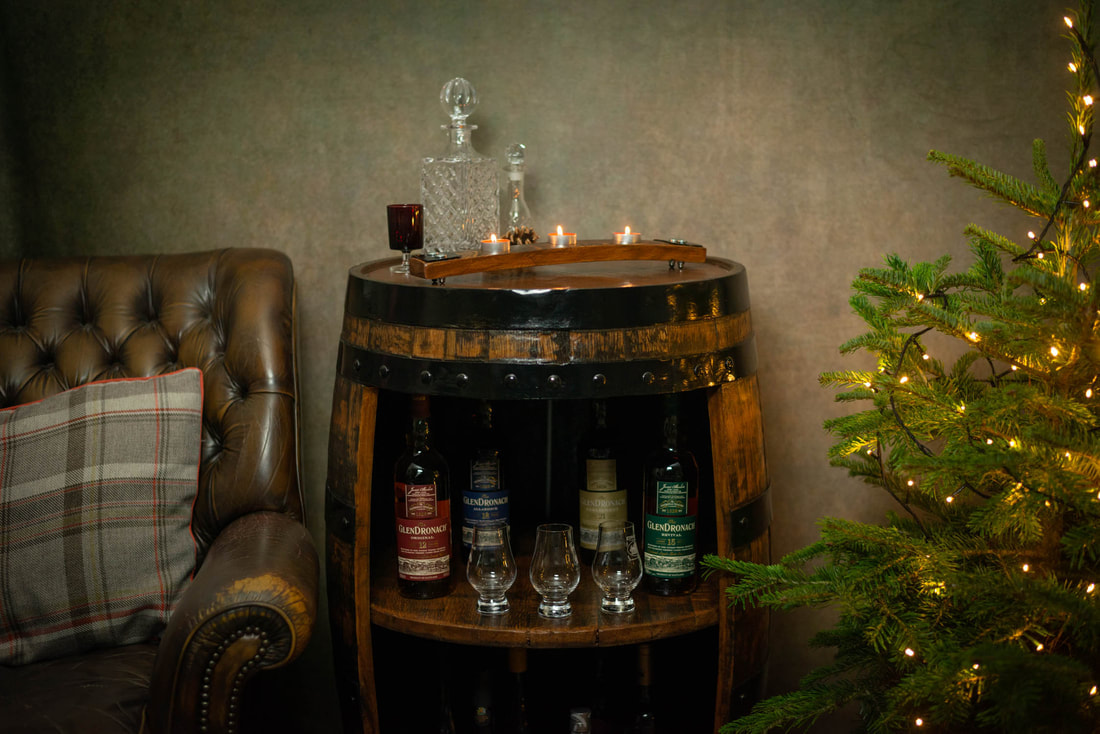 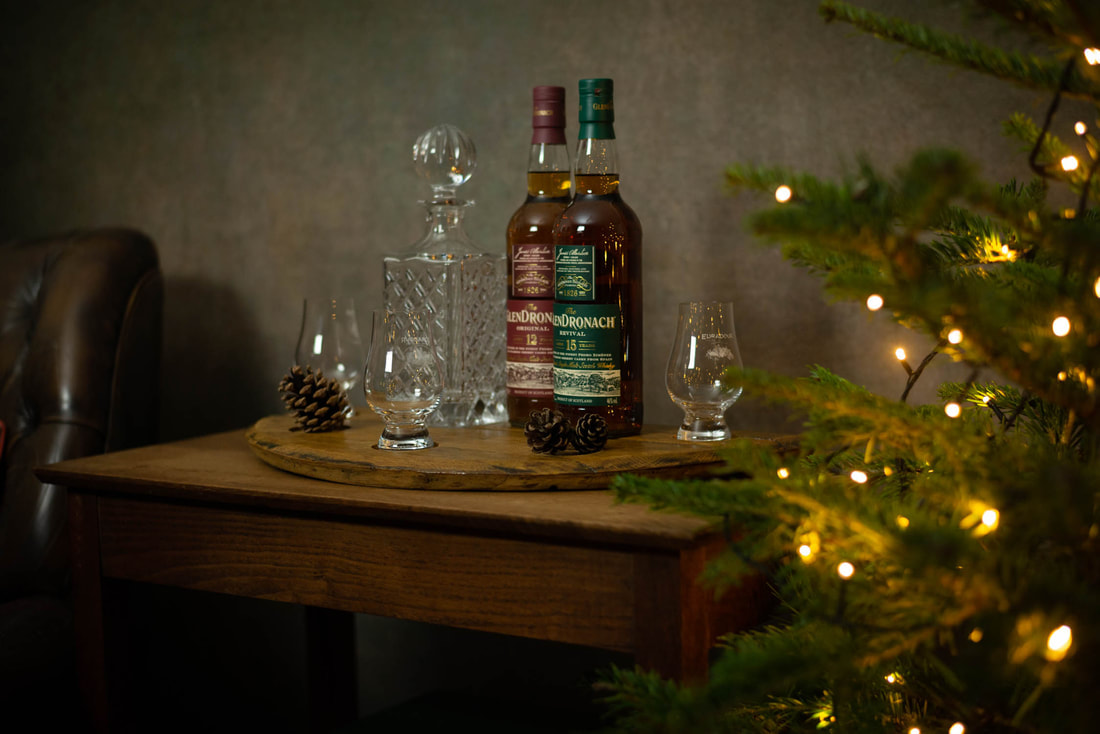 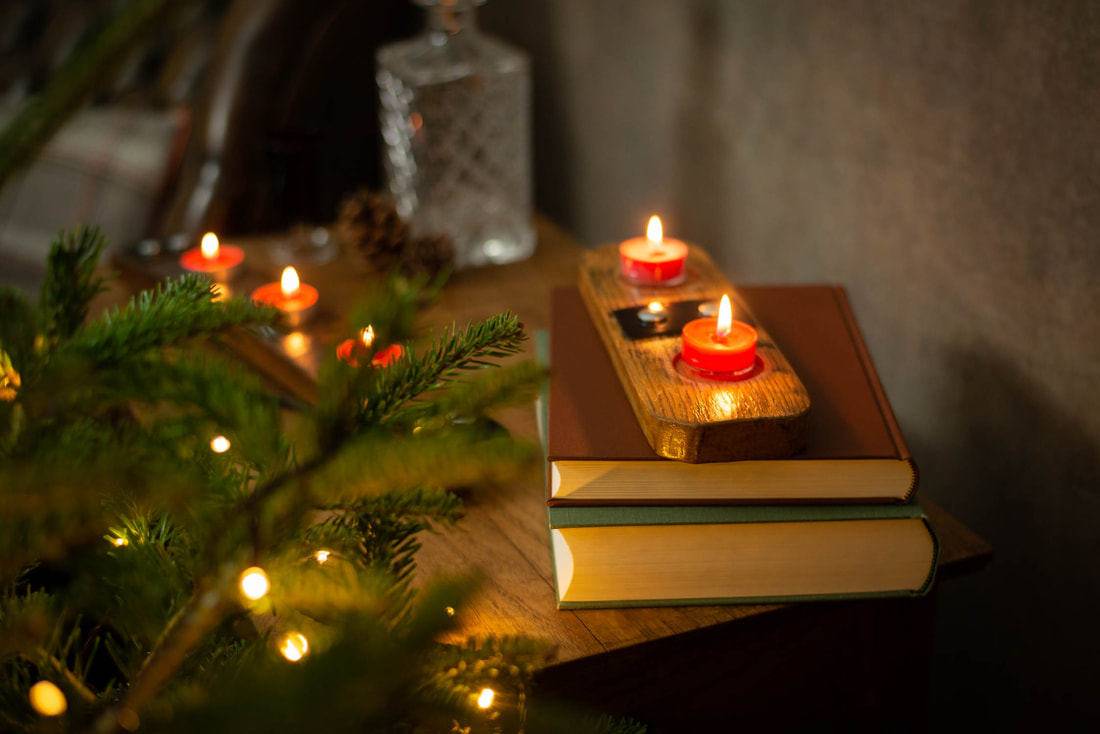 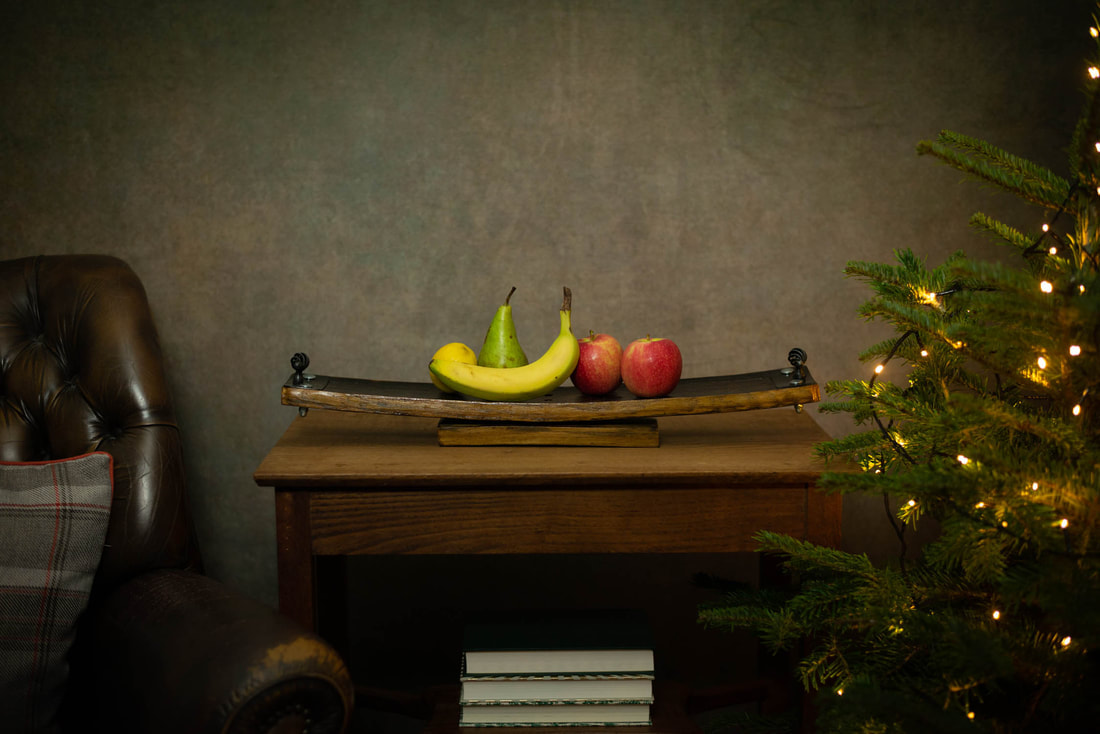
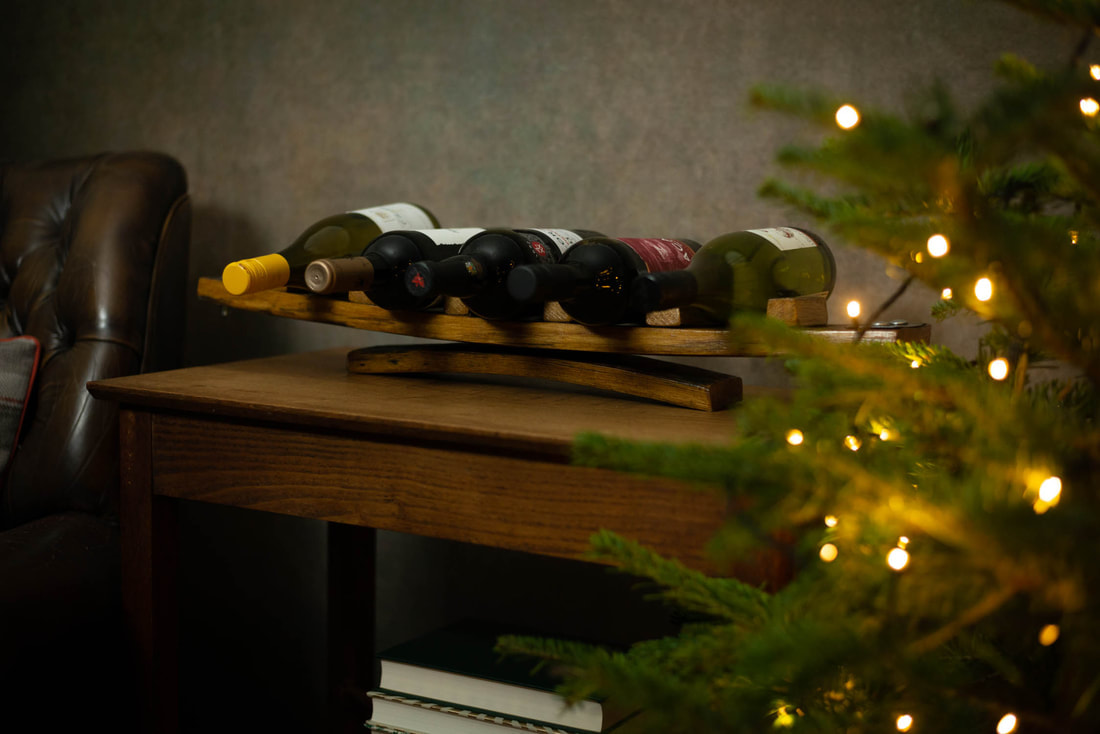
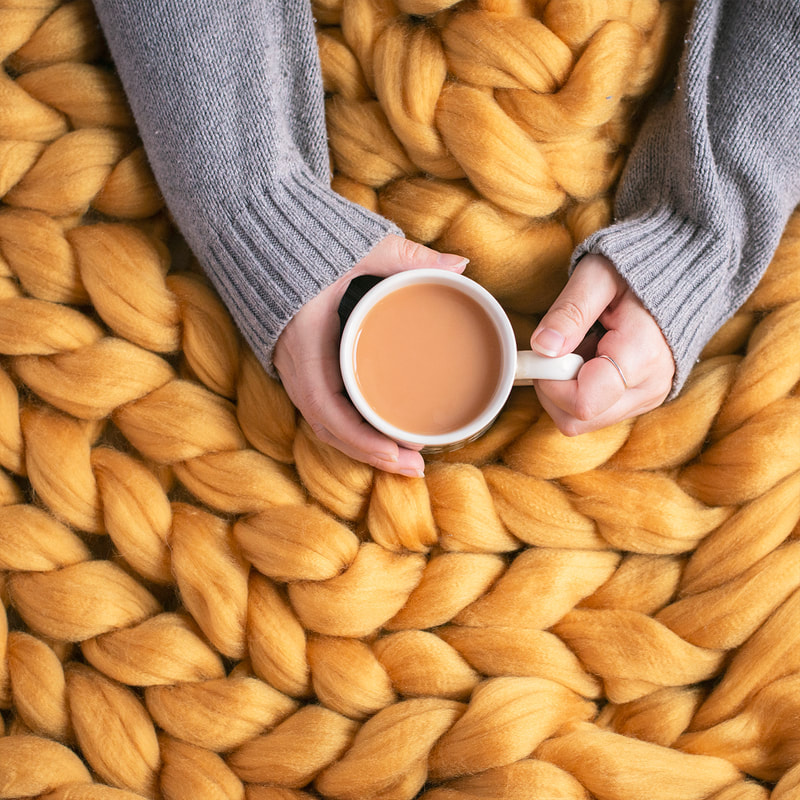
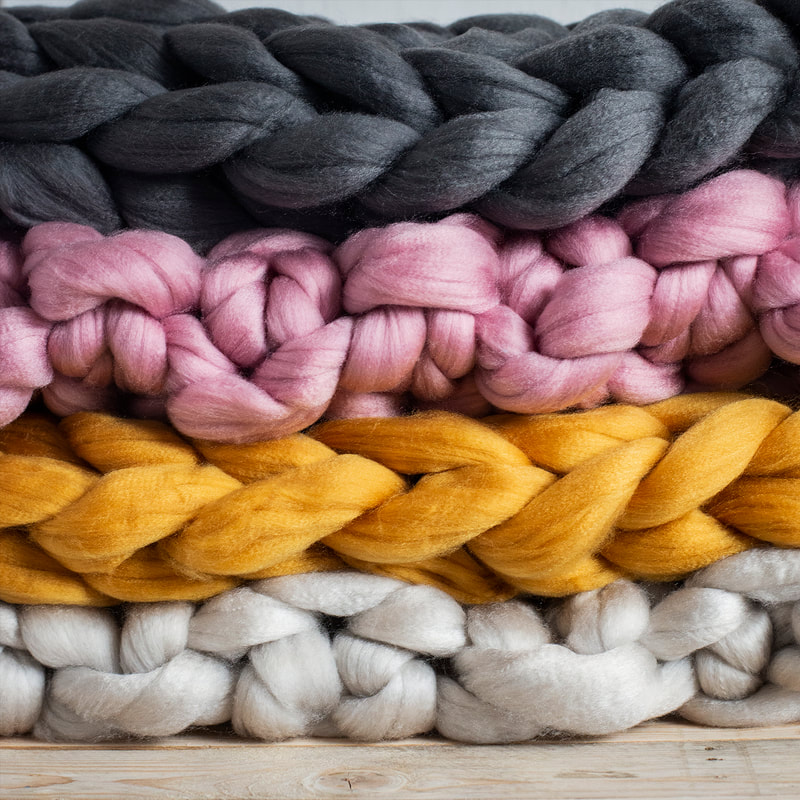
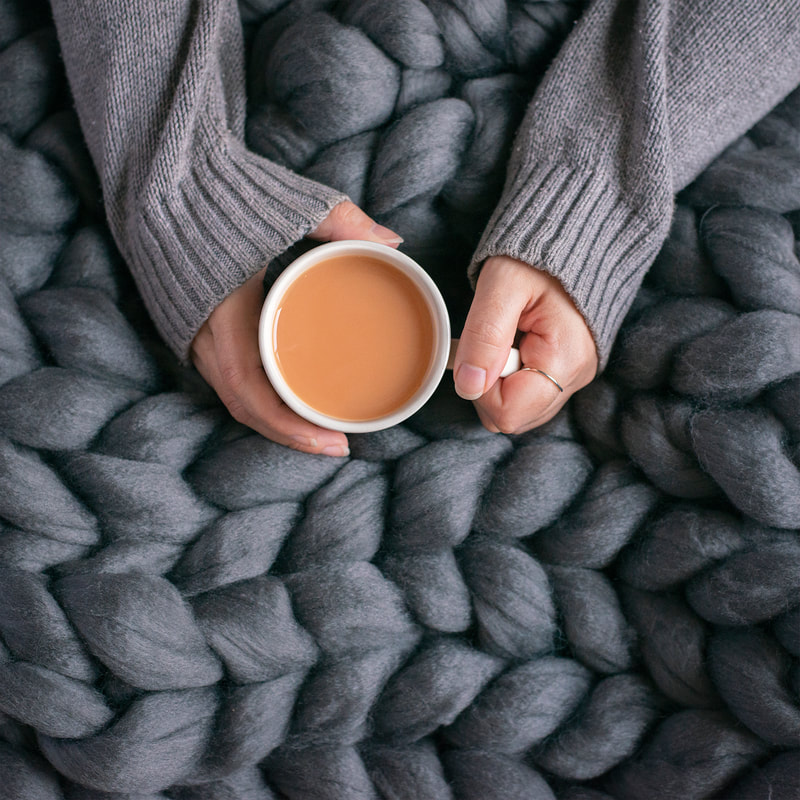
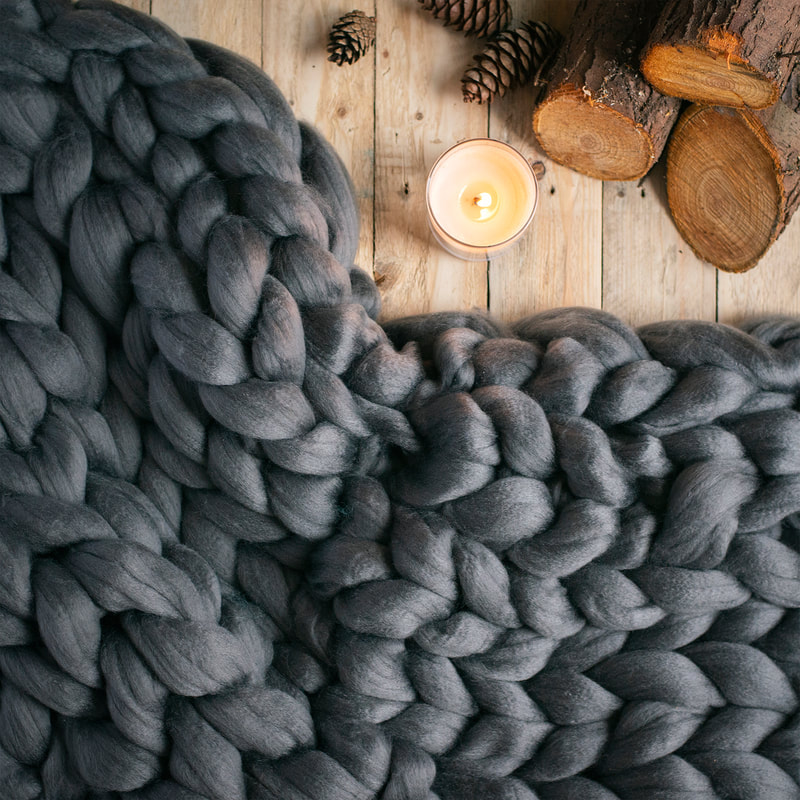
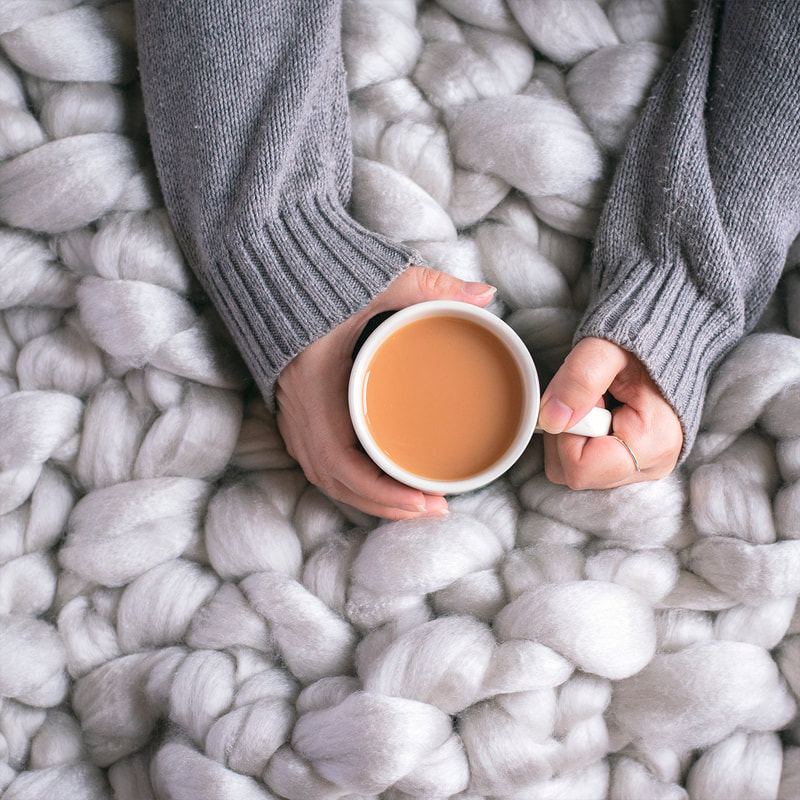
Tom's Oak Designs offer a range of handcrafted upcycled whisky barrel gifts. For this photoshoot we wanted to create a range of moody bothy style images with a cosy festive feel. After working on a moodboard, I created this lifestyle scene to shoot the products in with dramatic lighting and simple styling. If you'd like to book a photoshoot you can do so here. 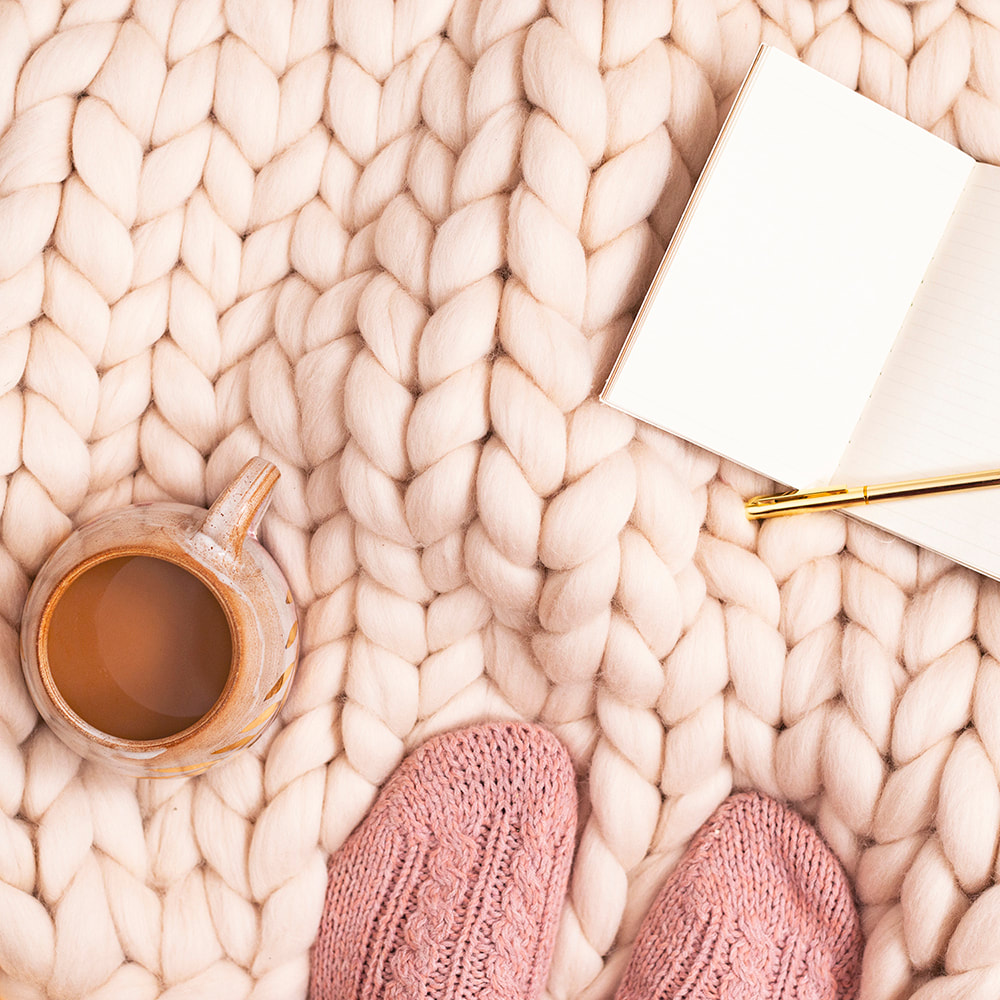 This mini shoot with Cushy Knit was the perfect brief to create super cosy, hygge style images. We wanted to keep it quite minimal but really inviting, so you want to step into the image on a chilly autumn day. I kept the props and styling simple but rustic to let the textures and colours of the blankets come to life. I think you can imagine just how soft and squishy they are from the final images! I gained some absolutely beautiful images. I have never been one for good photography skills so it is amazing I've now come across JillyJilly and will continue to use her for product photography in the future. I could not be more pleased with the outcome of my images. She kept in contact throughout the whole process and sent thumbnails of her ideas before the shoot. So professional and helpful. If you'd like to book a photoshoot you can do so here. 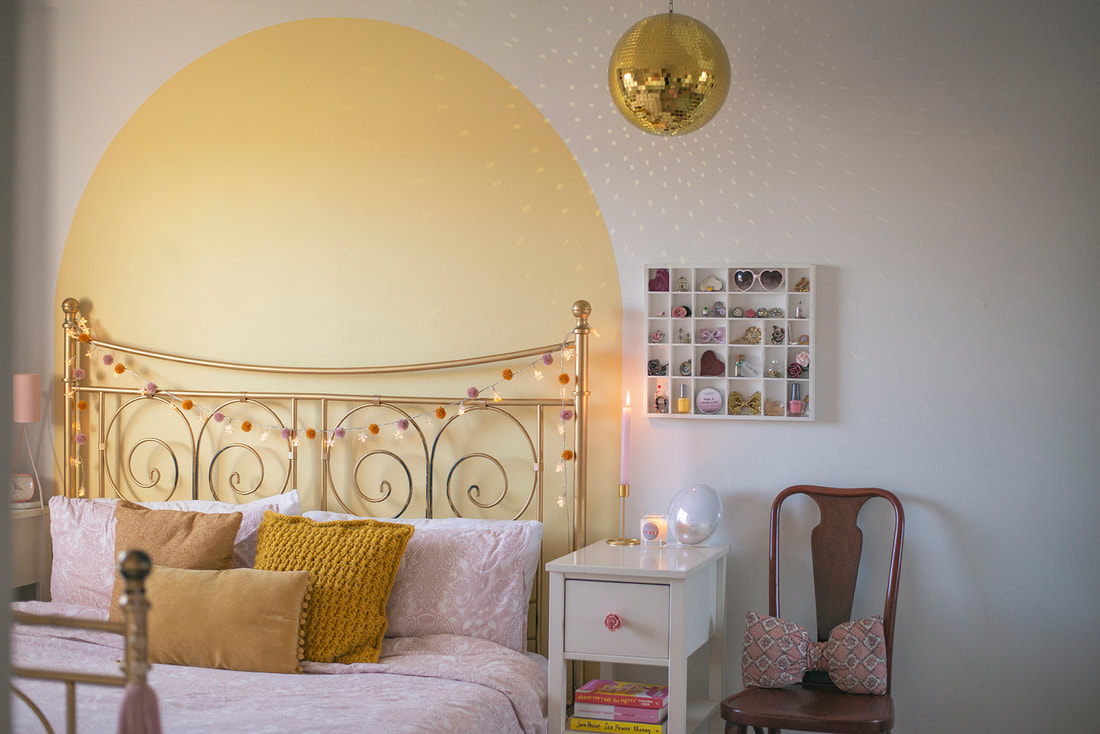 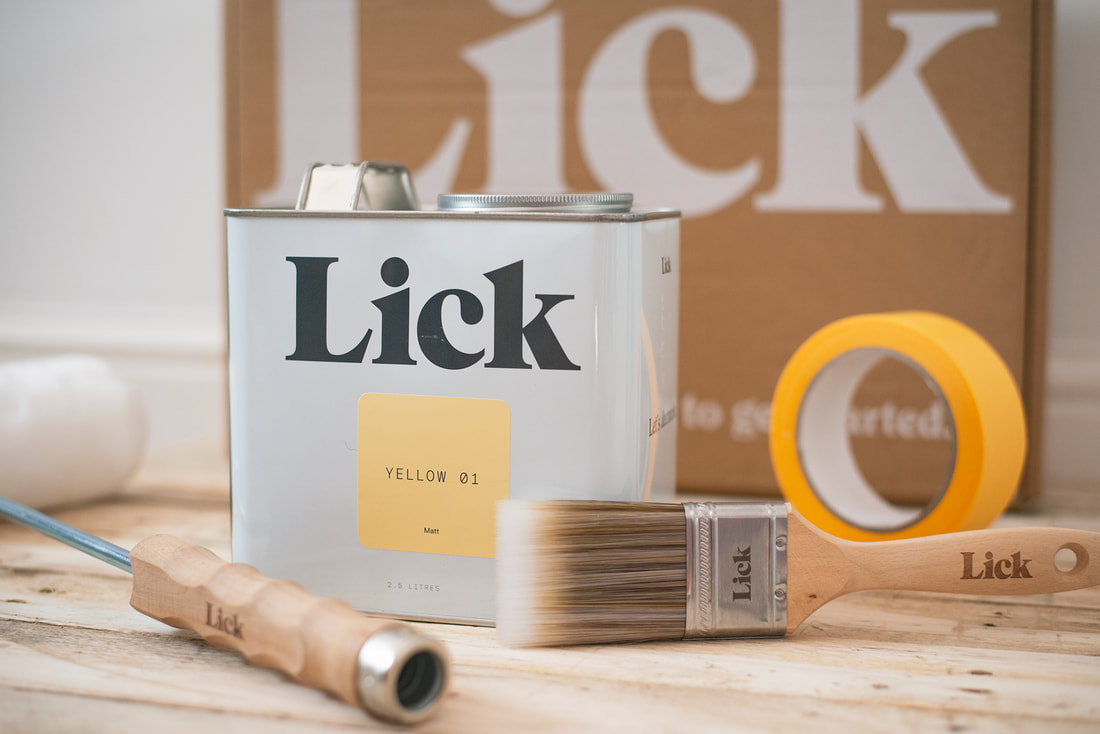
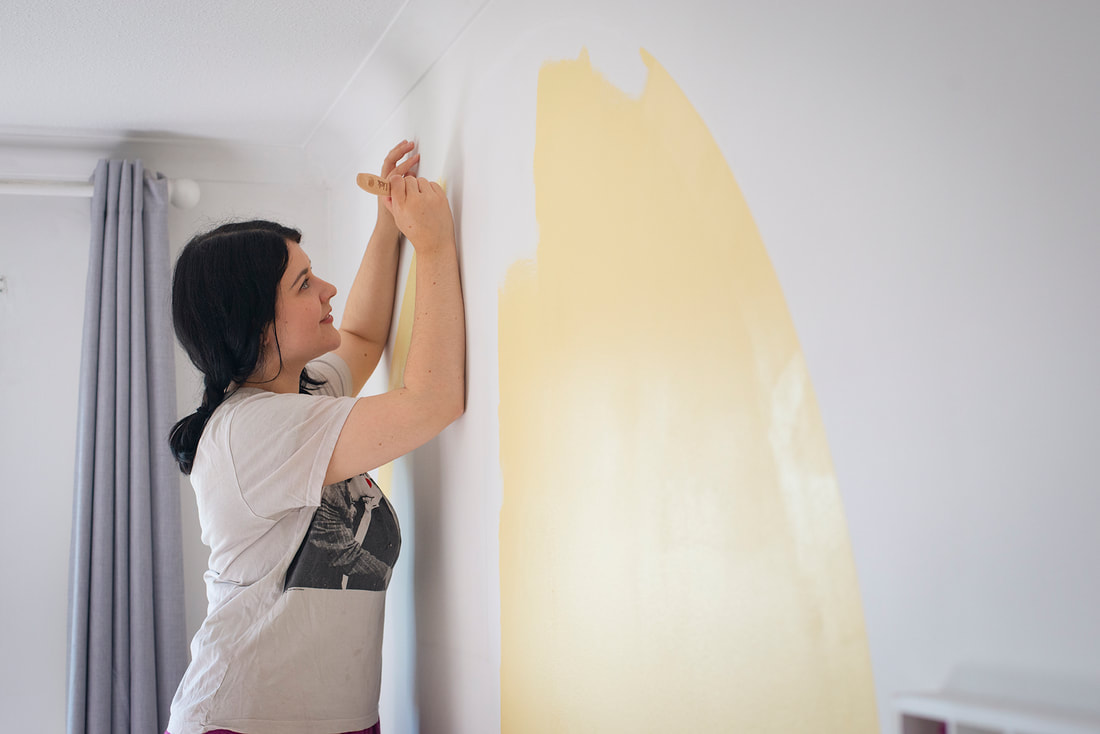
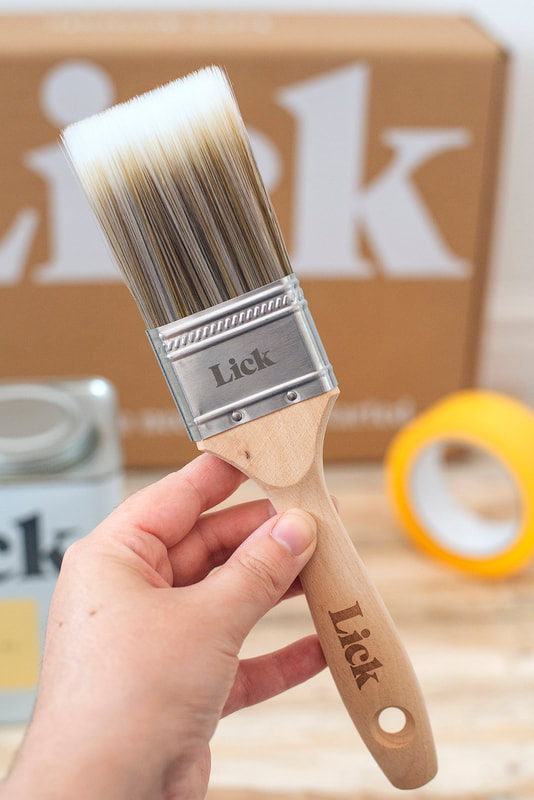
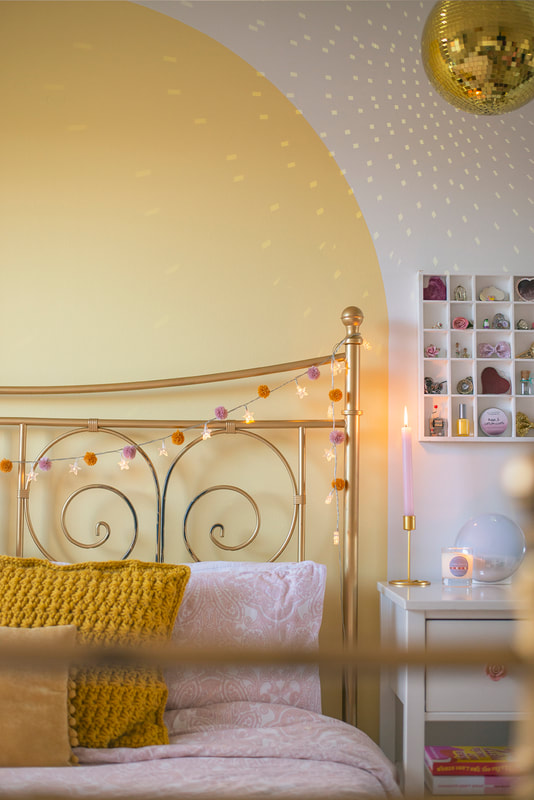
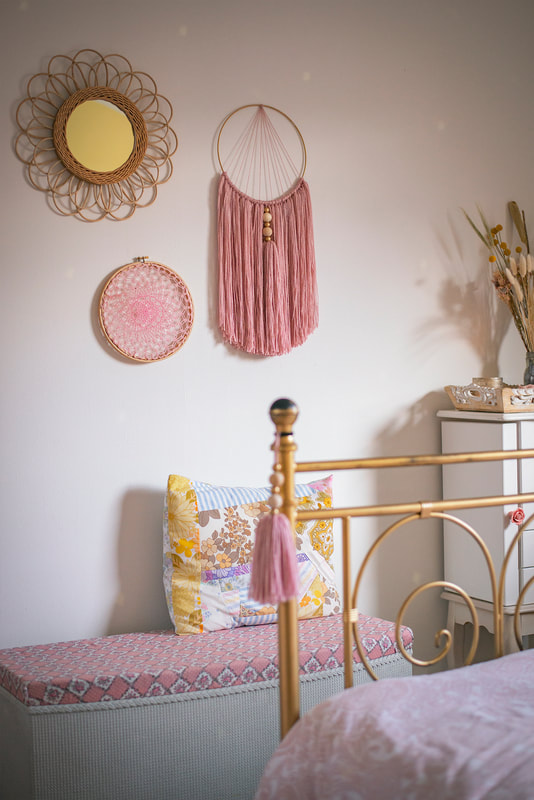
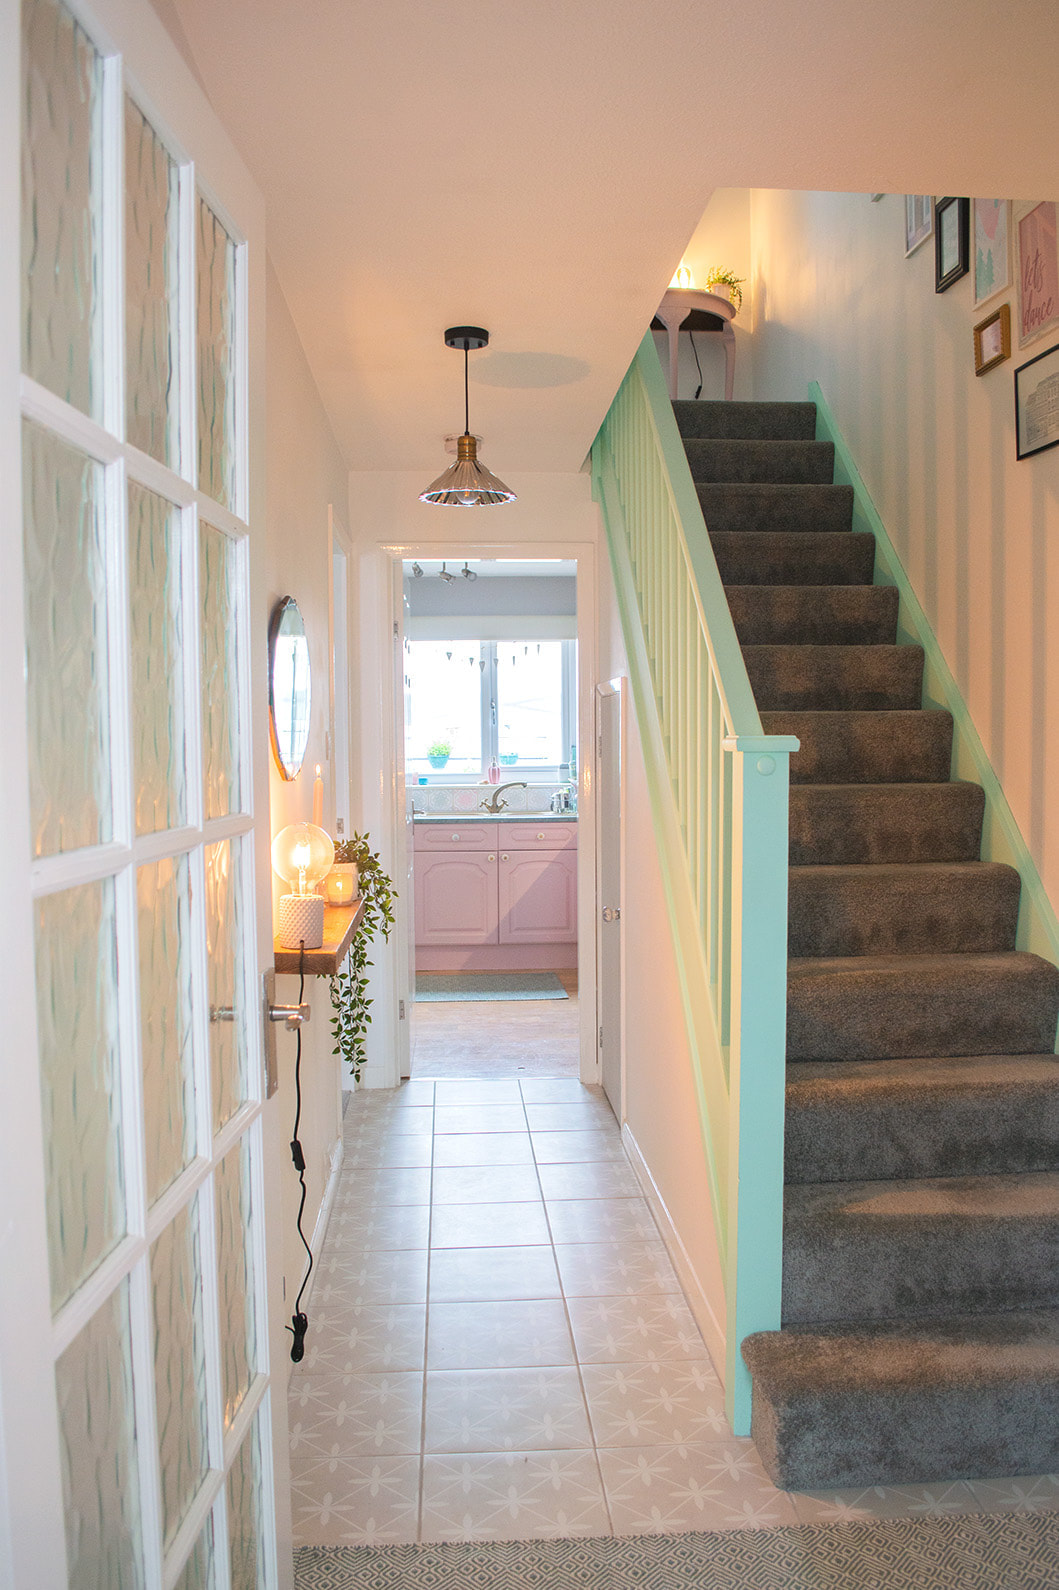
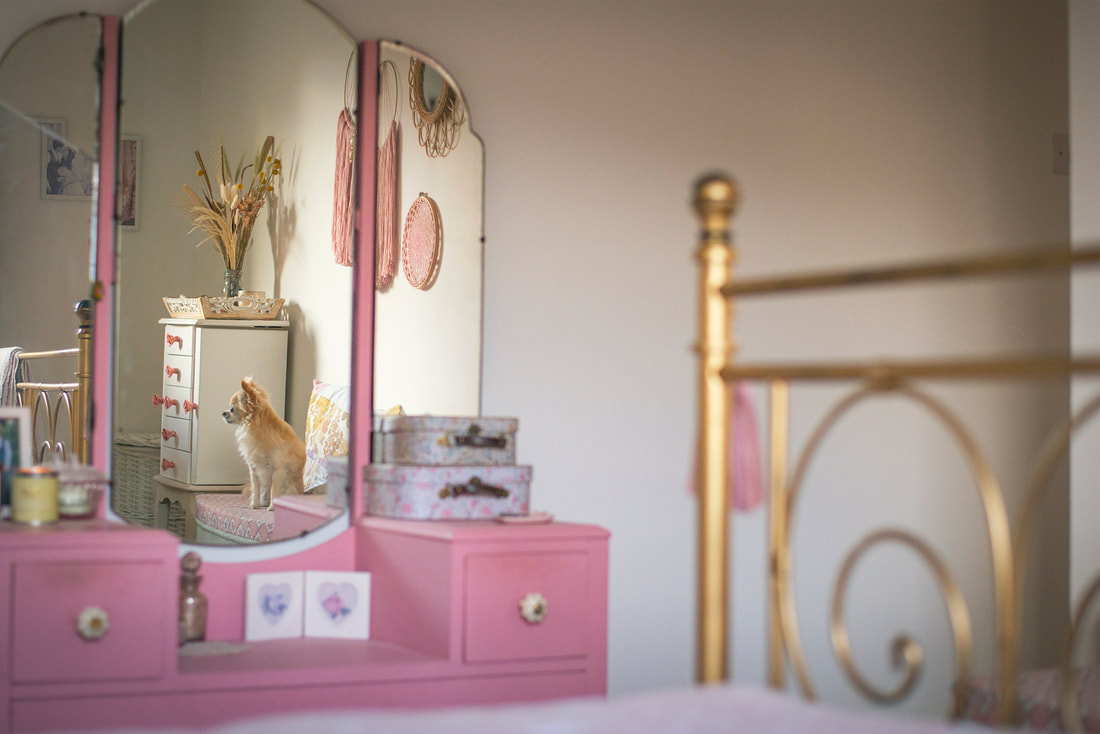 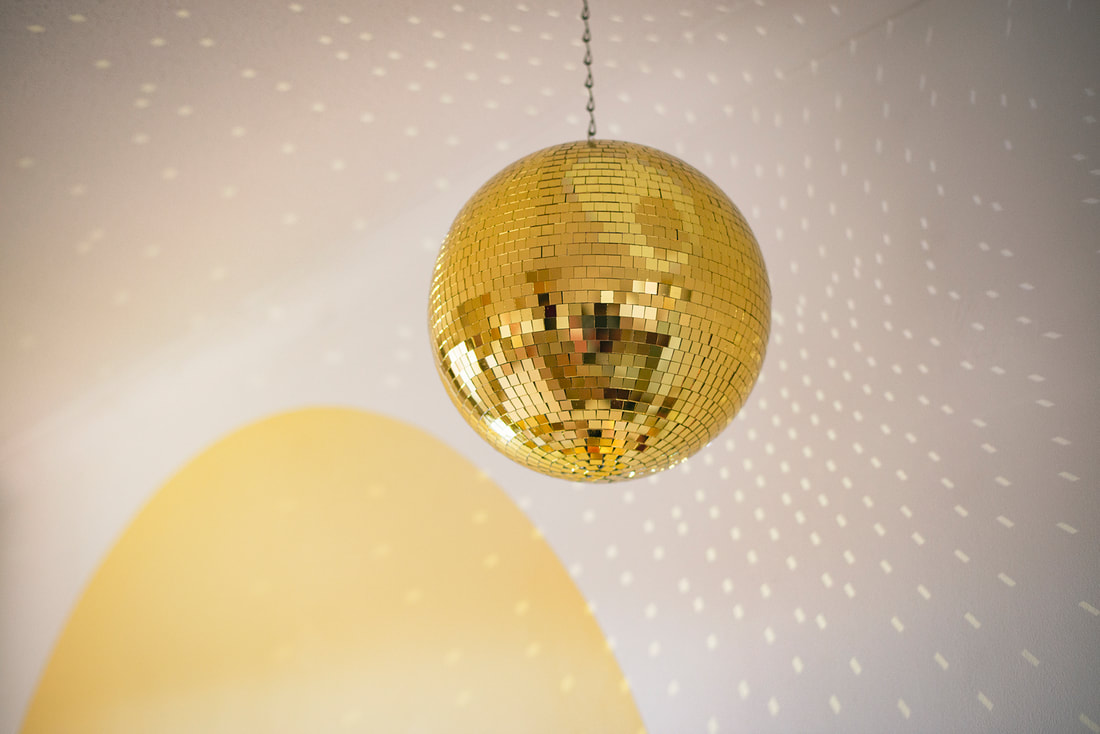 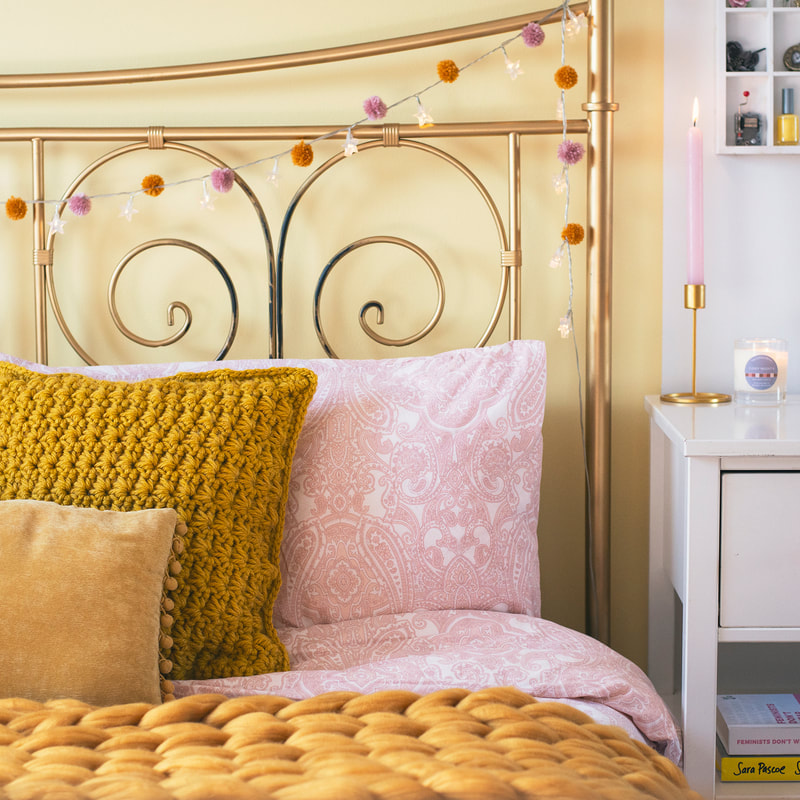 *Lick gifted me a Colour Consultation, Decorating Kit and paint in exchange for a review. All opinions are my own. When Lick got in touch asking if I'd like to try their Video Colourist Session to help makeover a room in my home I thought it would be a fab opportunity to change up our bedroom a little. My appointment was booked with Sam and held via WhatsApp. We had a lovely chat about interiors including my likes and dislikes, details of the space I wanted advice on (how we use it, what would be staying the same etc), my interiors style and any other requirements. It was a really relaxed chat and Sam gave me the encouragement I needed to go bold as I told her I loved the arch murals I'd been seeing on Instagram recently. After the session I was sent a bespoke mood board with details of Lick paint colours to complete the makeover. Lick then sent me one of their super handy Decorating Kits and a tin of Yellow 01 which is a soft creamy yellow, perfect for adding a cosy pop of colour to our otherwise white bedroom. I'm just going to take a moment here to say how much I love Lick's branding - from the little messages on the packaging to the logo engraved wooden handles and gorgeous tin - there are so many little touches that make them stand out. The decorating kit I received is the single room painting kit which includes a roller and handle, 2" flat brush, metal roller tray and yellow masking tape. We measured out the space behind the bed, taped up the straight sides and floor, then used a pencil with some string and a pin (as a compass) to draw the arch. David did the rollering while I did the arch edge - I was so surprised at how easy it was as a wee DIY project! The paint went on so nice and smooth, it only needed one coat as the wall underneath was white. It's a really thick, well pigmented paint and a little definitely goes a long way. We finished off our mini bedroom makeover with some wee pops of yellow and other cute accessories. First, a few thrifty ones - the cushions were spare ones my Mum had sitting around, I made some pompoms to add to my fairylights (you can see how I did this using a fork here), I added a couple of yellow/gold items to my accessories box frame, and I put one of my great grandmother's vintage doilies in an embroidery hoop as a wall decoration. The beautiful wall hanging is from Letti and Low on Etsy and I found the rattan mirror on eBay. I also couldn't resist taking a pic of one of Cushy Knit's squishy blankets on the bed as it just looks so snuggly with the new colour scheme. Then, last but not least, we got a big yellow mirror ball! I absolutely love it, it's so twinkly in the sun and just makes it feel like a really cheerful space to wake up in, especially on these gloomier mornings. If you're thinking about having a home makeover, I wouldn't hesitate to recommend Lick. The colourist sessions are such a great tool for helping inspire you to try something different in your home with confidence. You can find out more here and also be sure to follow Lick on Instagram as there's so many beautiful real homes featured. I keep spotting more colours I'd like to try elsewhere in the house! 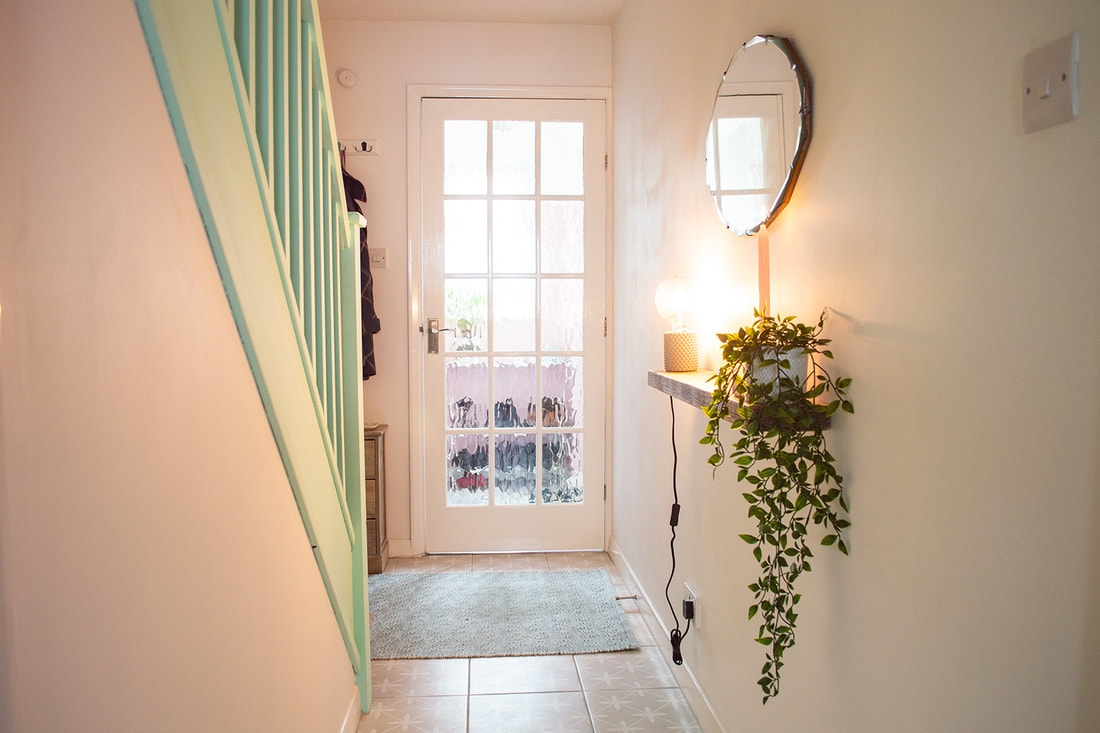 TA-DAH! It might have been over 6 months since we finished our hallway makeover, but it still feels fresh and new every day! I'm so pleased with how this turned out, especially as it was the final piece of the puzzle in terms of making our home fully our own. I started a moodboard aaages ago, because I can never resist a moodboard, but since the hall was going to be quite a big job for us, we saved it until last.
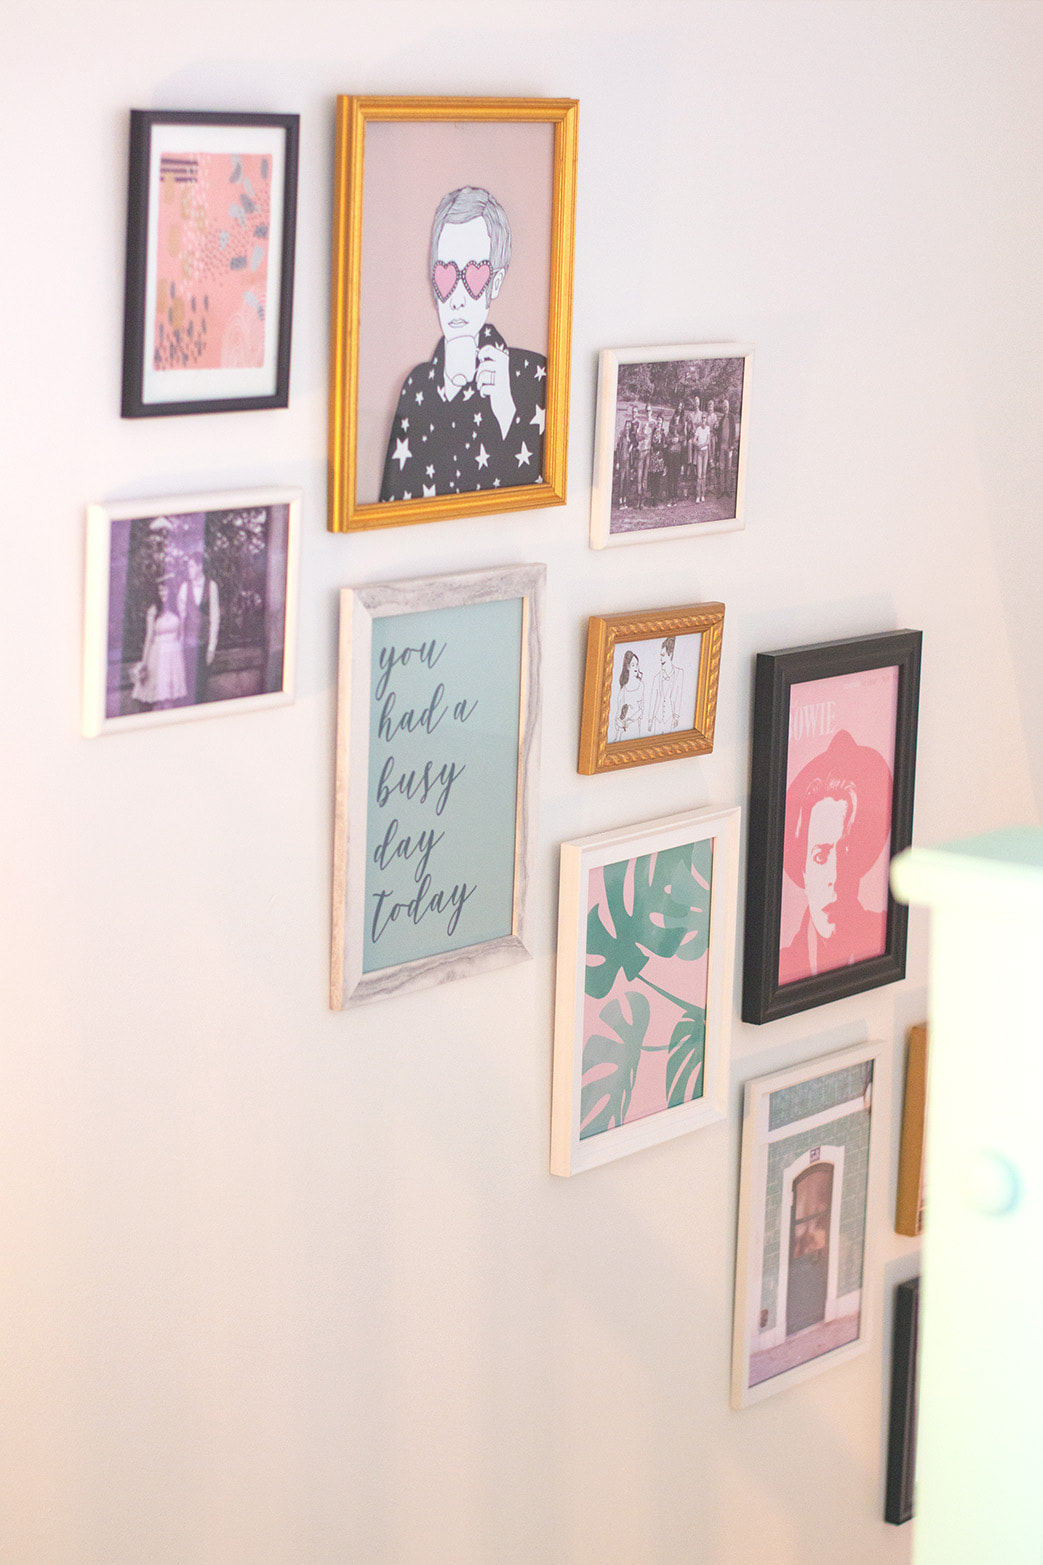
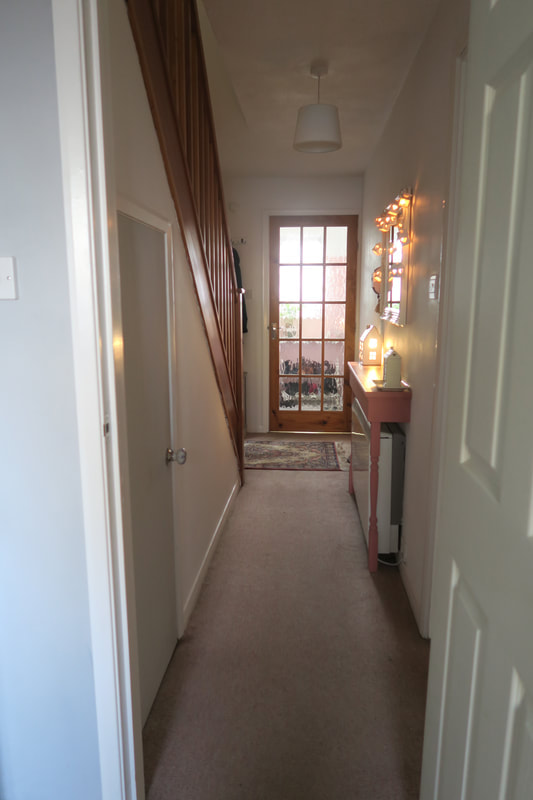
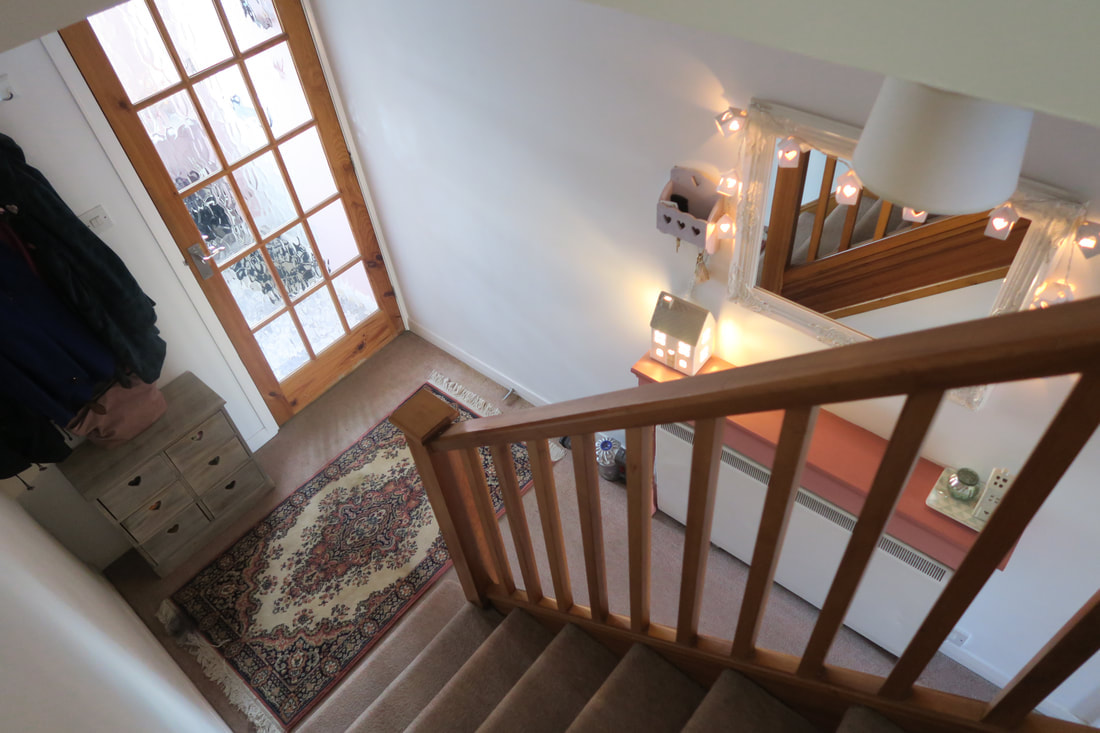
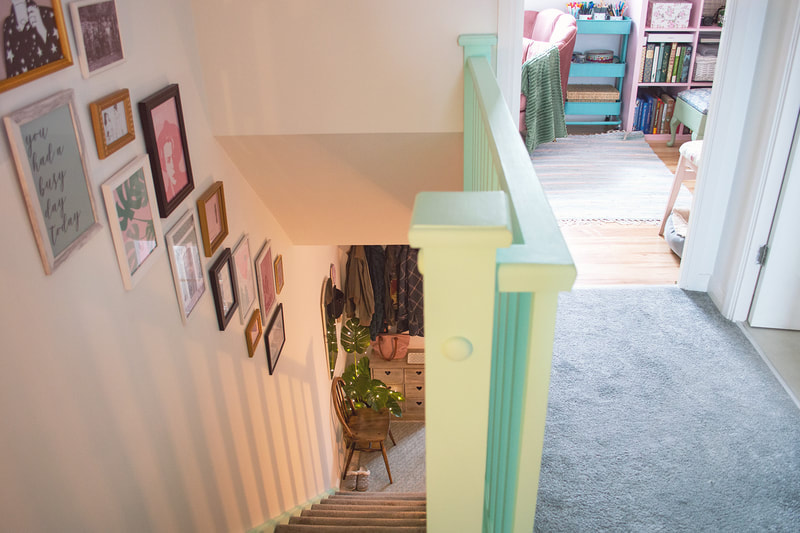
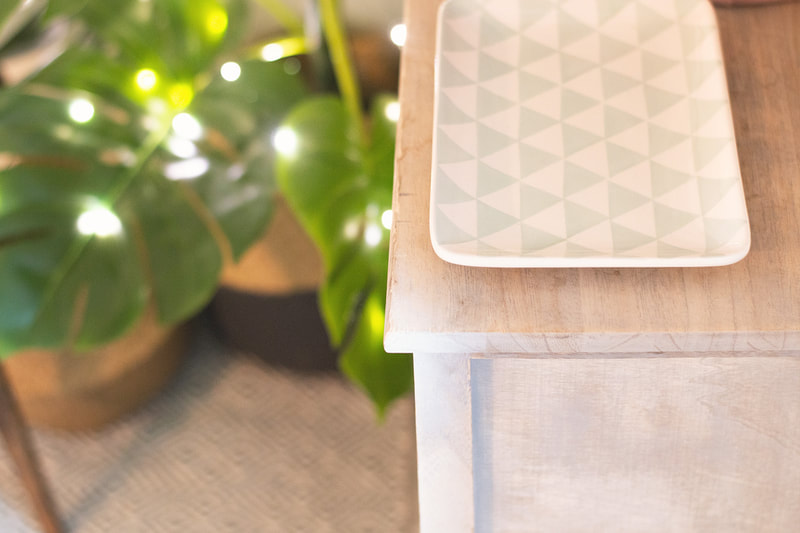
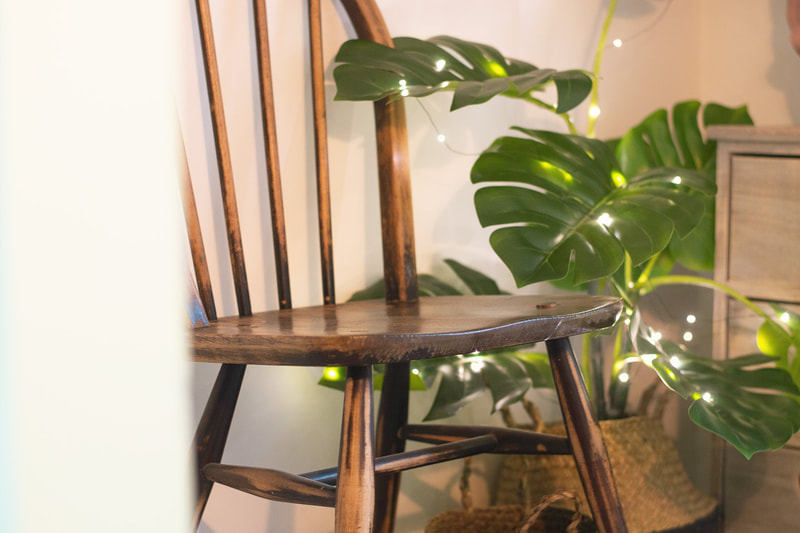
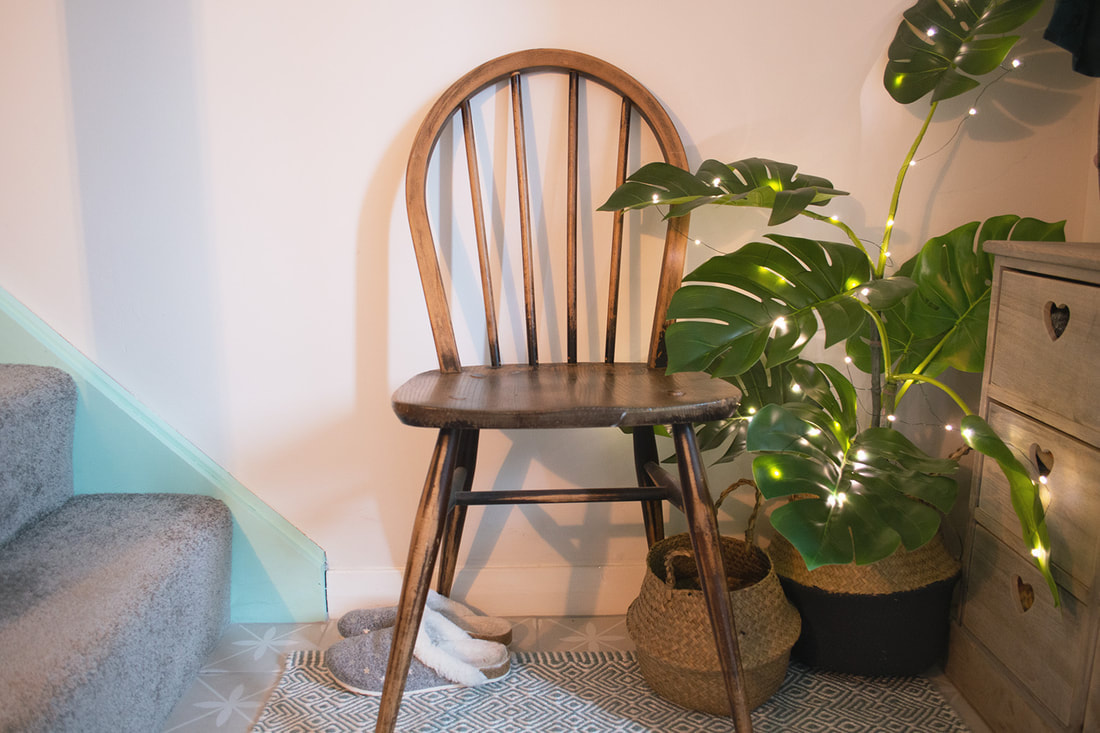 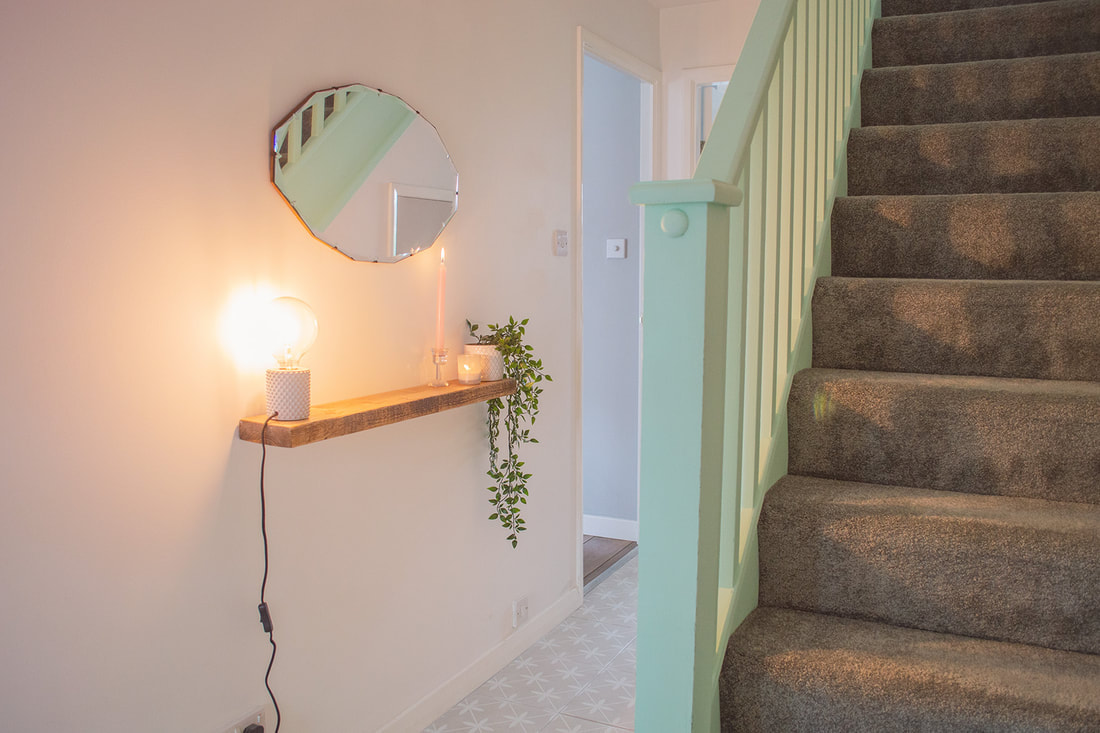 Before Some more details 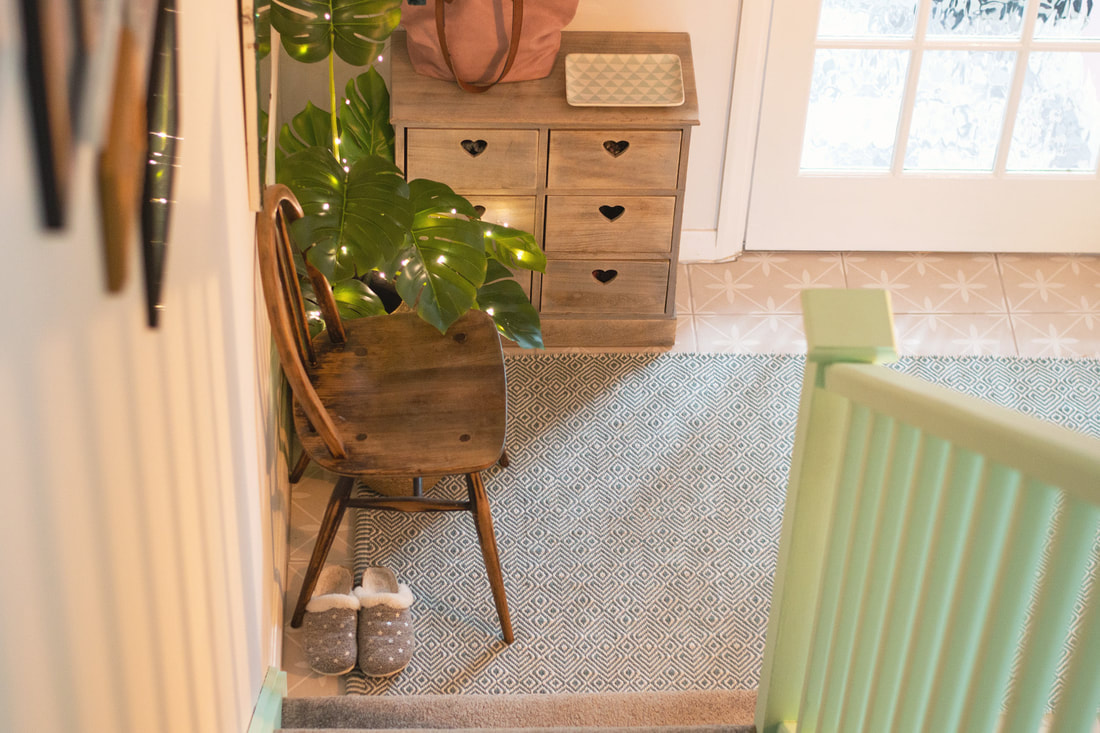 This post contains affiliate links to products. I may receive a commission for purchases made through these links. If you've seen any of my interiors posts before, you'll know we love to challenge ourselves to DIY, upcycle and thrift as much as possible. This has meant most of our makeovers were done on tiny budgets, but this is the first where we admitted defeat and paid to get the stair carpet fitted! Other than that, this was a classic team Jilly and David job - I did most of the tedious banister painting (Autentico Versante Matt in Menta) whilst David was in charge of tiling the floor. David also removed the old shelf/clunky storage heater that didn't do much, and put up our beautiful floating sleeper shelf (eBay £30). This turned out to be a much bigger job than expected as he wanted it to be super secure, but it's so worth it as it really opens up the space and adds character. Meanwhile, I was rummaging through the house and garage to see what I could use to accessorise. I love this old spindly chair, but I'm not sure where it came from! We already had the drawers in the hall but they look much more at home in the new colour scheme, which is actually pretty neutral for us. I wanted the space to feel as light and airy as possible, so knew all the brown woodwork needed to be painted. The floor tiles were a big part of the inspiration for keeping it a more natural colour palette (£25.63m2 from Tiles Direct). Originally we were going to stick with just mint and greens to add colour but the pink snuck in through some of the accessories as I felt it added more warmth when paired with cosy lighting and touches of gold. The frames were mostly from charity shops and feature a mix of my own illustrations and photos, with some Etsy prints mixed in. (Let's Dance from PrintPunkStudio / Elton John from CarrissaTanton / Blah Blah Blah from StelleDesignStudio / Work Hard & Be Kind from mboldnstudio). The beautiful Weaver Green rug was an early birthday present, it's made entirely from recycled plastic bottles! The mirrors are vintage - the one above the chair belonged to my great grandmother and the other was only £10 from Fancy That?. The glass light shades also have a vintage look but are actually just cheap ones from eBay. I also found the seagrass baskets on there which add a nice contrasting texture. Finally, we wanted to add some plants but I've tried keeping them alive in the hall before with no luck - there's just not enough sunlight sadly. So I've cheated and got a few lovely artificial plants from IKEA which definitely bring some life to the space. It's quite hard to write a post like this without it becoming a list of products sometimes! I hope you've enjoyed seeing our hallway makeover, I'd love to know what your favourite part is? 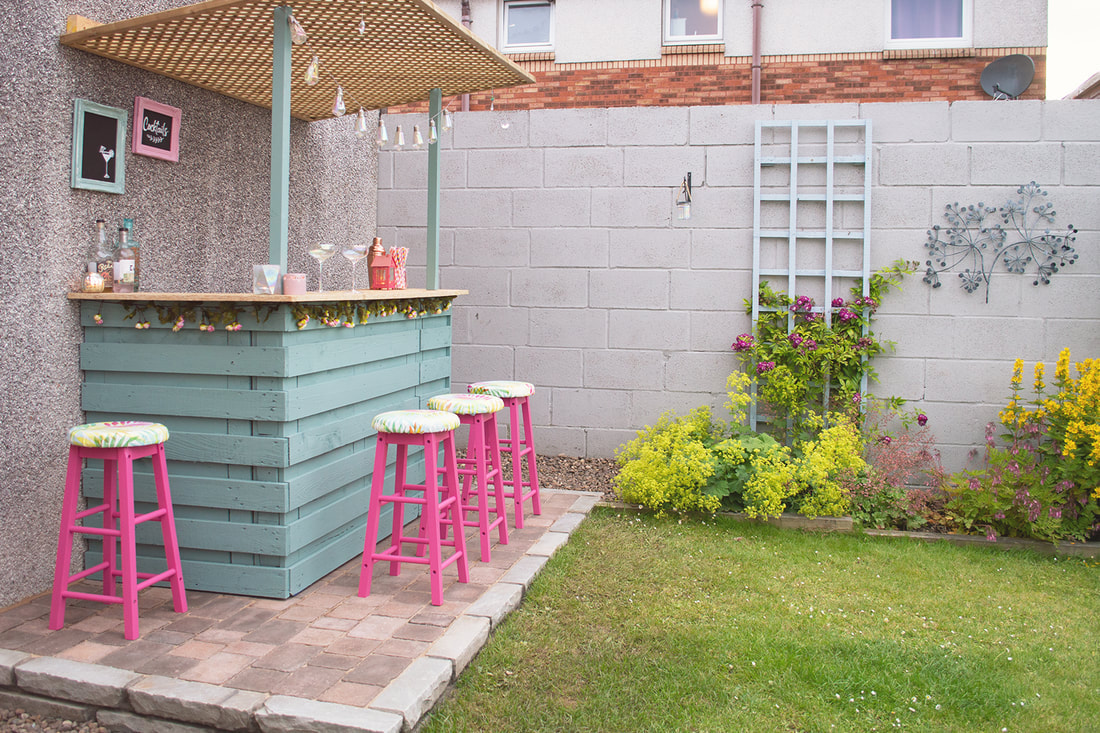 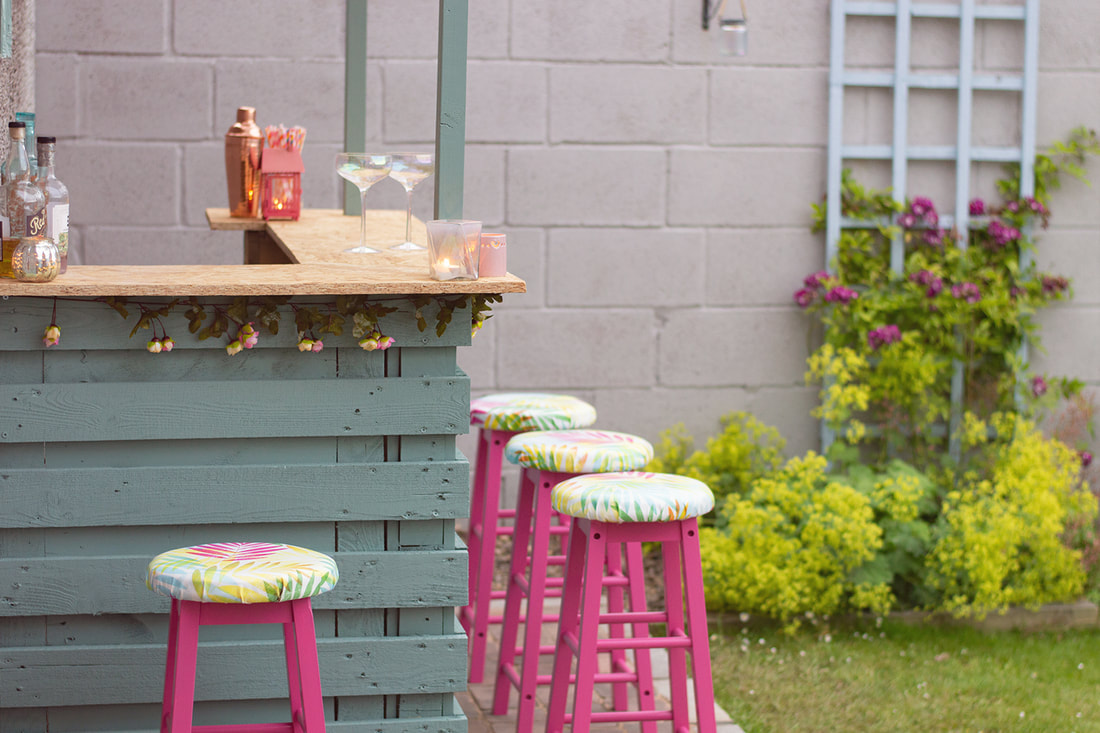
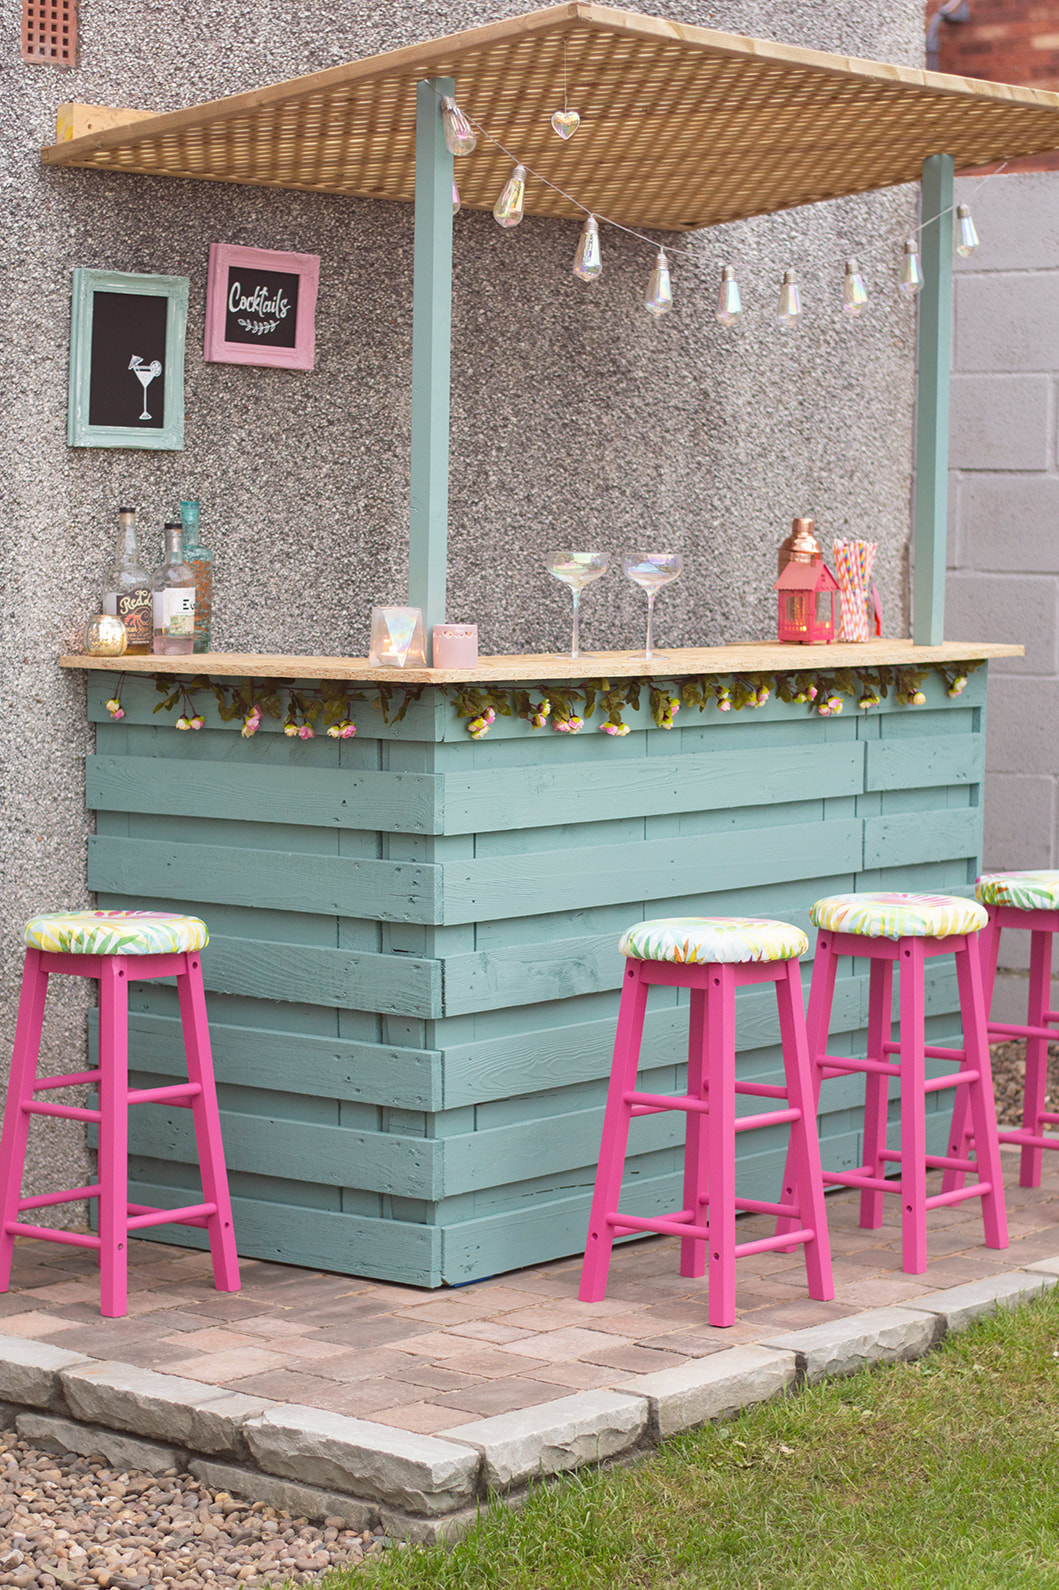
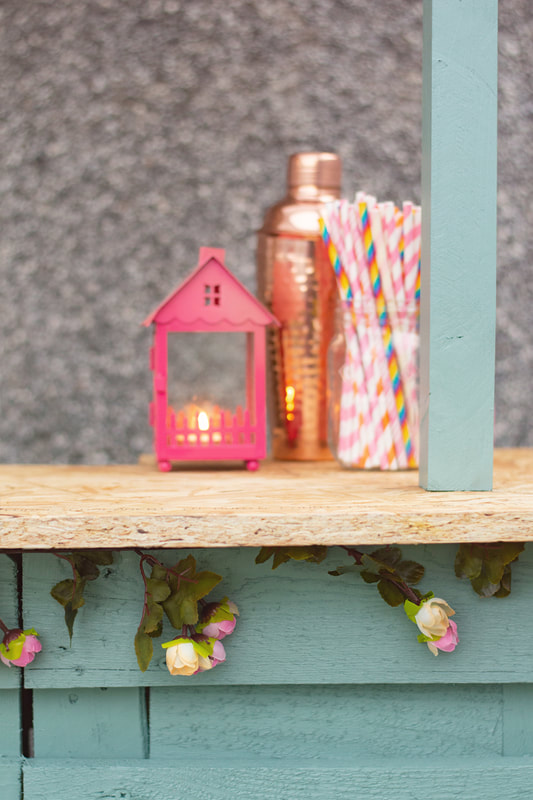
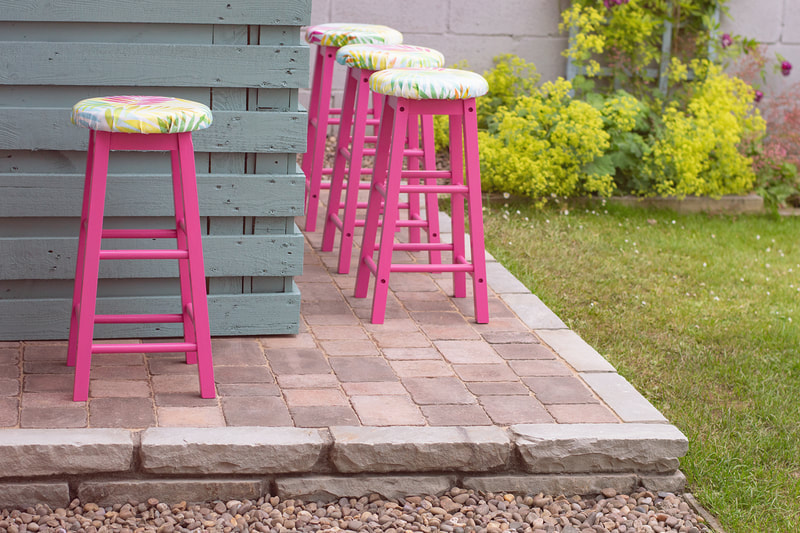
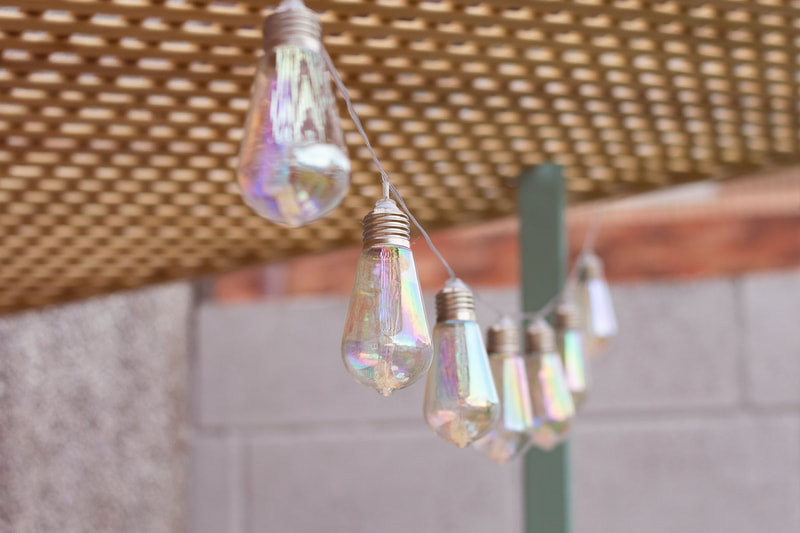
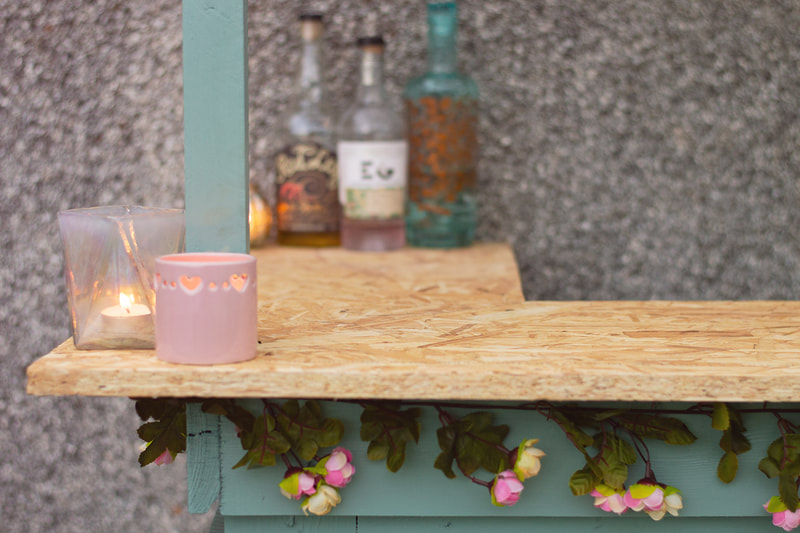
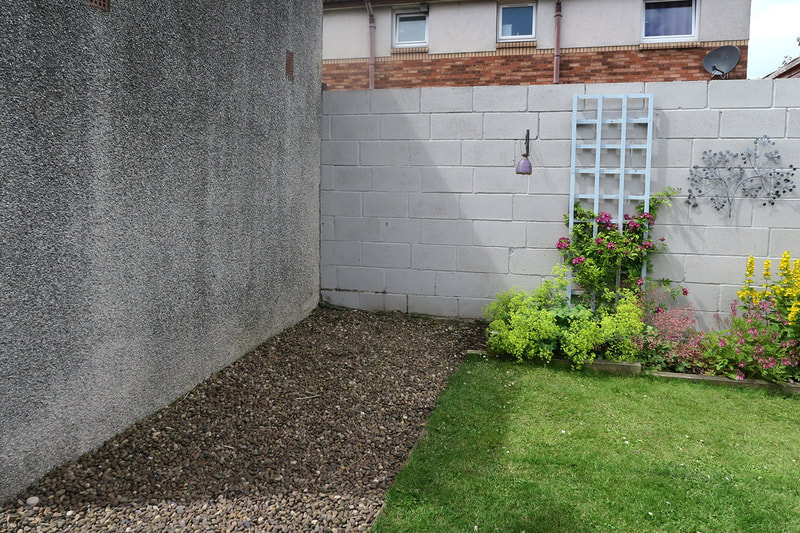
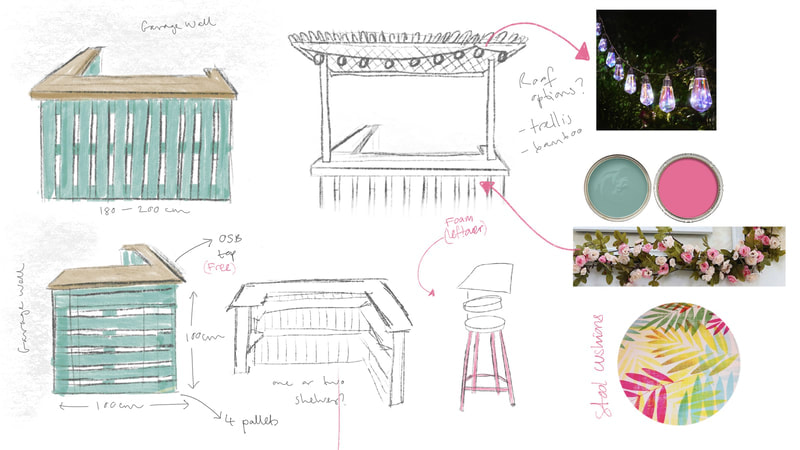
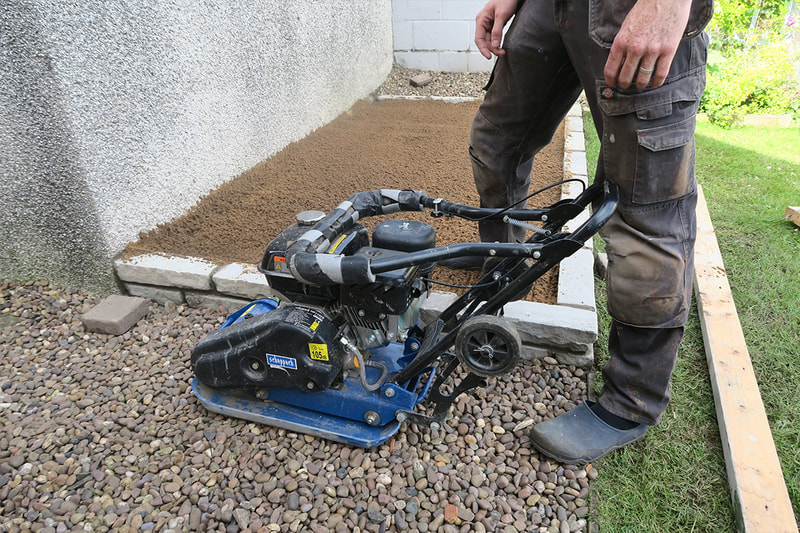
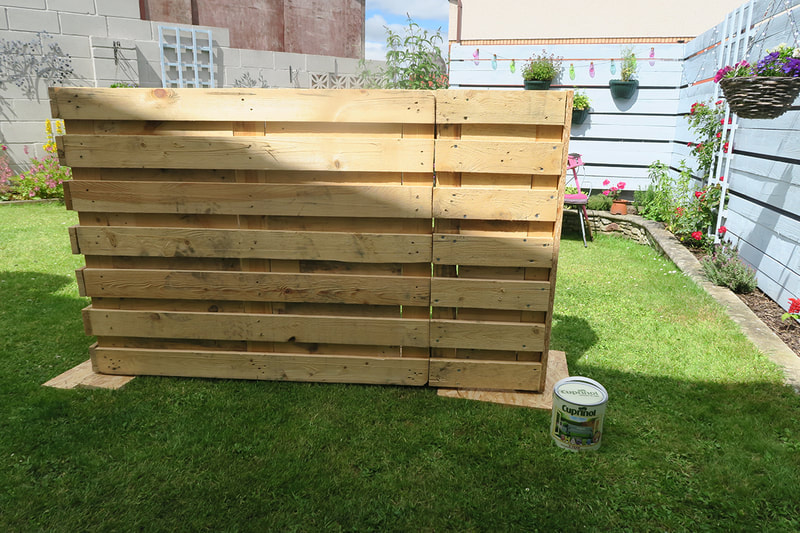
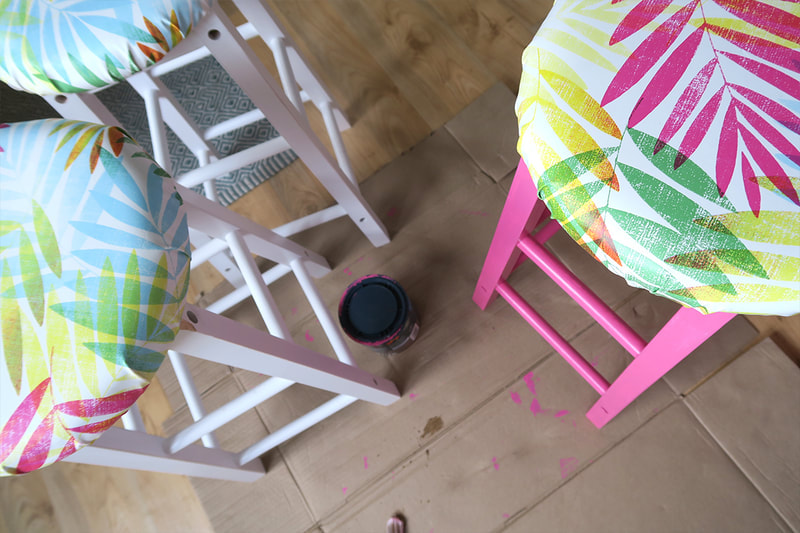
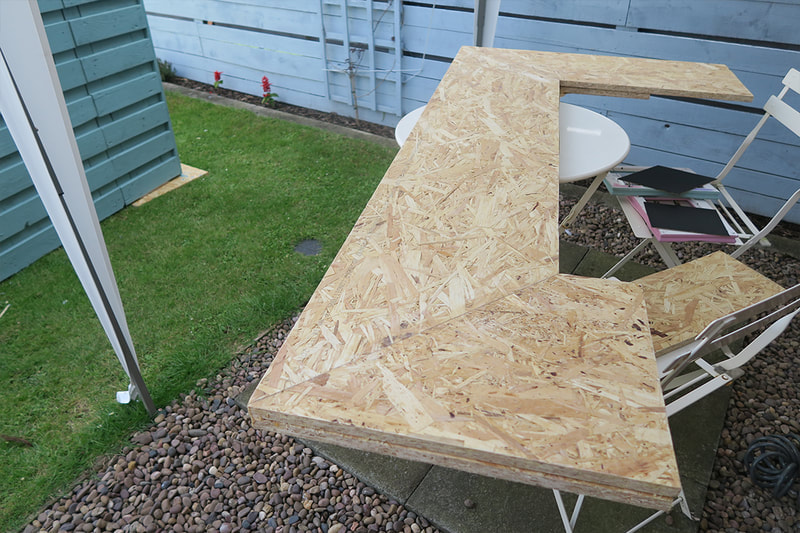
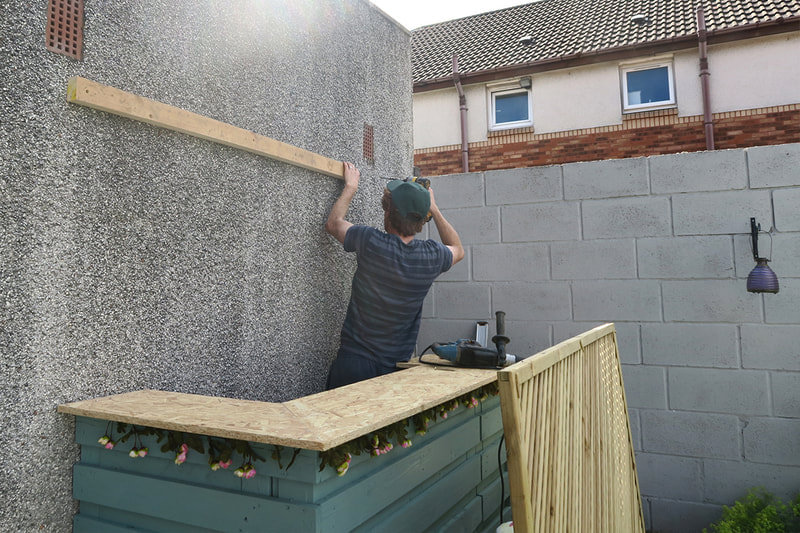
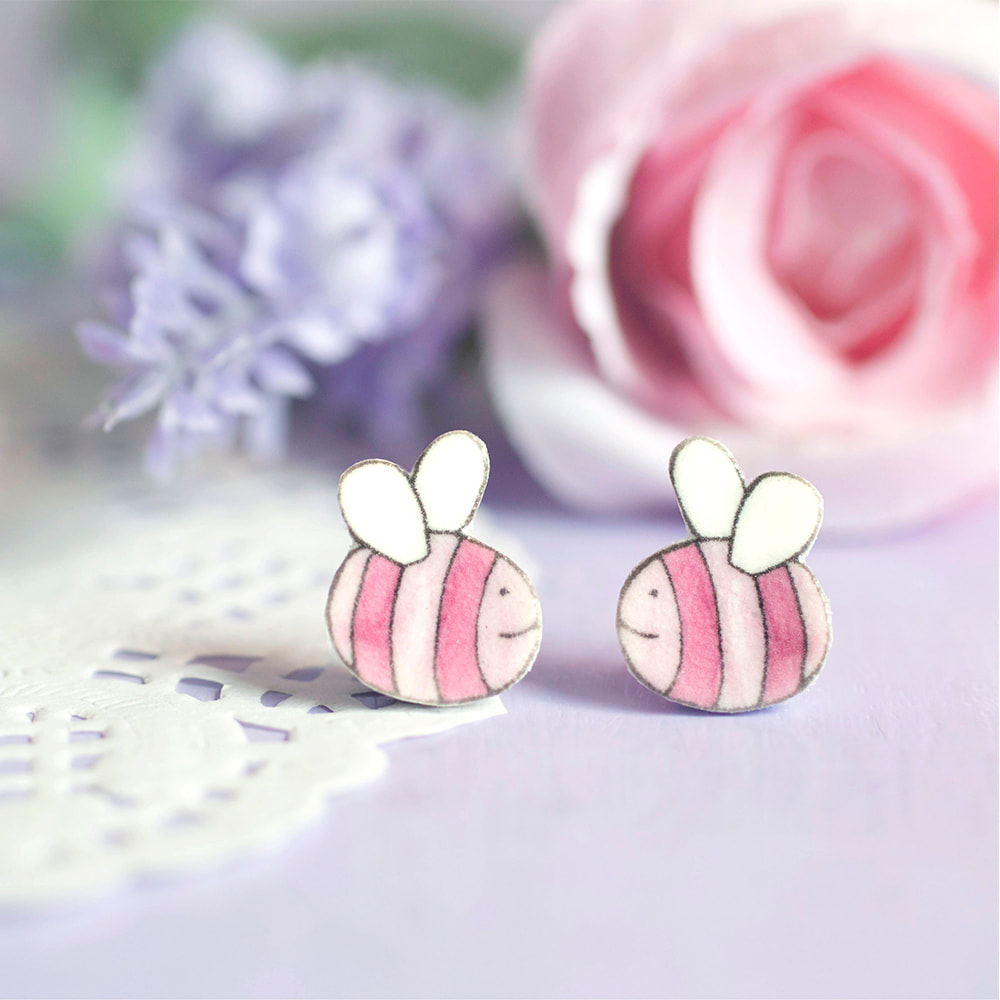
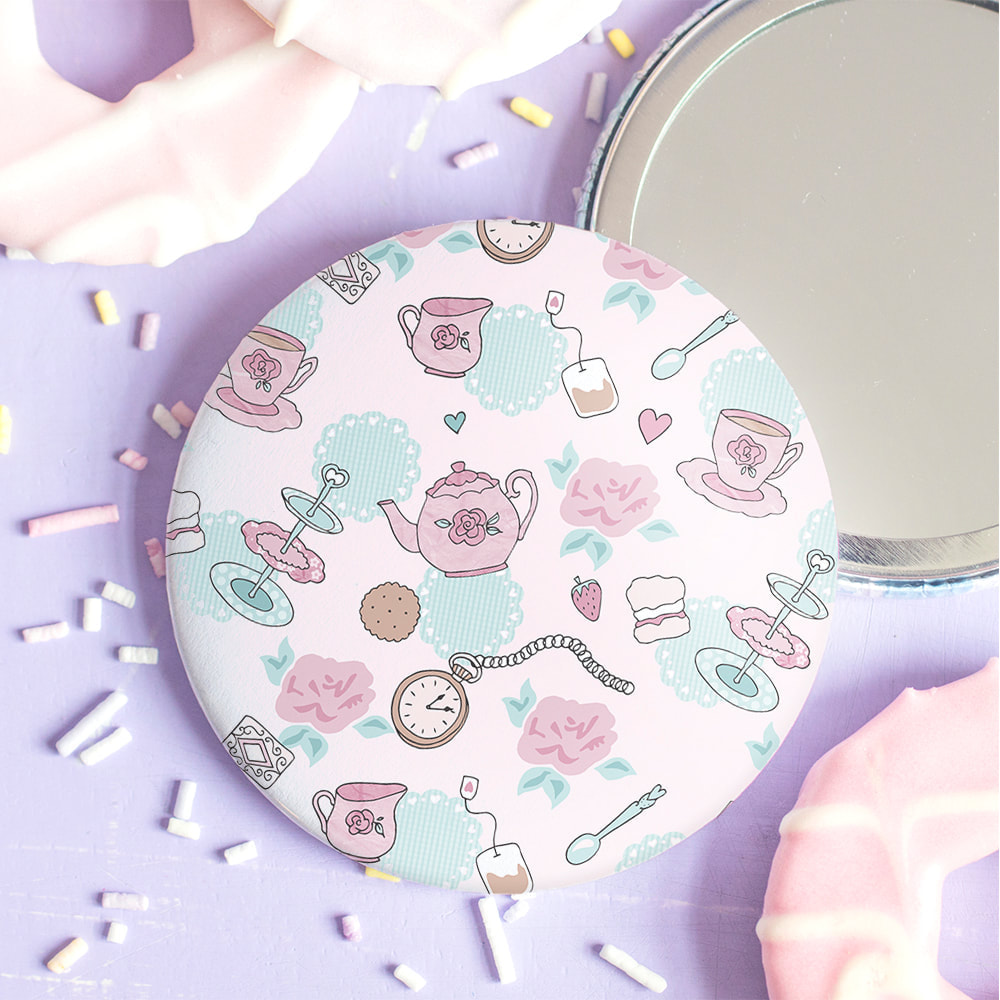
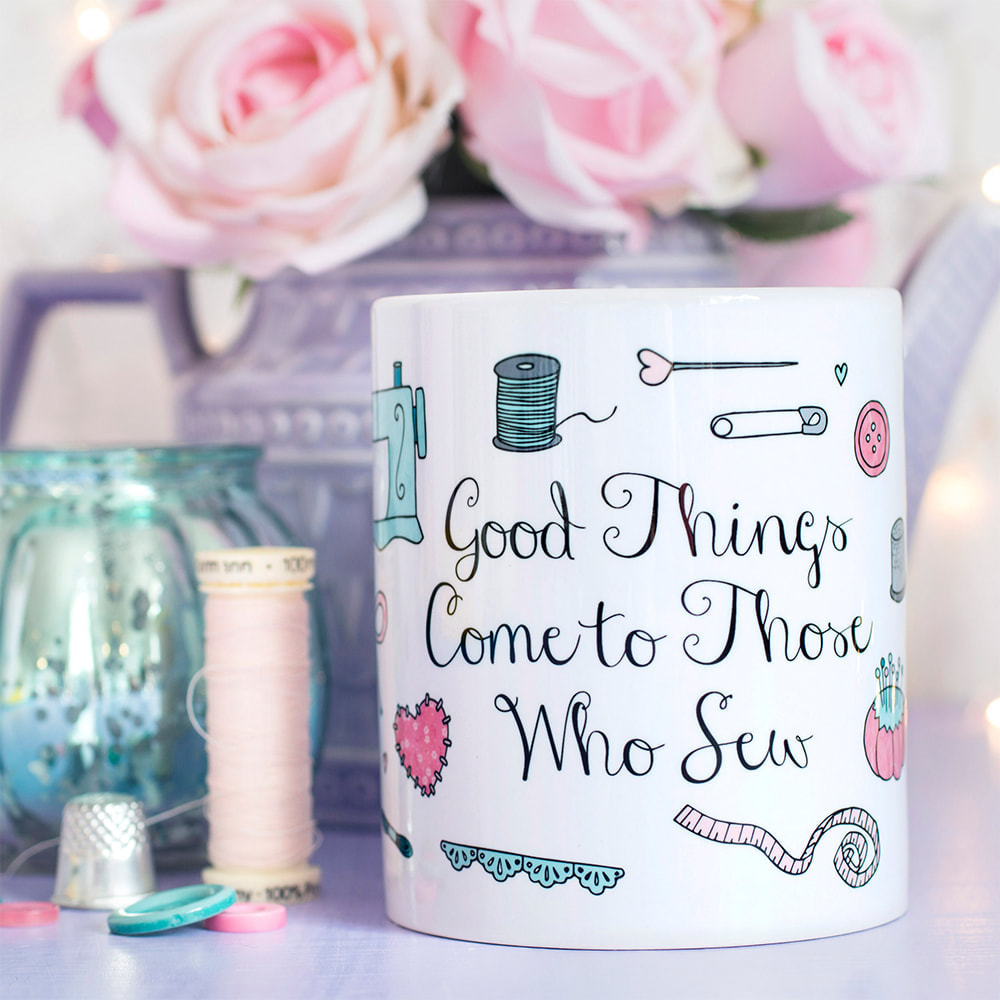
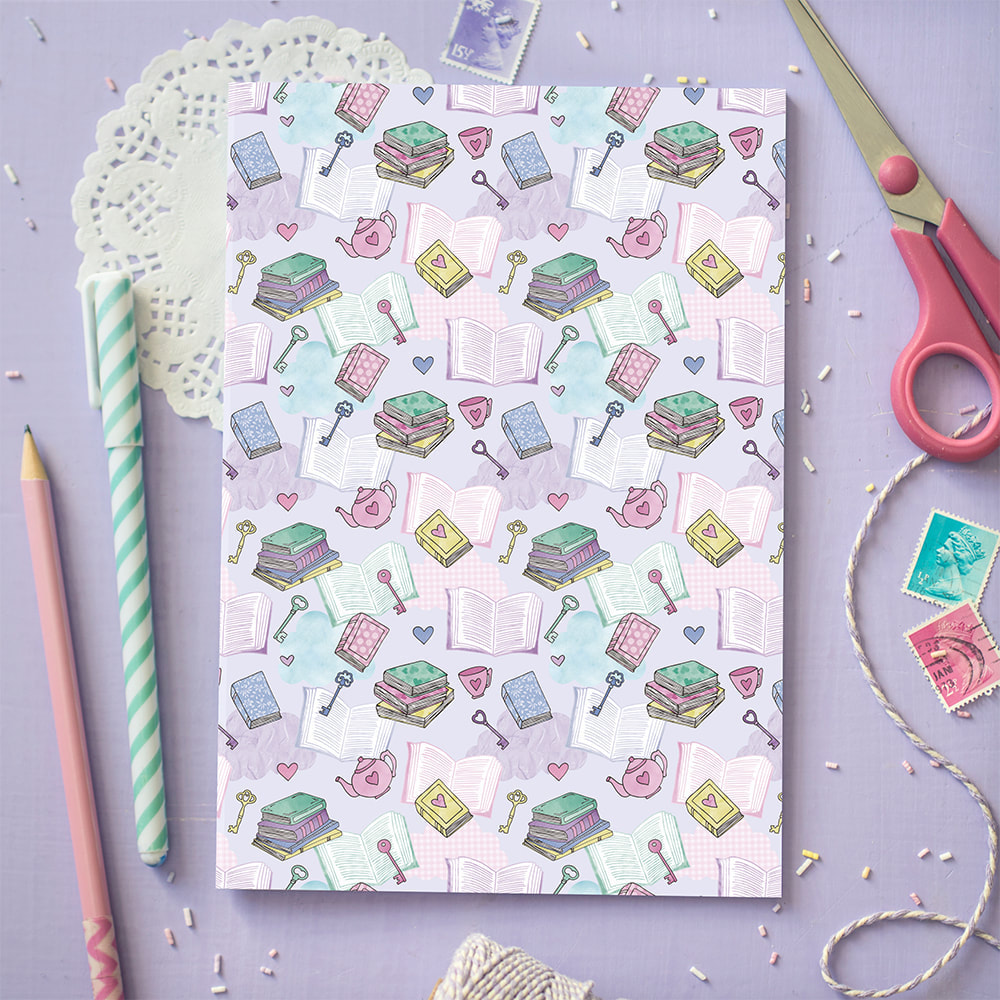
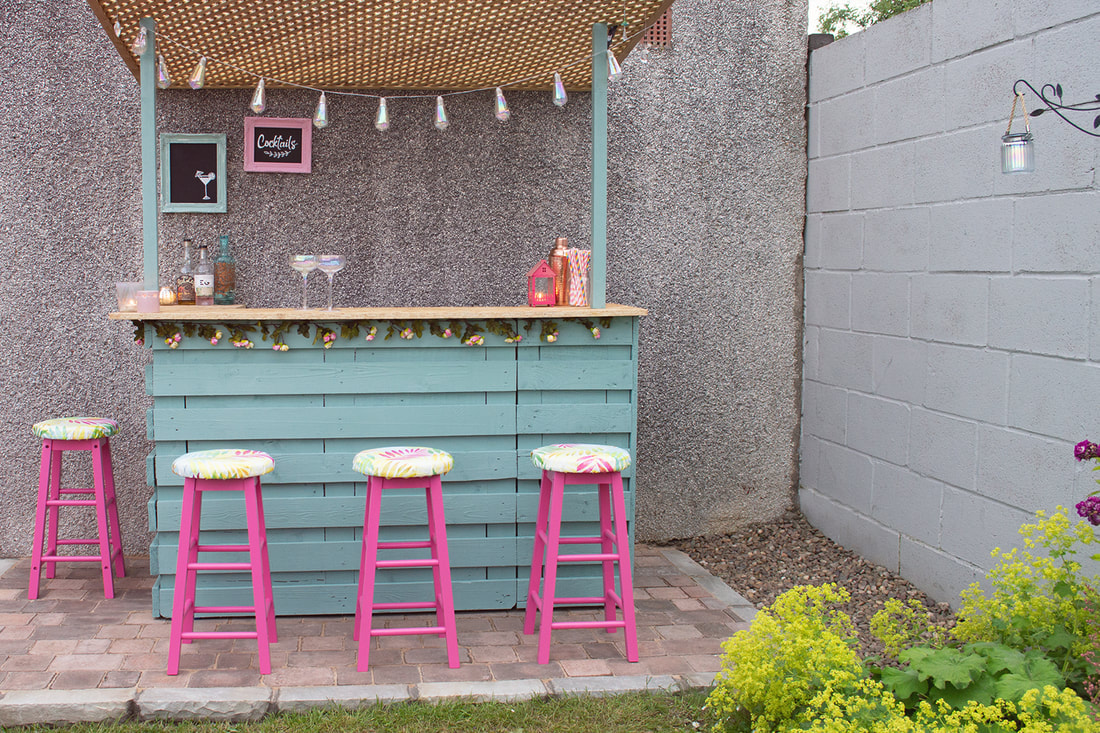 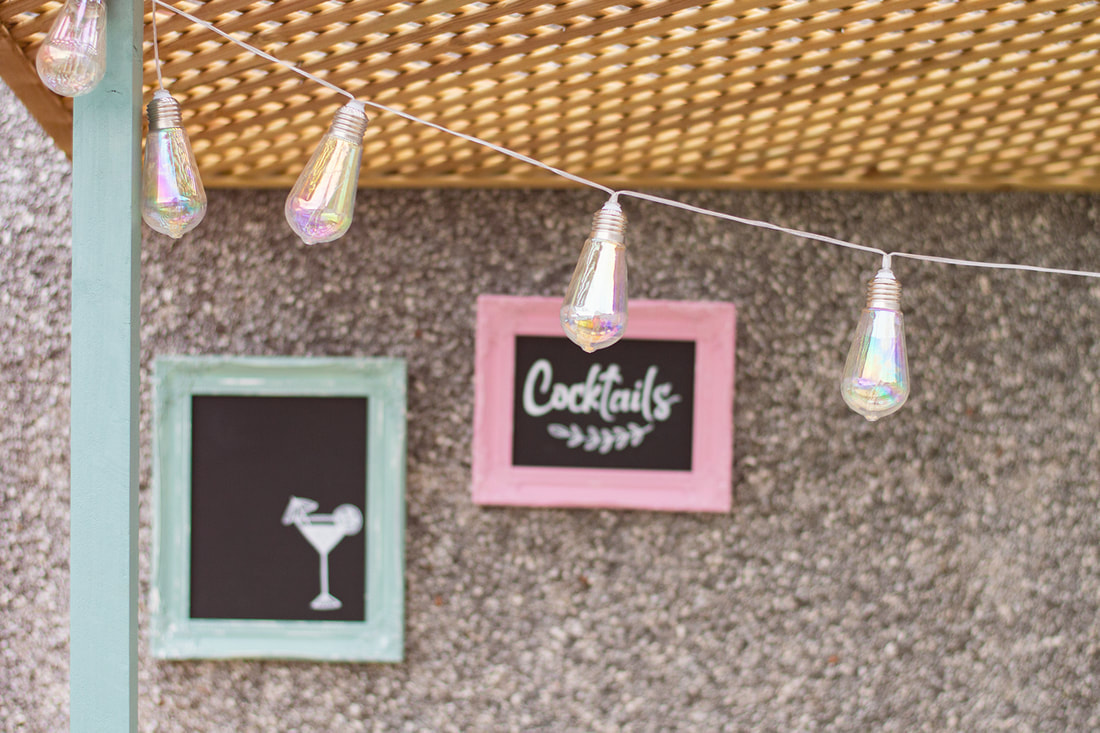 This post contains affiliate links to products. I may receive a commission for purchases made through these links I'd had some bar ideas on my Garden Inspiration Pinterest board for ages now, but it just seemed like one of those never-going-to-happen projects. We've had this empty, unused corner of the garden which I decided would be the perfect spot for one so it was time to convince David. I showed him lots of examples and he said if I did a sketch of how I wanted it to look, mainly using the scrap materials we already had, we could do it. Yesss!! I can't believe how it's turned out! It's just so real. I initially thought I'd just be getting a fold down pallet shelf or something tiny. In the end we used a bunch of stuff from our garage junk collection - 3 pallets from materials deliveries, trellis for the roof (from a bin store David made), osb countertop (leftover from a garage repair), and the roof posts and monoblocks were salvaged from a skip trip. Of course, with David being a landscape gardener he was able to magic up a lovely patio base, then he constructed the bar using my drawing as a guide. I was in charge of the stools and all of the painting (so much painting). The stools were £12 because of a lucky voucher situation, and I already had foam to use for the tops leftover from another project. I covered the tops with this tropical leaf tablecloth (£6.99) which inspired the colour scheme. The paint cost £24 with lots leftover. The colours are Paradise Petals by Johnstone's and Seagrass by Cuprinol. We did most of the work in a weekend, then I was just waiting for my solar lights to arrive to have fun with the styling. They look so pretty but sadly aren't working, so I've got to return them or I'd have taken a twinkly night-time photo. The other accessories were mostly just things we already had - the chalkboard frames are repurposed from my old tradeshow display. I did buy the floral garland on eBay though. Amazingly, in total we spent around £60! I hope you like our DIY bar! We can't wait to have some friends and family round for cocktail nights! I'll share the rest of our garden makeover soon. These images were from my illustrated giftware shop which I ran from 2014-2020. The brand photography was colourful and quirky to reflect the designs, using a range of props to create a soft, dreamy aesthetic. JillyJilly products were featured in a selection of publications over the years with these lifestyle images making it to print. These product photographs were also the reason I was selected by Etsy UK as a mentor for their 2017 education programme. If you'd like to book a photoshoot you can do so here. |

HelloHere you'll find my latest projects, behind the scenes, tips, DIY projects and more! Categories
All
Past Posts
October 2023
|